
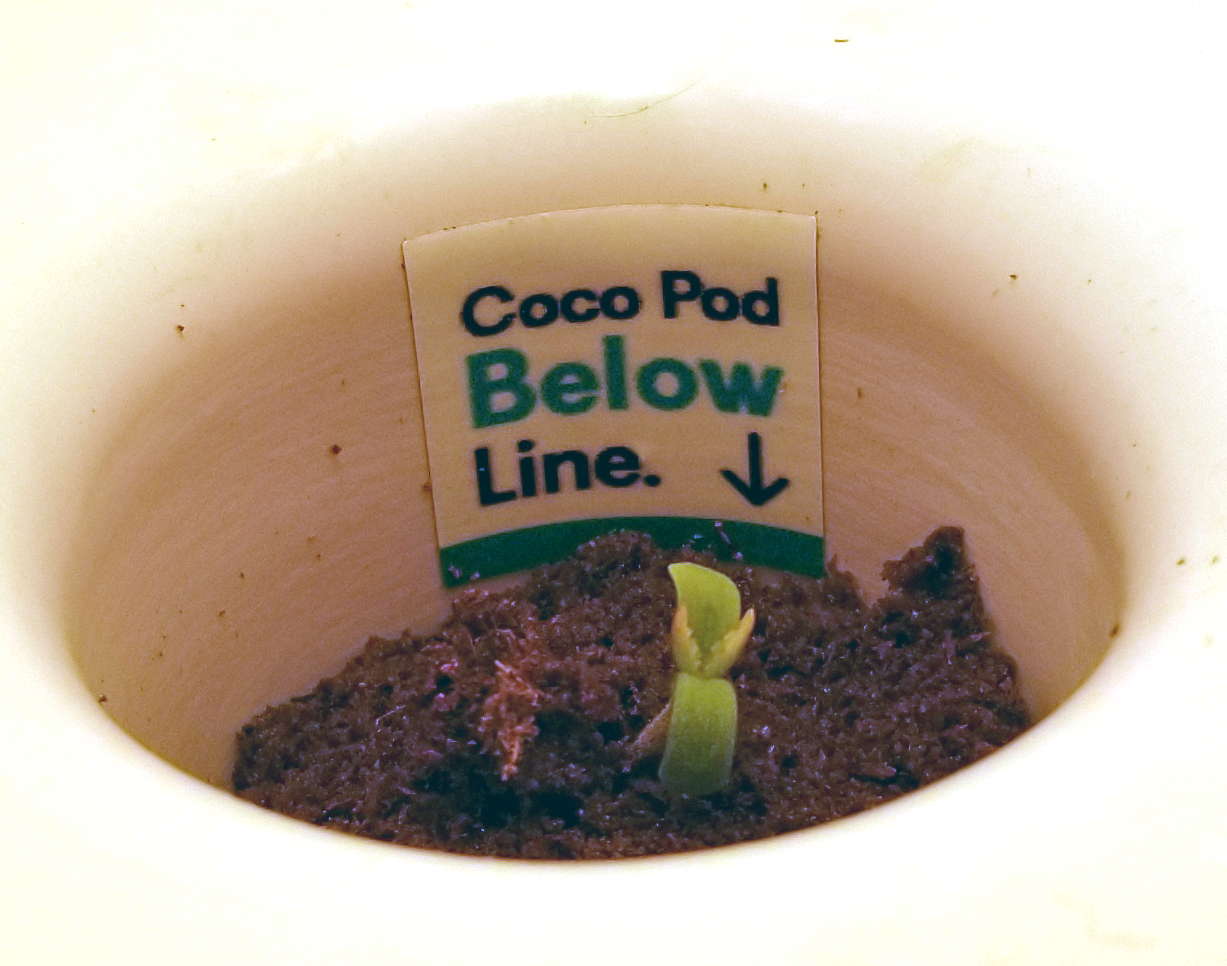
Day 5 of Germination
2 Likes
Day 6 of germination and the bottom of my coco pod looks just like this one did:
Added hydroguard to the area (about 6ml dropped on all around bottom) and added a bit more to the res. Not sure if that’ll clear it up but this is one way to find out, otherwise it’s getting the h2o2…
1 Like
So I misread that post, looks like the white stuff here in this case is ok if it doesn’t turn brown?

2 Likes
What’s the temp of your res water? If it’s above 70, then that just might be the start of pithium growth.
It appears to be about 72.5F
In doing some troubleshooting I noticed that the little trap doors on the back are a bit warmer than the sides of the unit, so I’m going to run with those off to see if that helps cool that area off a bit as there’s cool air being channeled across the back of the unit.
Additionally I notice that the air hose at that location is very slightly warm to the touch, at least warmer than my fingertip is. Could that be contributing to warming the water, if the air for aeration is coming in warm?
So it’s been about 20 hours since I removed the trap door from the rear of the unit.
- The air hose is now cold to the touch, the cold air is making its way into the bottom now!
- Just clocked the res temp is 69.3F, it’s possible it’s a touch colder but I stopped waiting for it to settle when it got down this far - the highest I saw yesterday was 73.3F so that’s a huge improvement
After these grows I’m going to look at augmenting the circulation down below with some additional fans.
2 Likes


Just to post a quick update, after the “great cleanse” I moved back to using hydroguard in addition to soil amendments which are basically same ingredients as Recharge, thanks @Osage for the idea to try that. I would’ve bought Recharge but after checking label I realized I have stronger equivalents from my other grows already. Also doing my own mixing/pH when filling (using combo of Ph Perfect 3-part set, with Amor Si and using bottle #5 for CalMag). Mixing the nutrients (more thoroughly than the bubbles alone do) seems to make a fairly major difference in of itself.
I also introduced a little cooling fan into the reservoir which has helped to keep the water temp in check (I only needed about a 1-2 degree buffer, it provides about 3-4 degrees). I don’t recommend anyone else try that without understanding what can happen and how to mitigate.
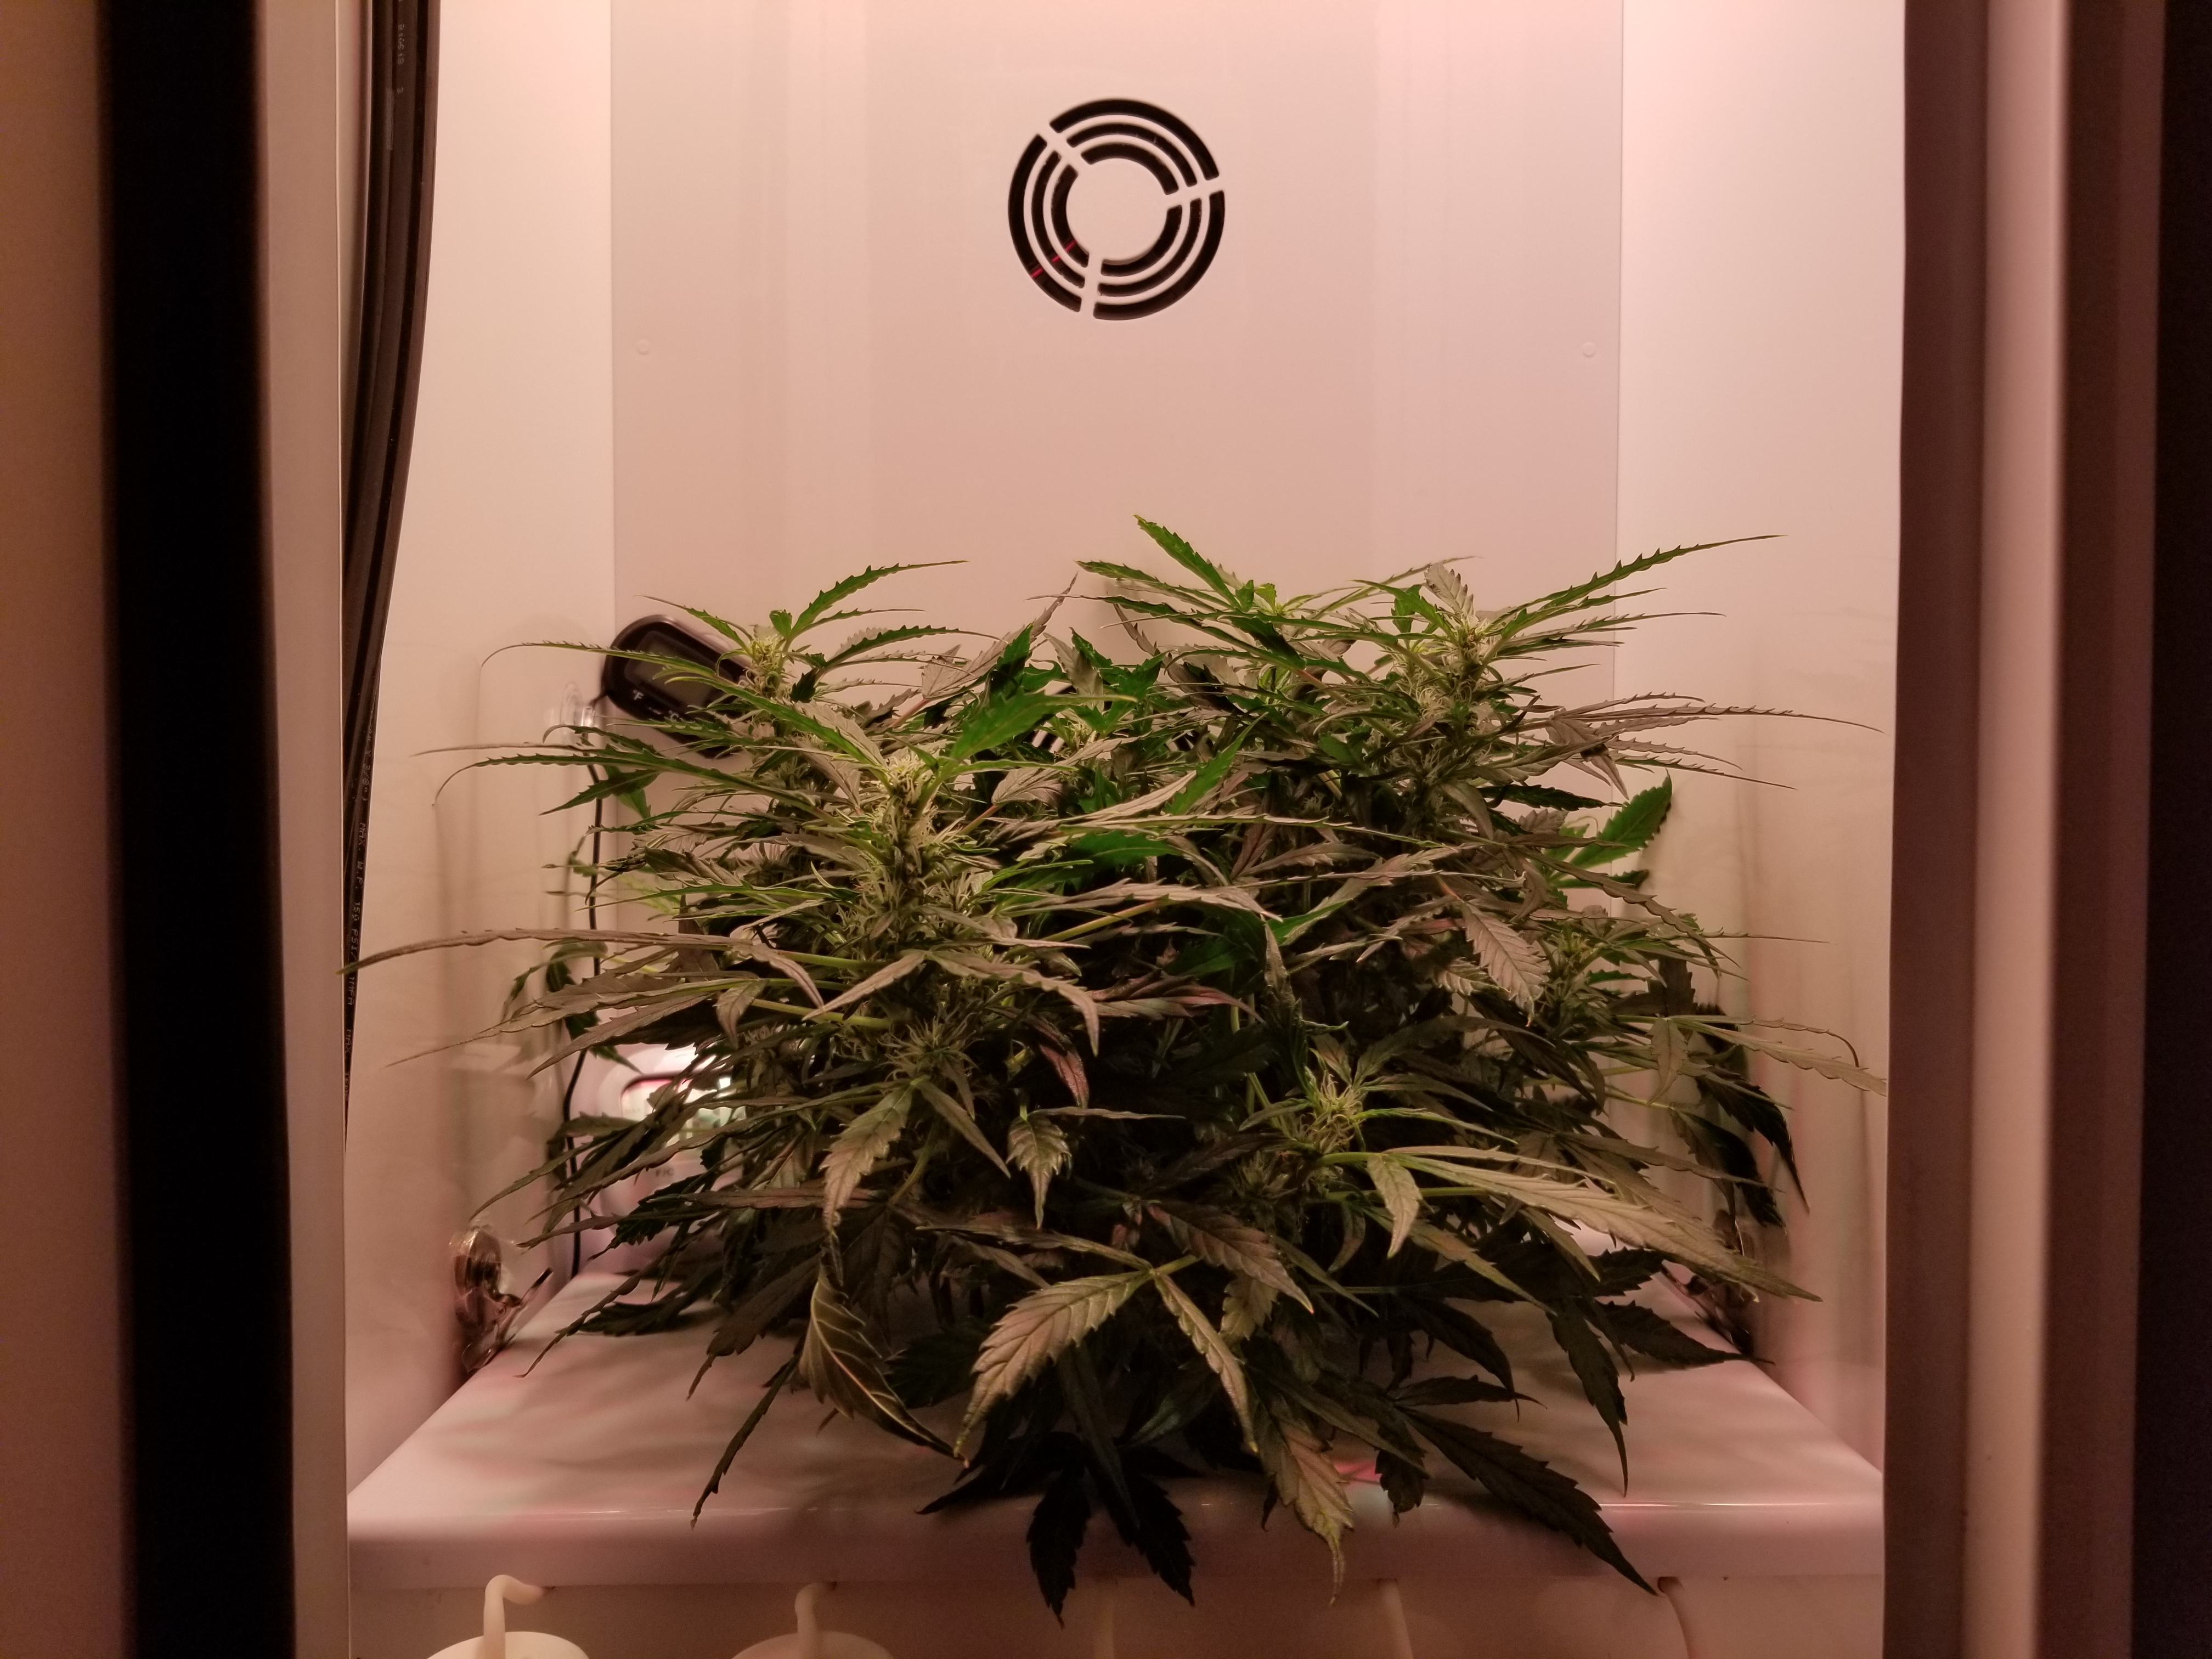
Here’s a pic before “hairstyling” a few days ago:

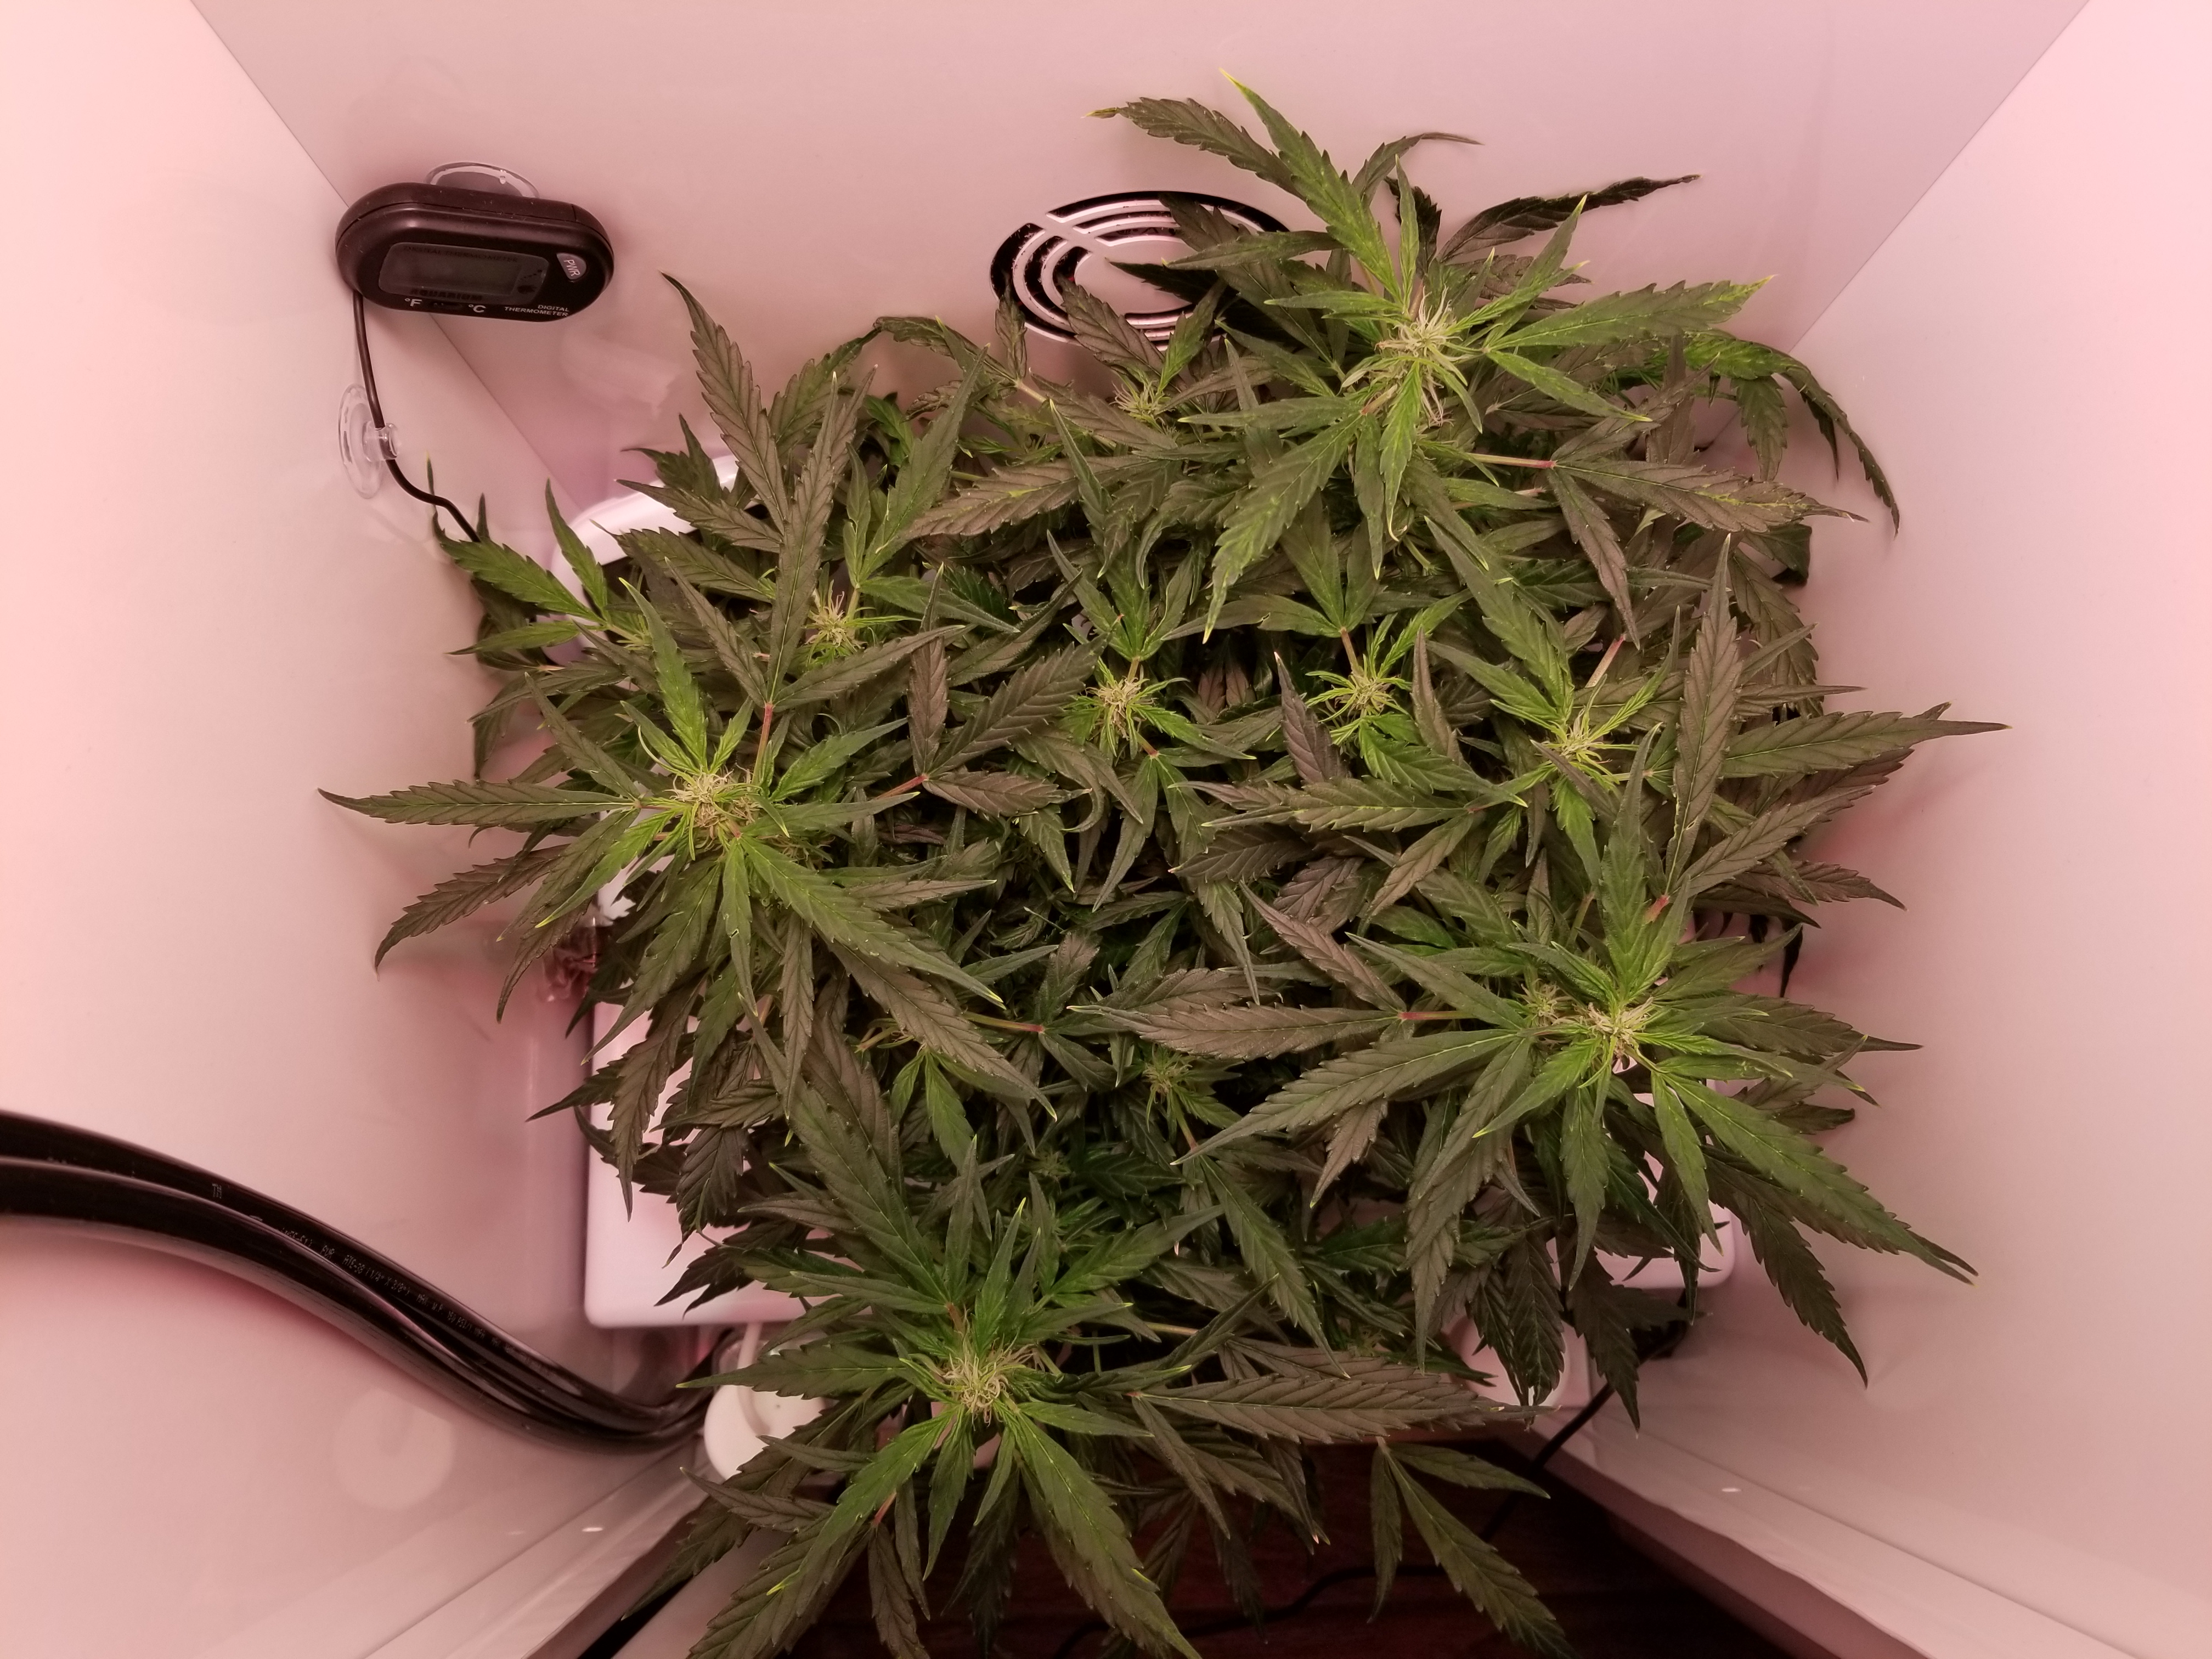
Here’s a pic after tucking a bunch of branches into the middle, with more bud sites exposed:

I have to do that every 2 days, she unfolds back to praying leaves every morning:
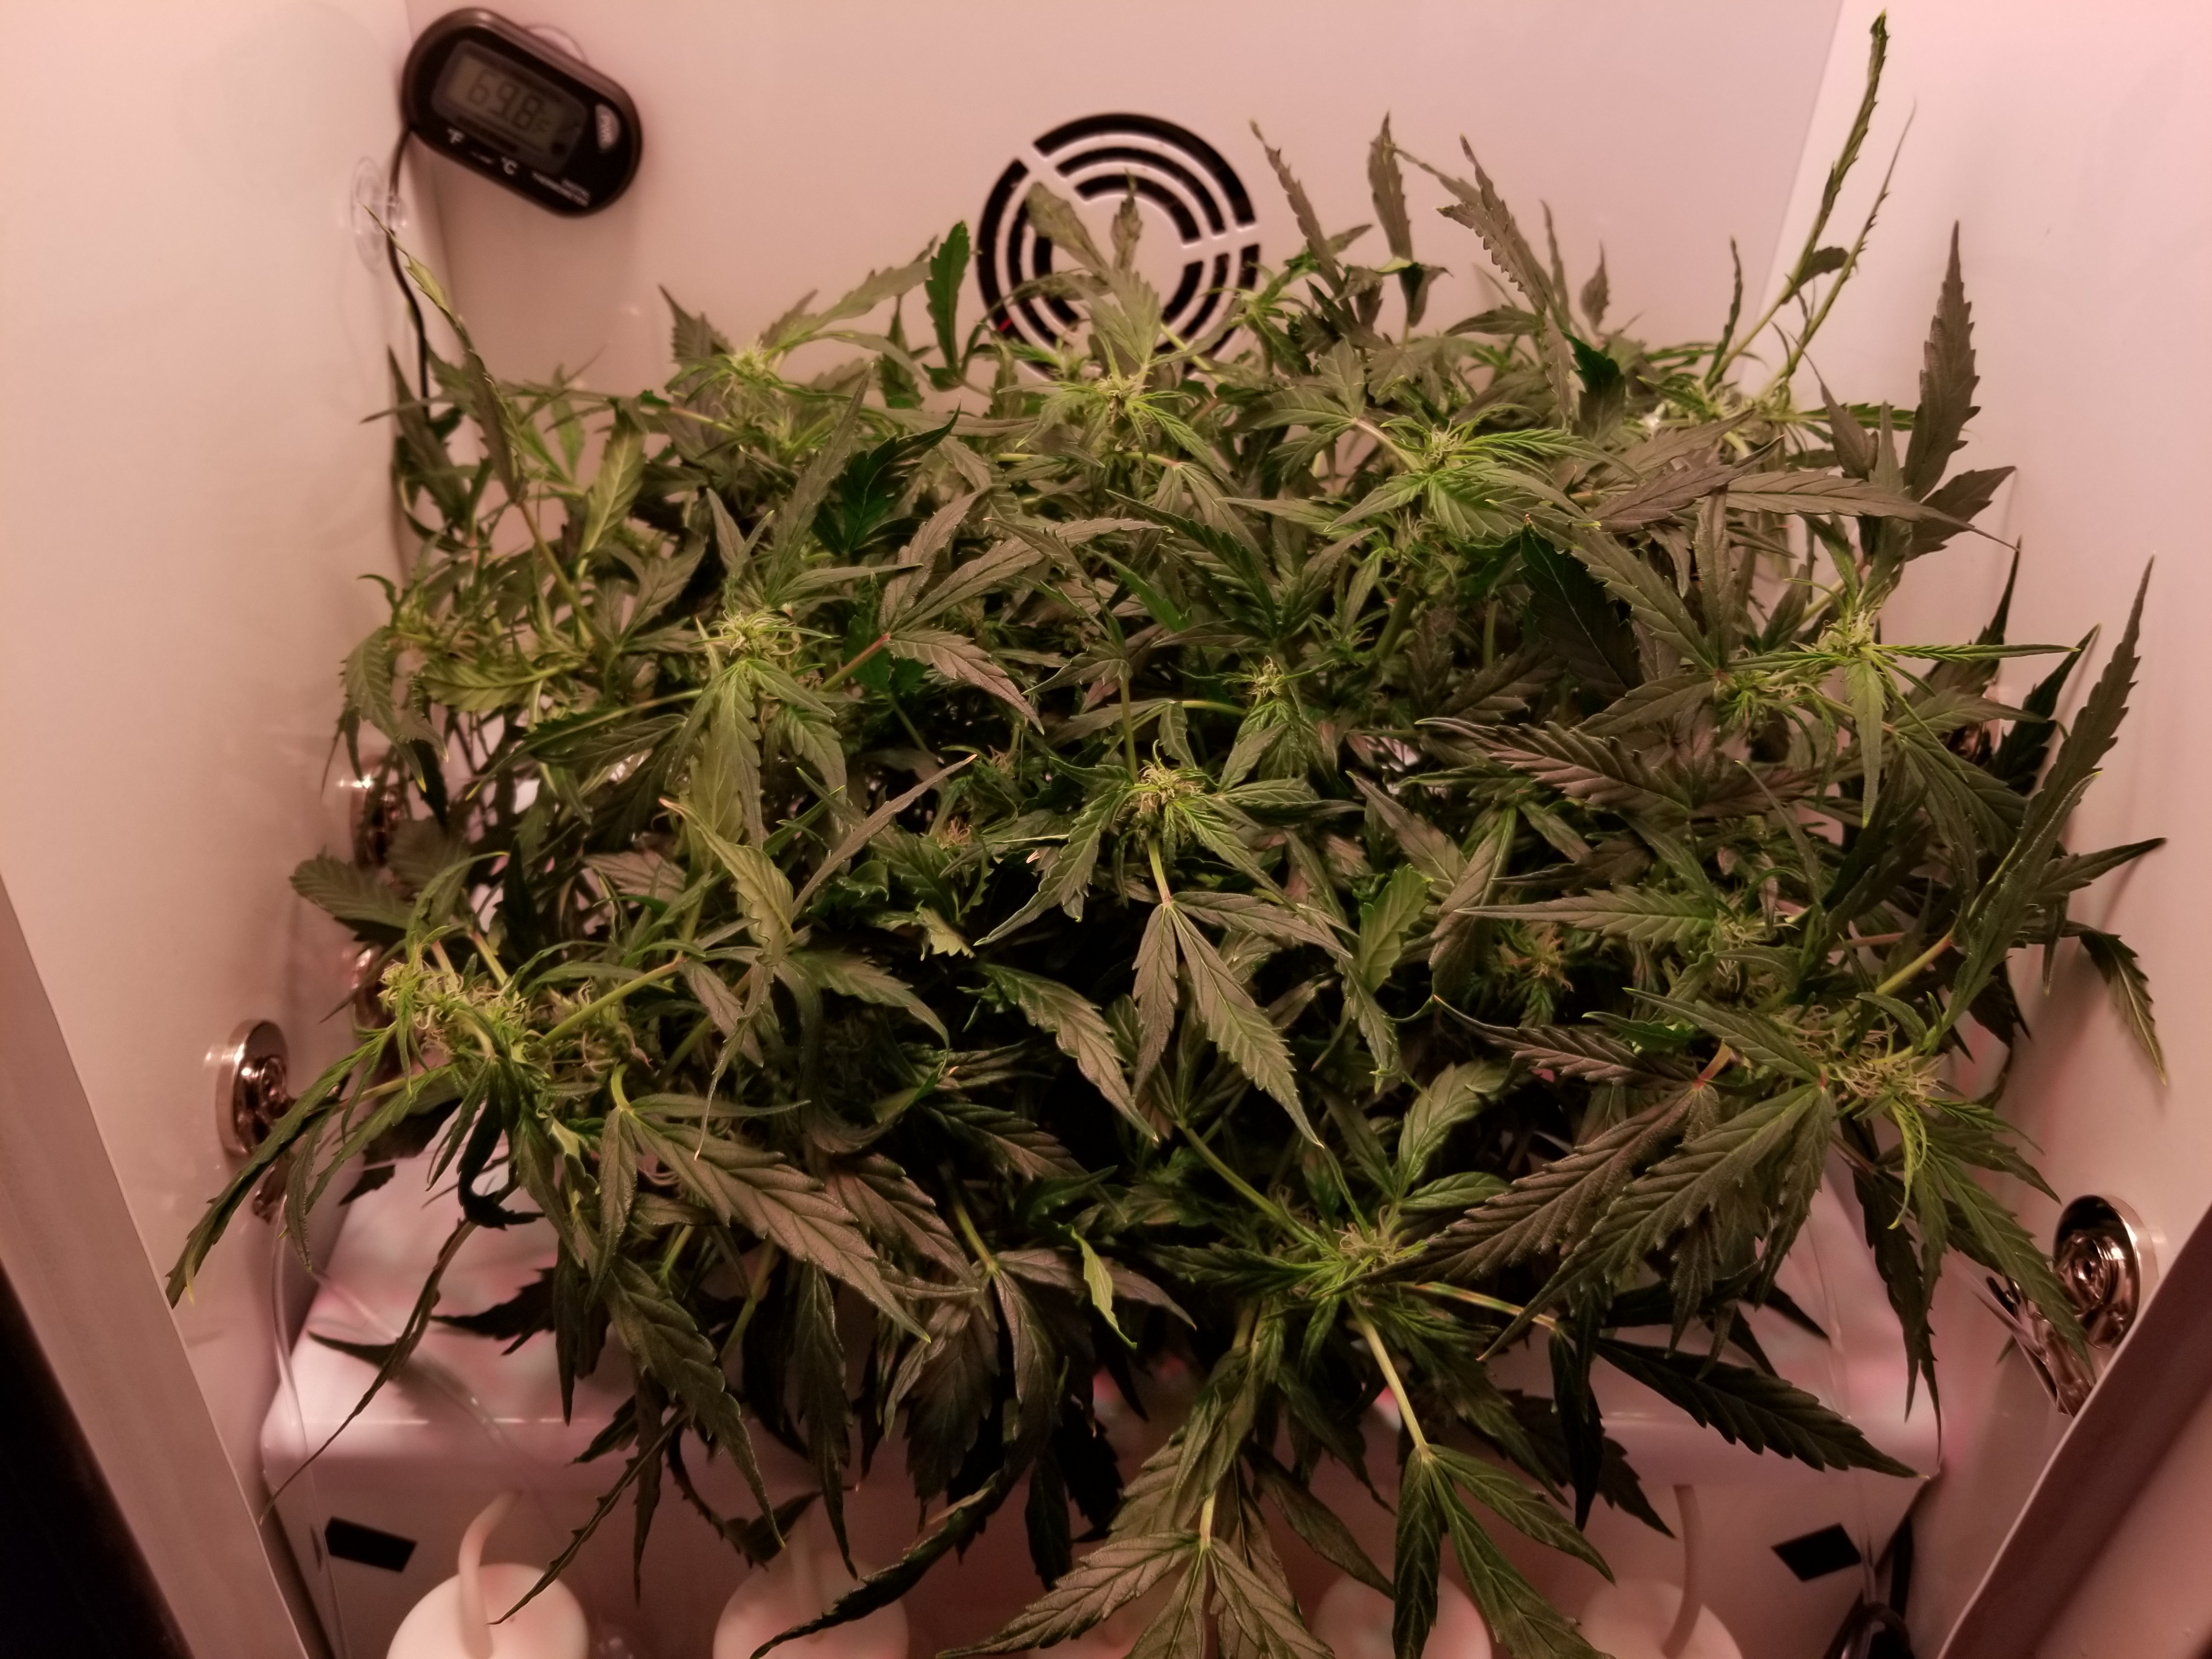
The reason I’m tucking instead of snipping is because I believe that to be the error I made with my other auto in the grobo (which also experienced root trauma early on) – so for this one I’m trying to minimize any additional trauma. It looks healthier than the ones I’ve grown in soil at this point (great color/shine/etc) so I’m inclined to continue tucking instead of snipping until the end of the grow to try to get the most out of this little gal. Have explored into the center, no pests or PM or anything - the fan is blowing right onto the bush so that’s likely why that’s the case given I haven’t relaxed the humidity much yet.
This one was also topped, whereas this strain grown in soil I only FIM’d. There are about 2x as many bud sites on this one! If the soil grow serves as a measure this looks like it’ll yield about 1/2oz if she makes it the whole way. The quality should be good, though, Canuk genetics haven’t let me down yet in that regard.
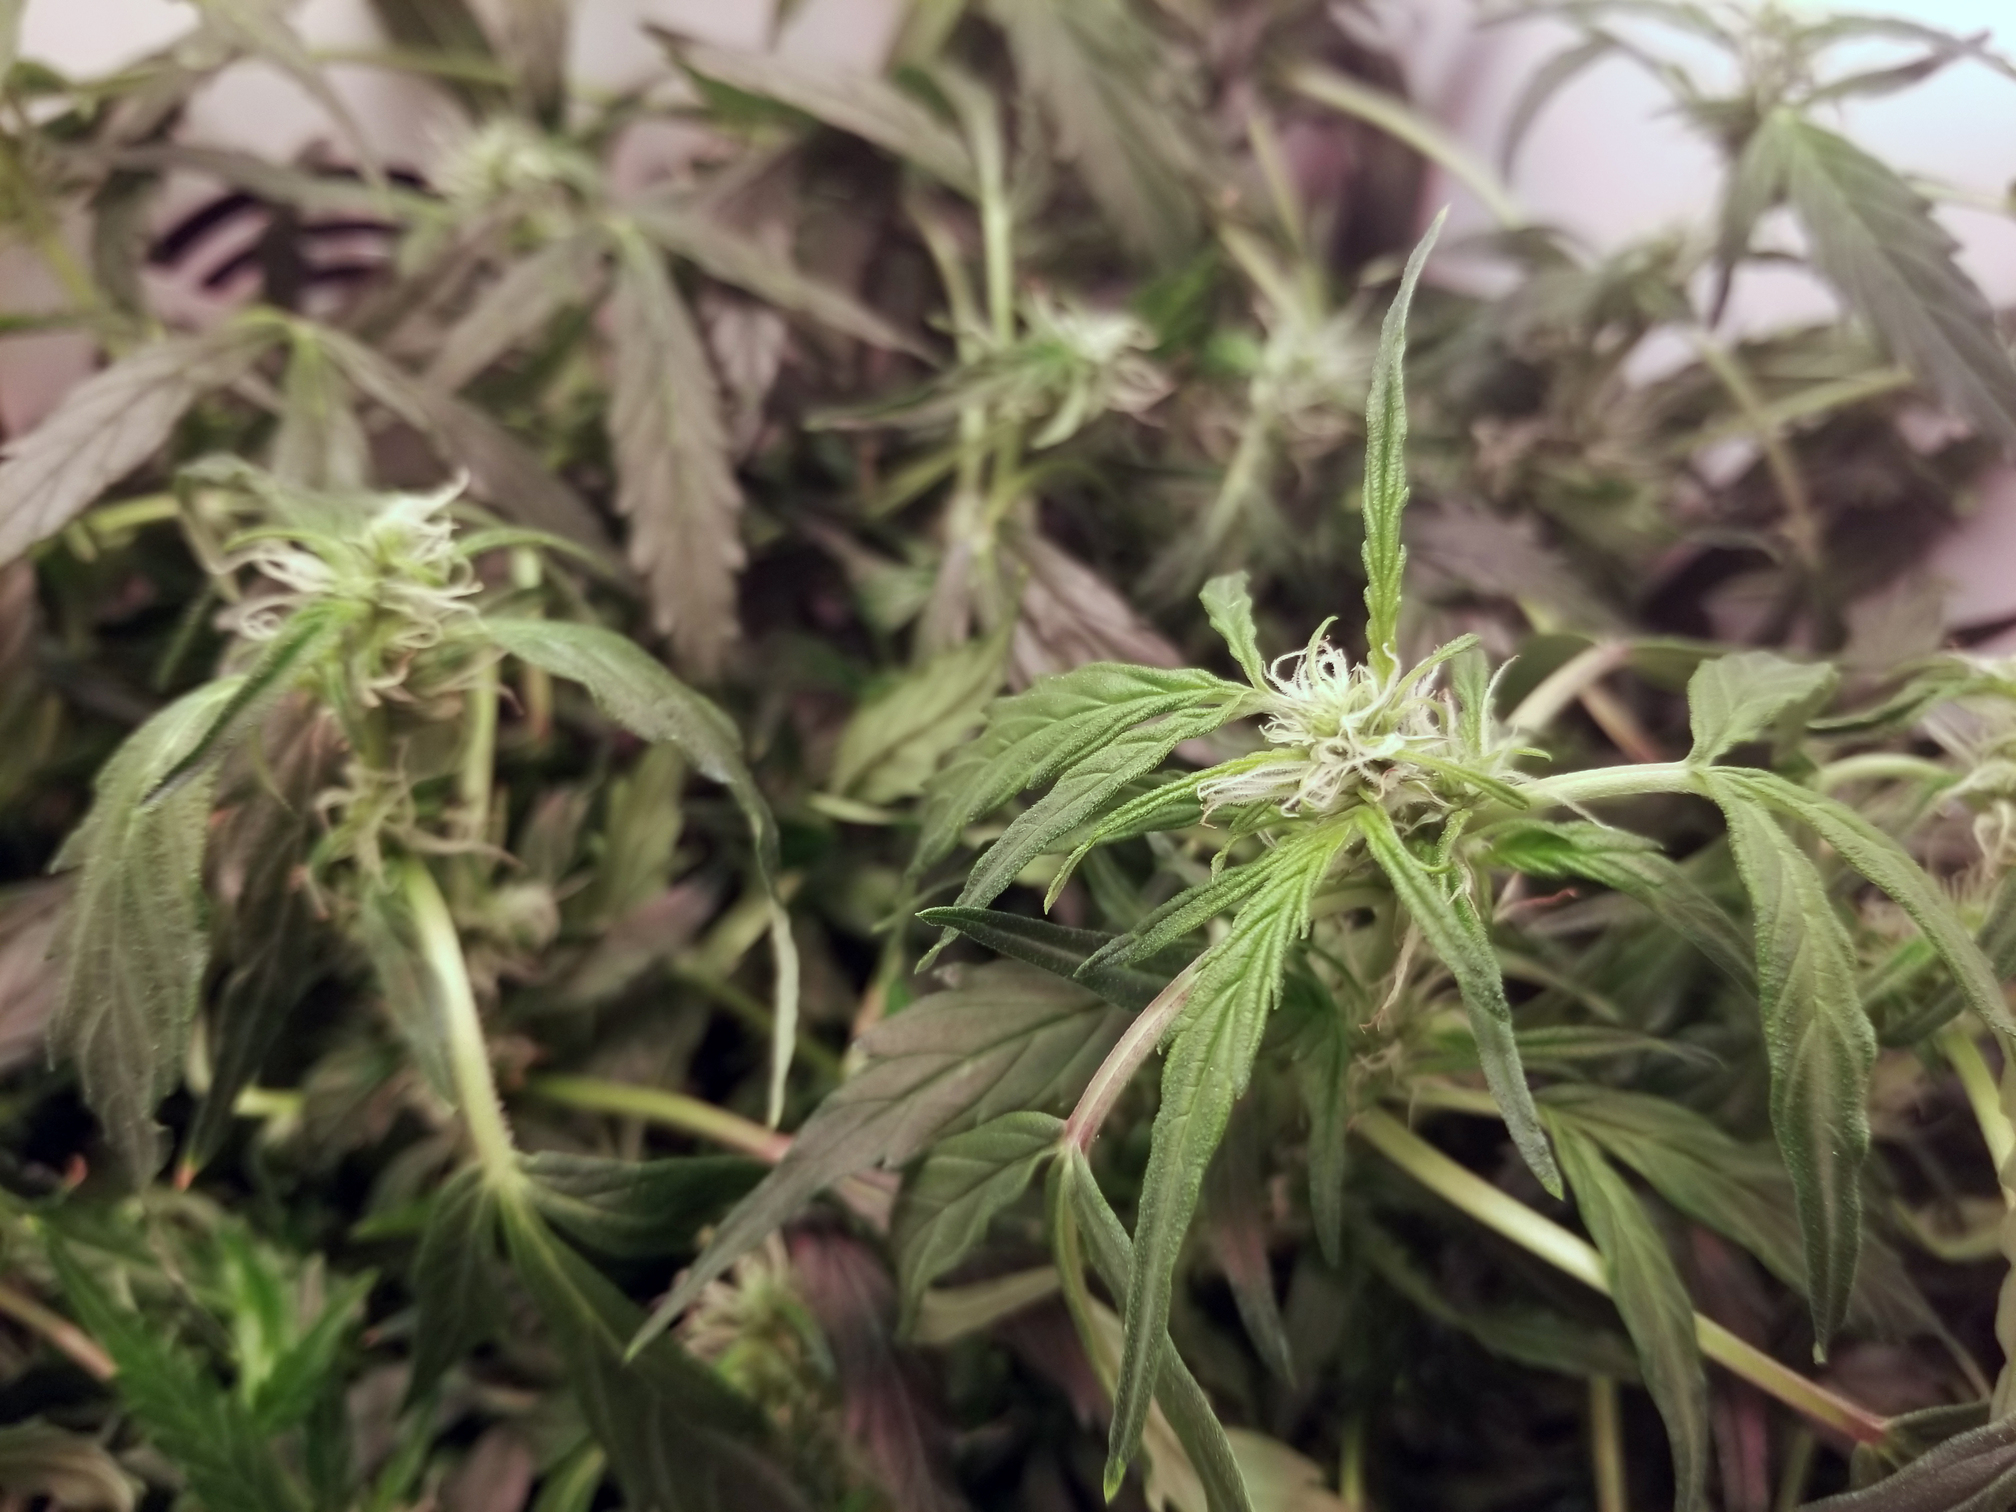
Here’s a clearer pic of the bud sites (the white parts stand out better under this light):

3 Likes
Oh yeah - that’s Day 70 - Flowering (Day 15 /32)
I did extend veg a little bit while fixing the root (rot) issue and will probably extend flower by 1 wk if she needs it.
2 Likes
I don’t know much about autos, does extending help or hurt an auto because it switches stages automatically?
It doesn’t do much to prevent flowering, no - she actually started flowering during the veg phase.
The stress did stunt and slow things down a bit, so I figured to leave veg mode on for a bit longer to let her recover a bit more first.
Here’s what she looked like in the past.
Nearly two months ago, she was “in the ER” for a day while the grobo was re-sanitized. At this point I switched from using biologicals (like hydroguard) to using sterile additives to keep the slime at bay while determining my next course of action:
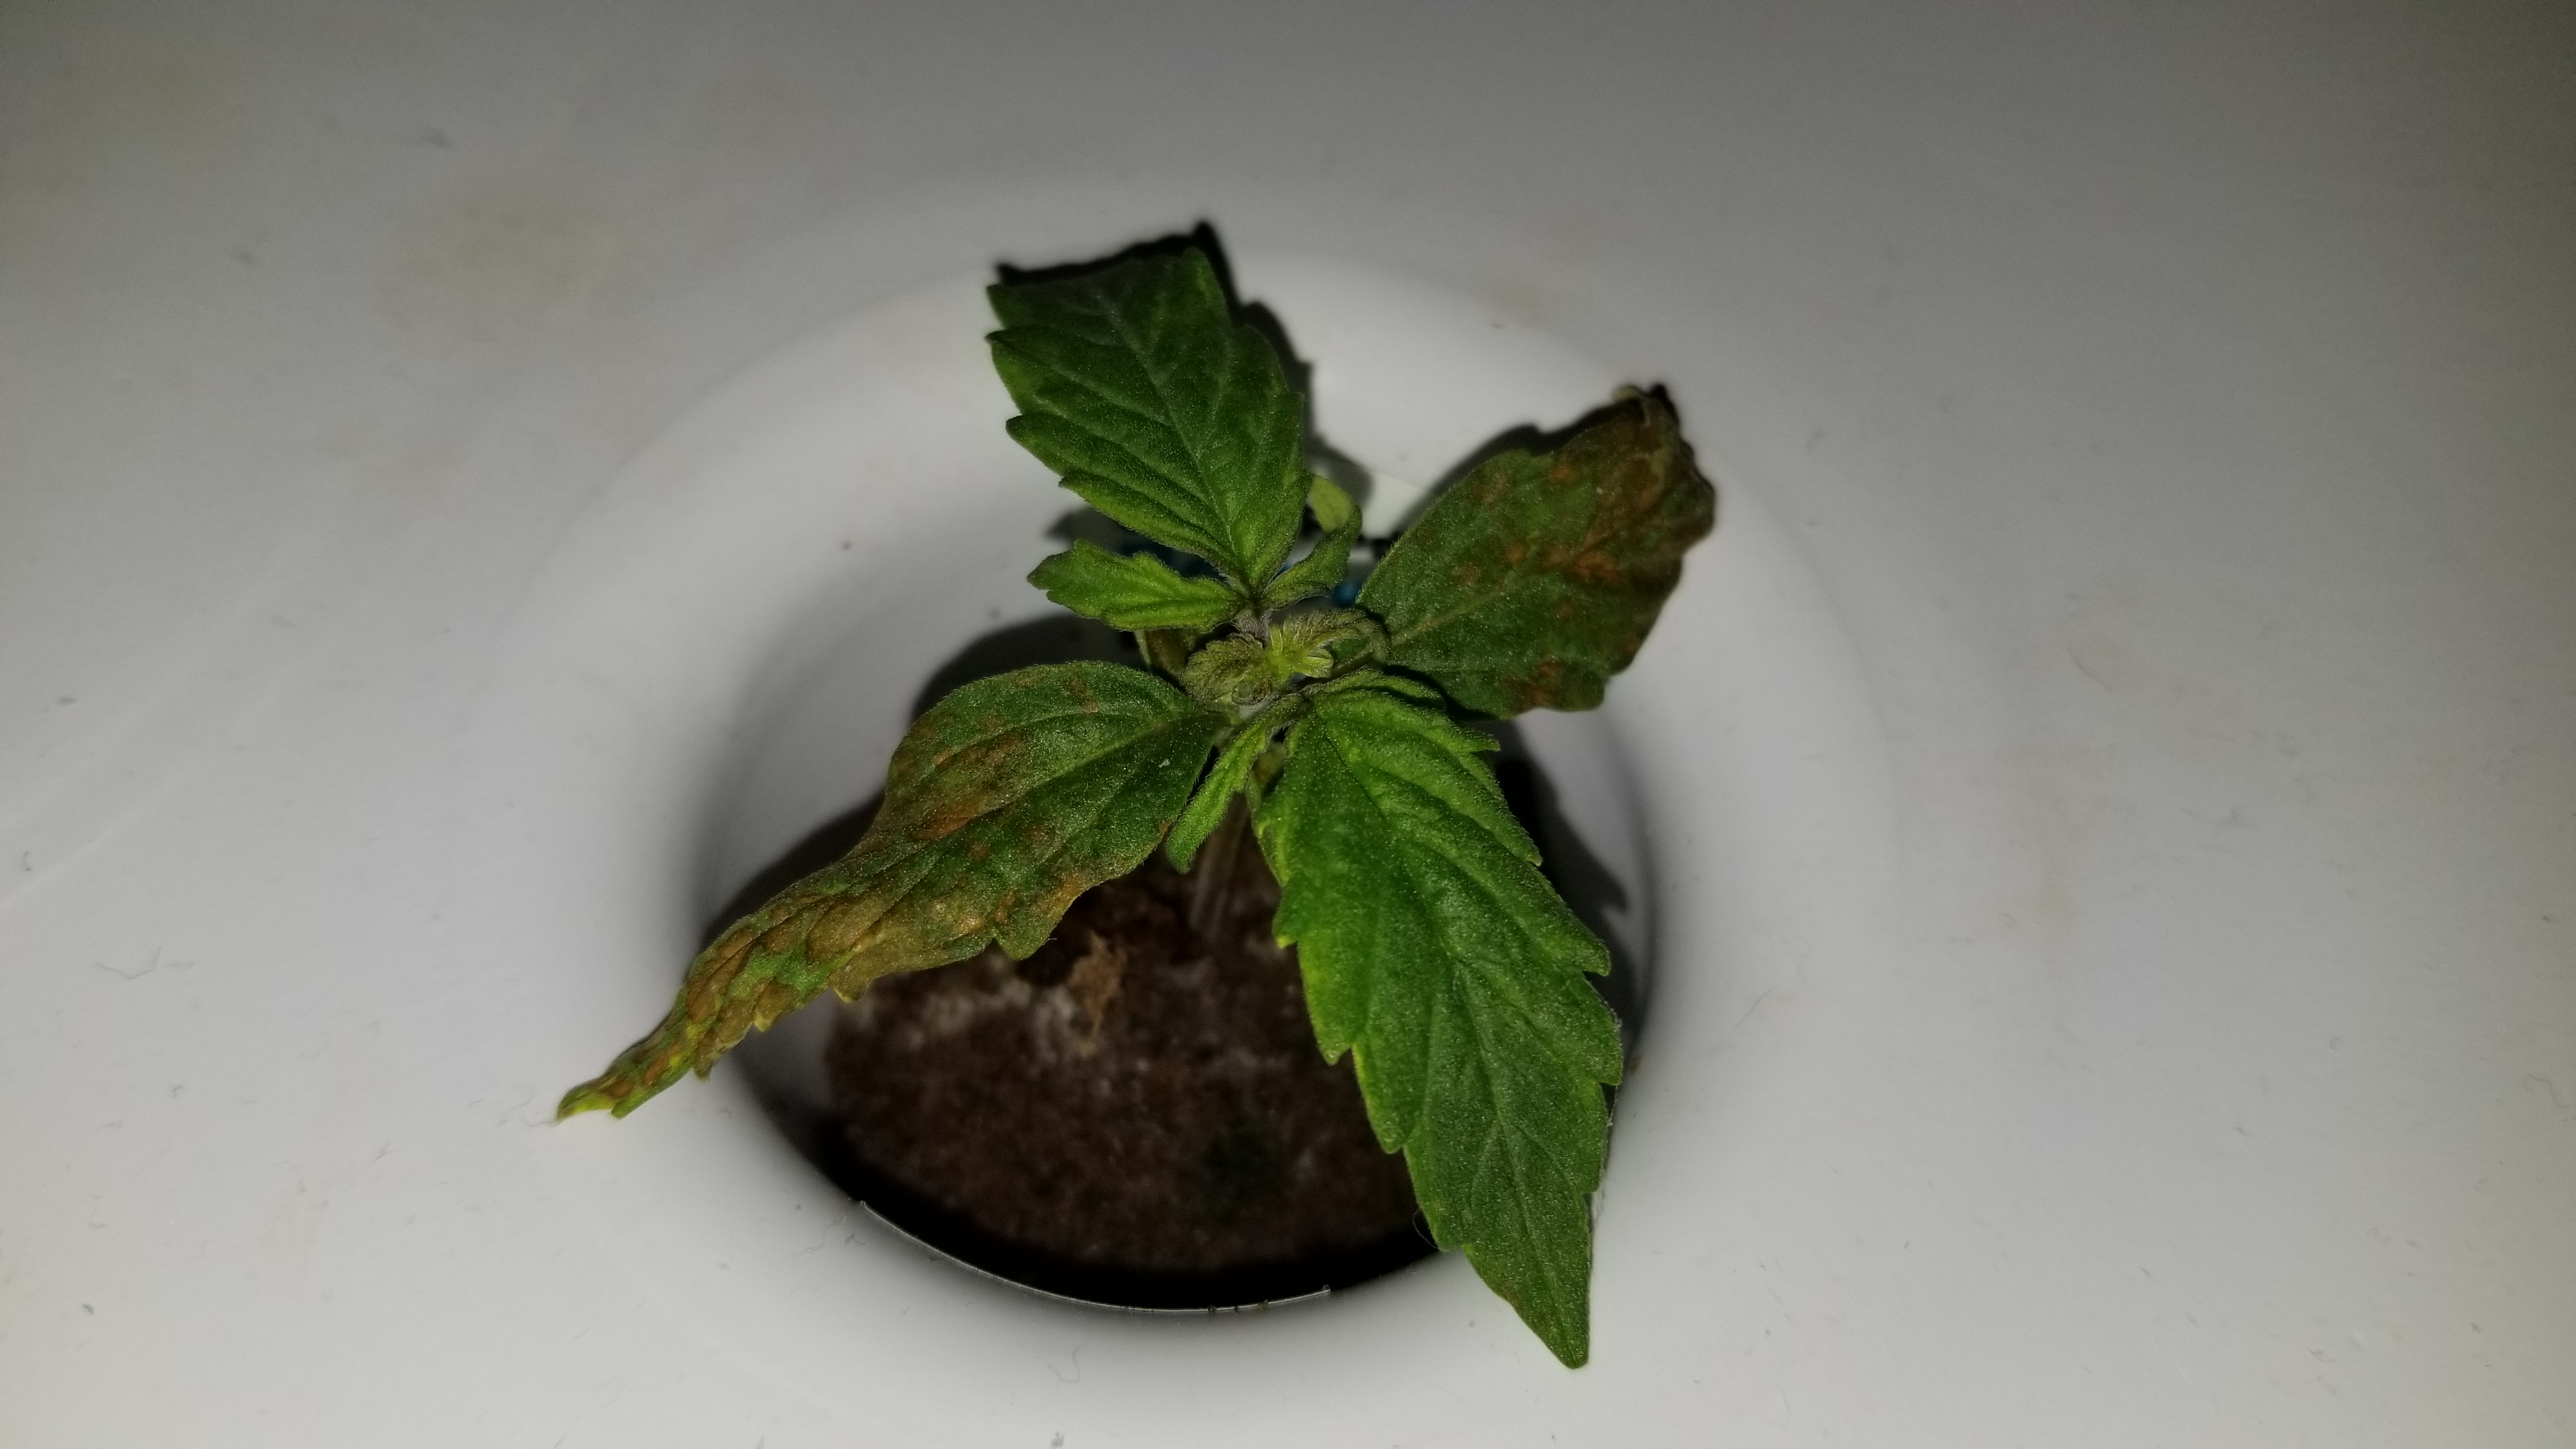
Nearly a week later, this was the day I cut off the bottom-most set of leaves (they were starting to go grey):

A couple weeks after that, still seeing really poor root development and inward curling on leaves:


- This is also when I started experimenting with mixing my own nutes to in order to figure out if it’s a deficiency or overdosing, started by adding what I thought might be “too much” to see if it gets better or worse.
- Gave a double-to-triple dose of grobo nutes (dumped in res) and “disabled” the pH fluctuations by disconnecting the 1 & 2 bottles.
- Reduced the amount of sterilizing agent that was being added to water every few days.
A week later she started to bush up a bit better and leaves were starting to uncurl:

- At this point the amount of sterilizing agent being added to water was minimal (due to miscalculation, was adding a few drops of 0.6% instead of 6% chlorine) so I just stopped using it entirely.
About a week later the problems started to re-surface, the leaves are droopy and the “brown rust-colored skin” was taking more leaf by the day:


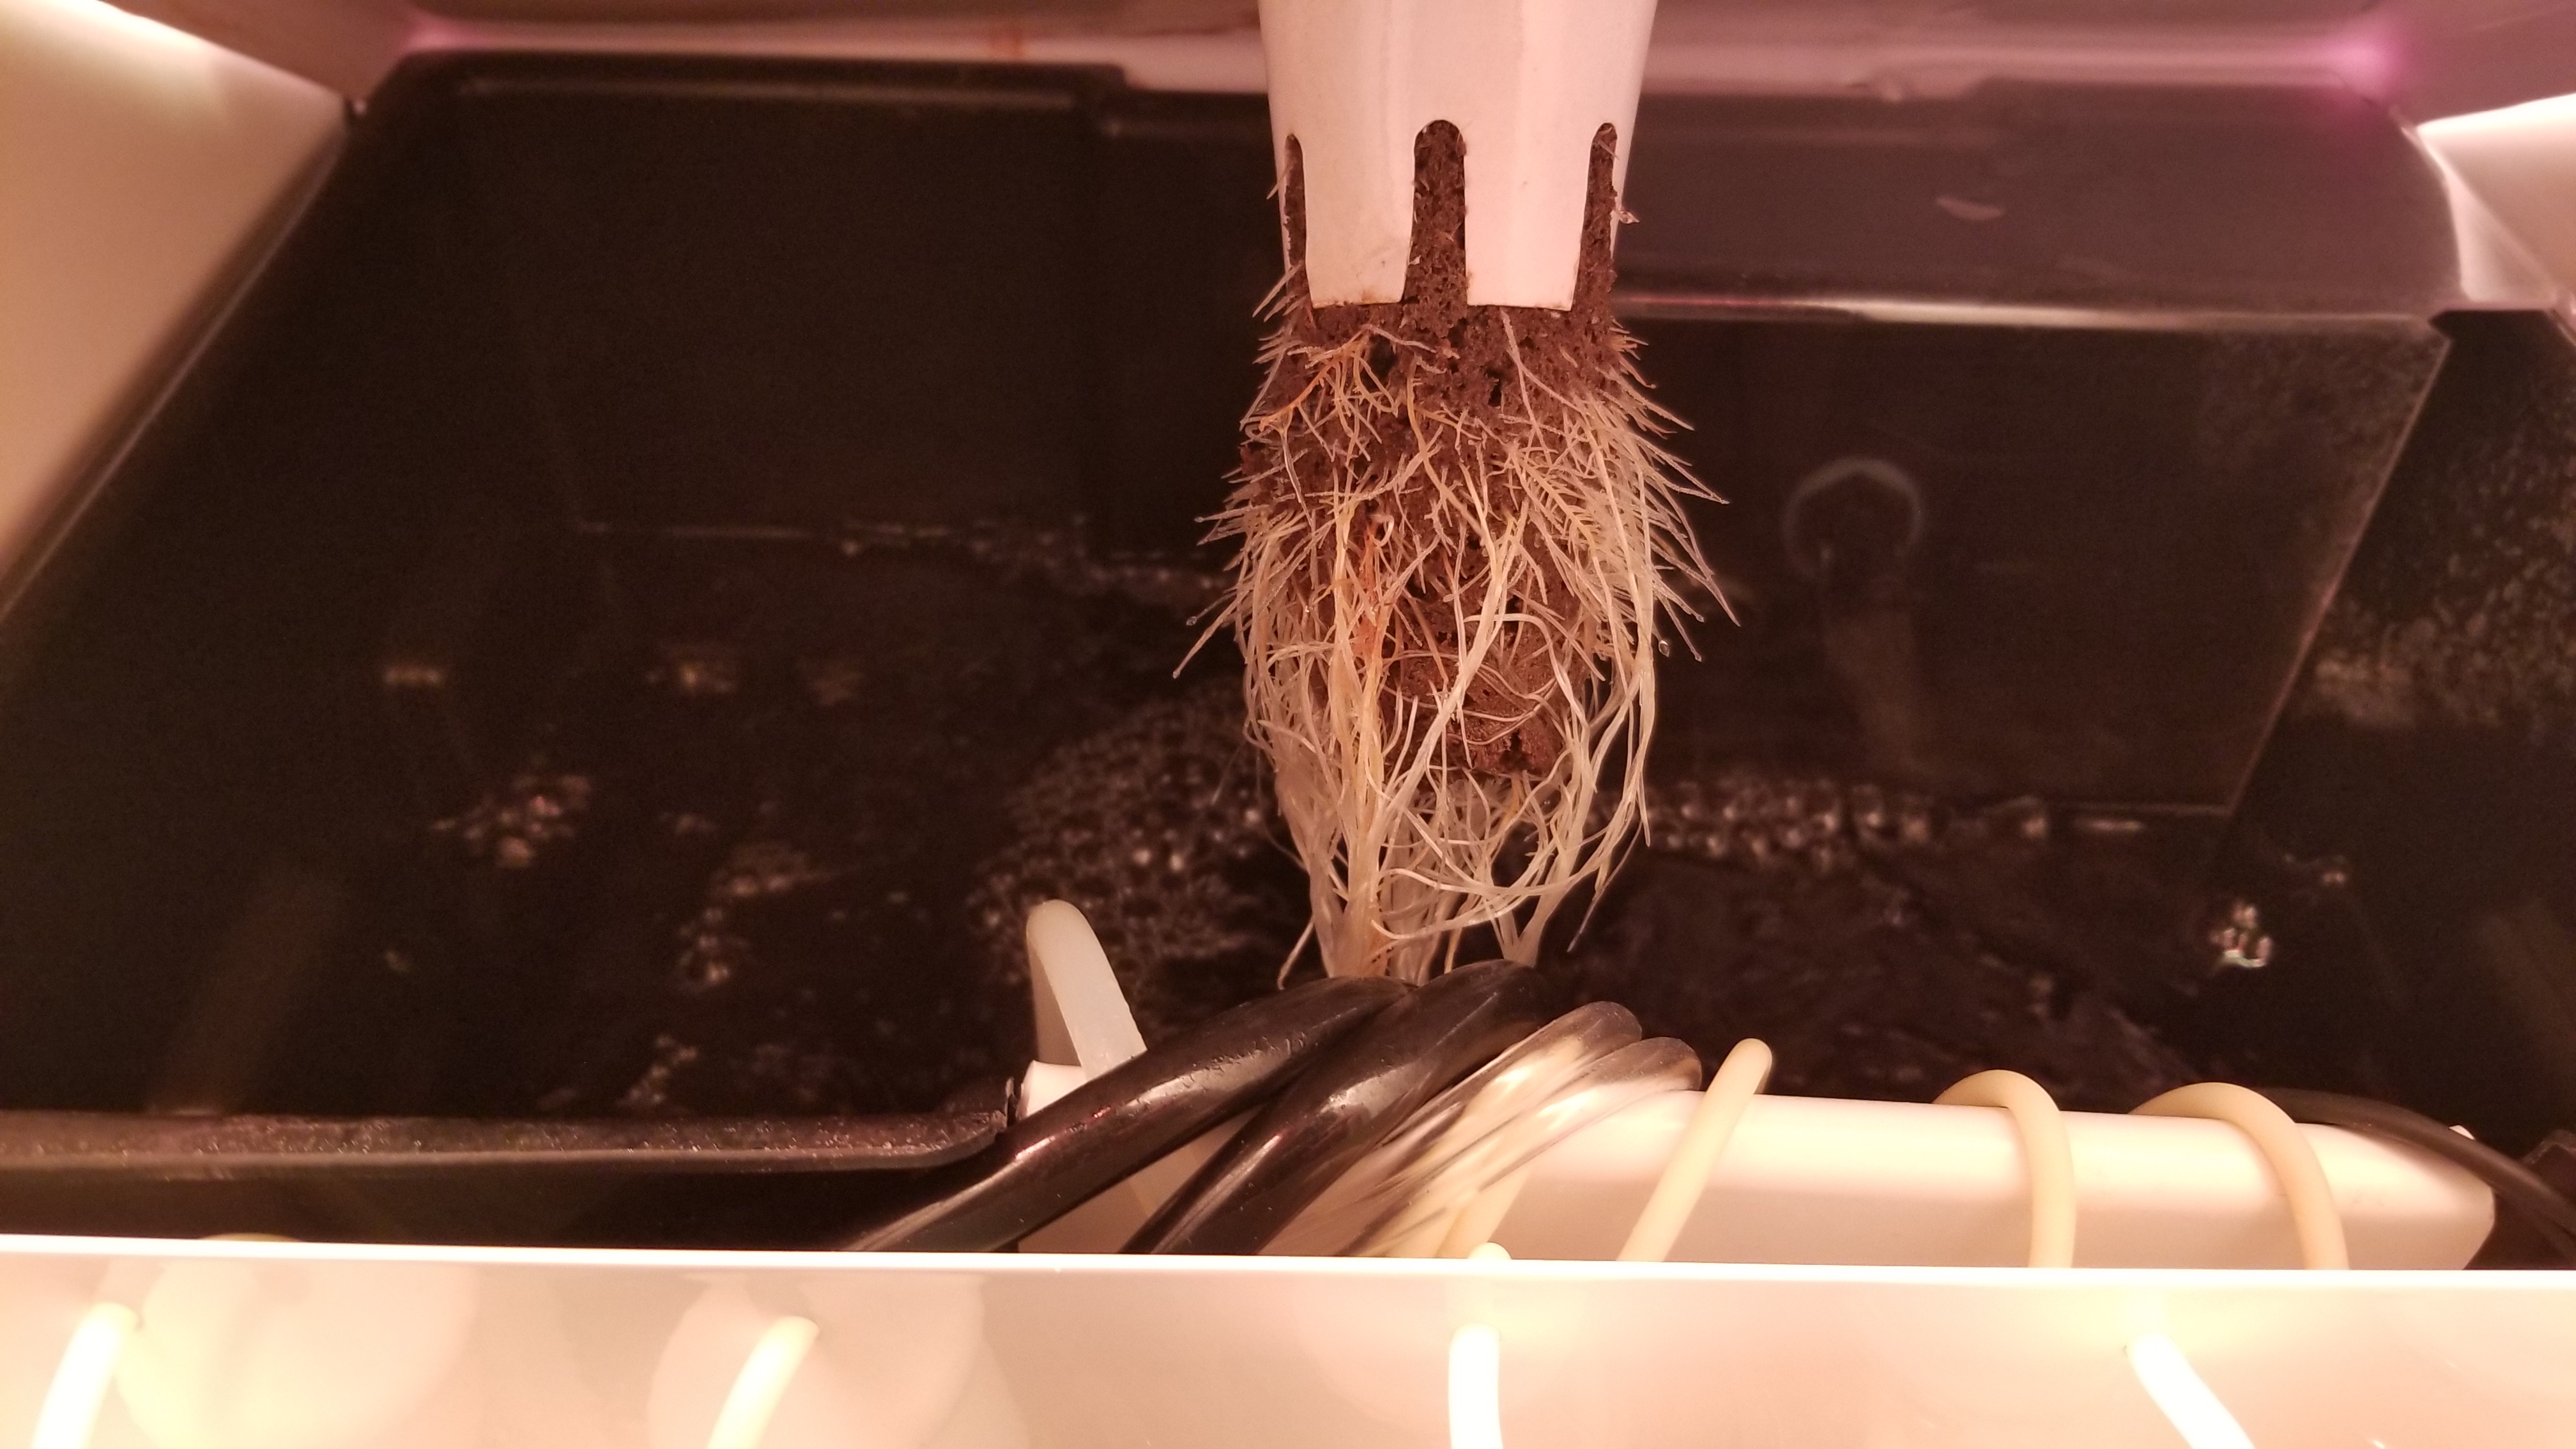
The roots were looking better, though, which was why I cut back on the sterilizing agent:
- As good as that looks, it was actually quite slow - not many were making it down to the water, it was seemingly a struggle for her to get that much out.
The next day the situation got a bit worse, all of the leaves were drooping and starting to curl in again:

So she went back to the ER to sit in a bath of hydrogen peroxide (250 mL @ 3%) mixed with water (650 mL) for about 1.5 hours:

-
Before:
-
After:

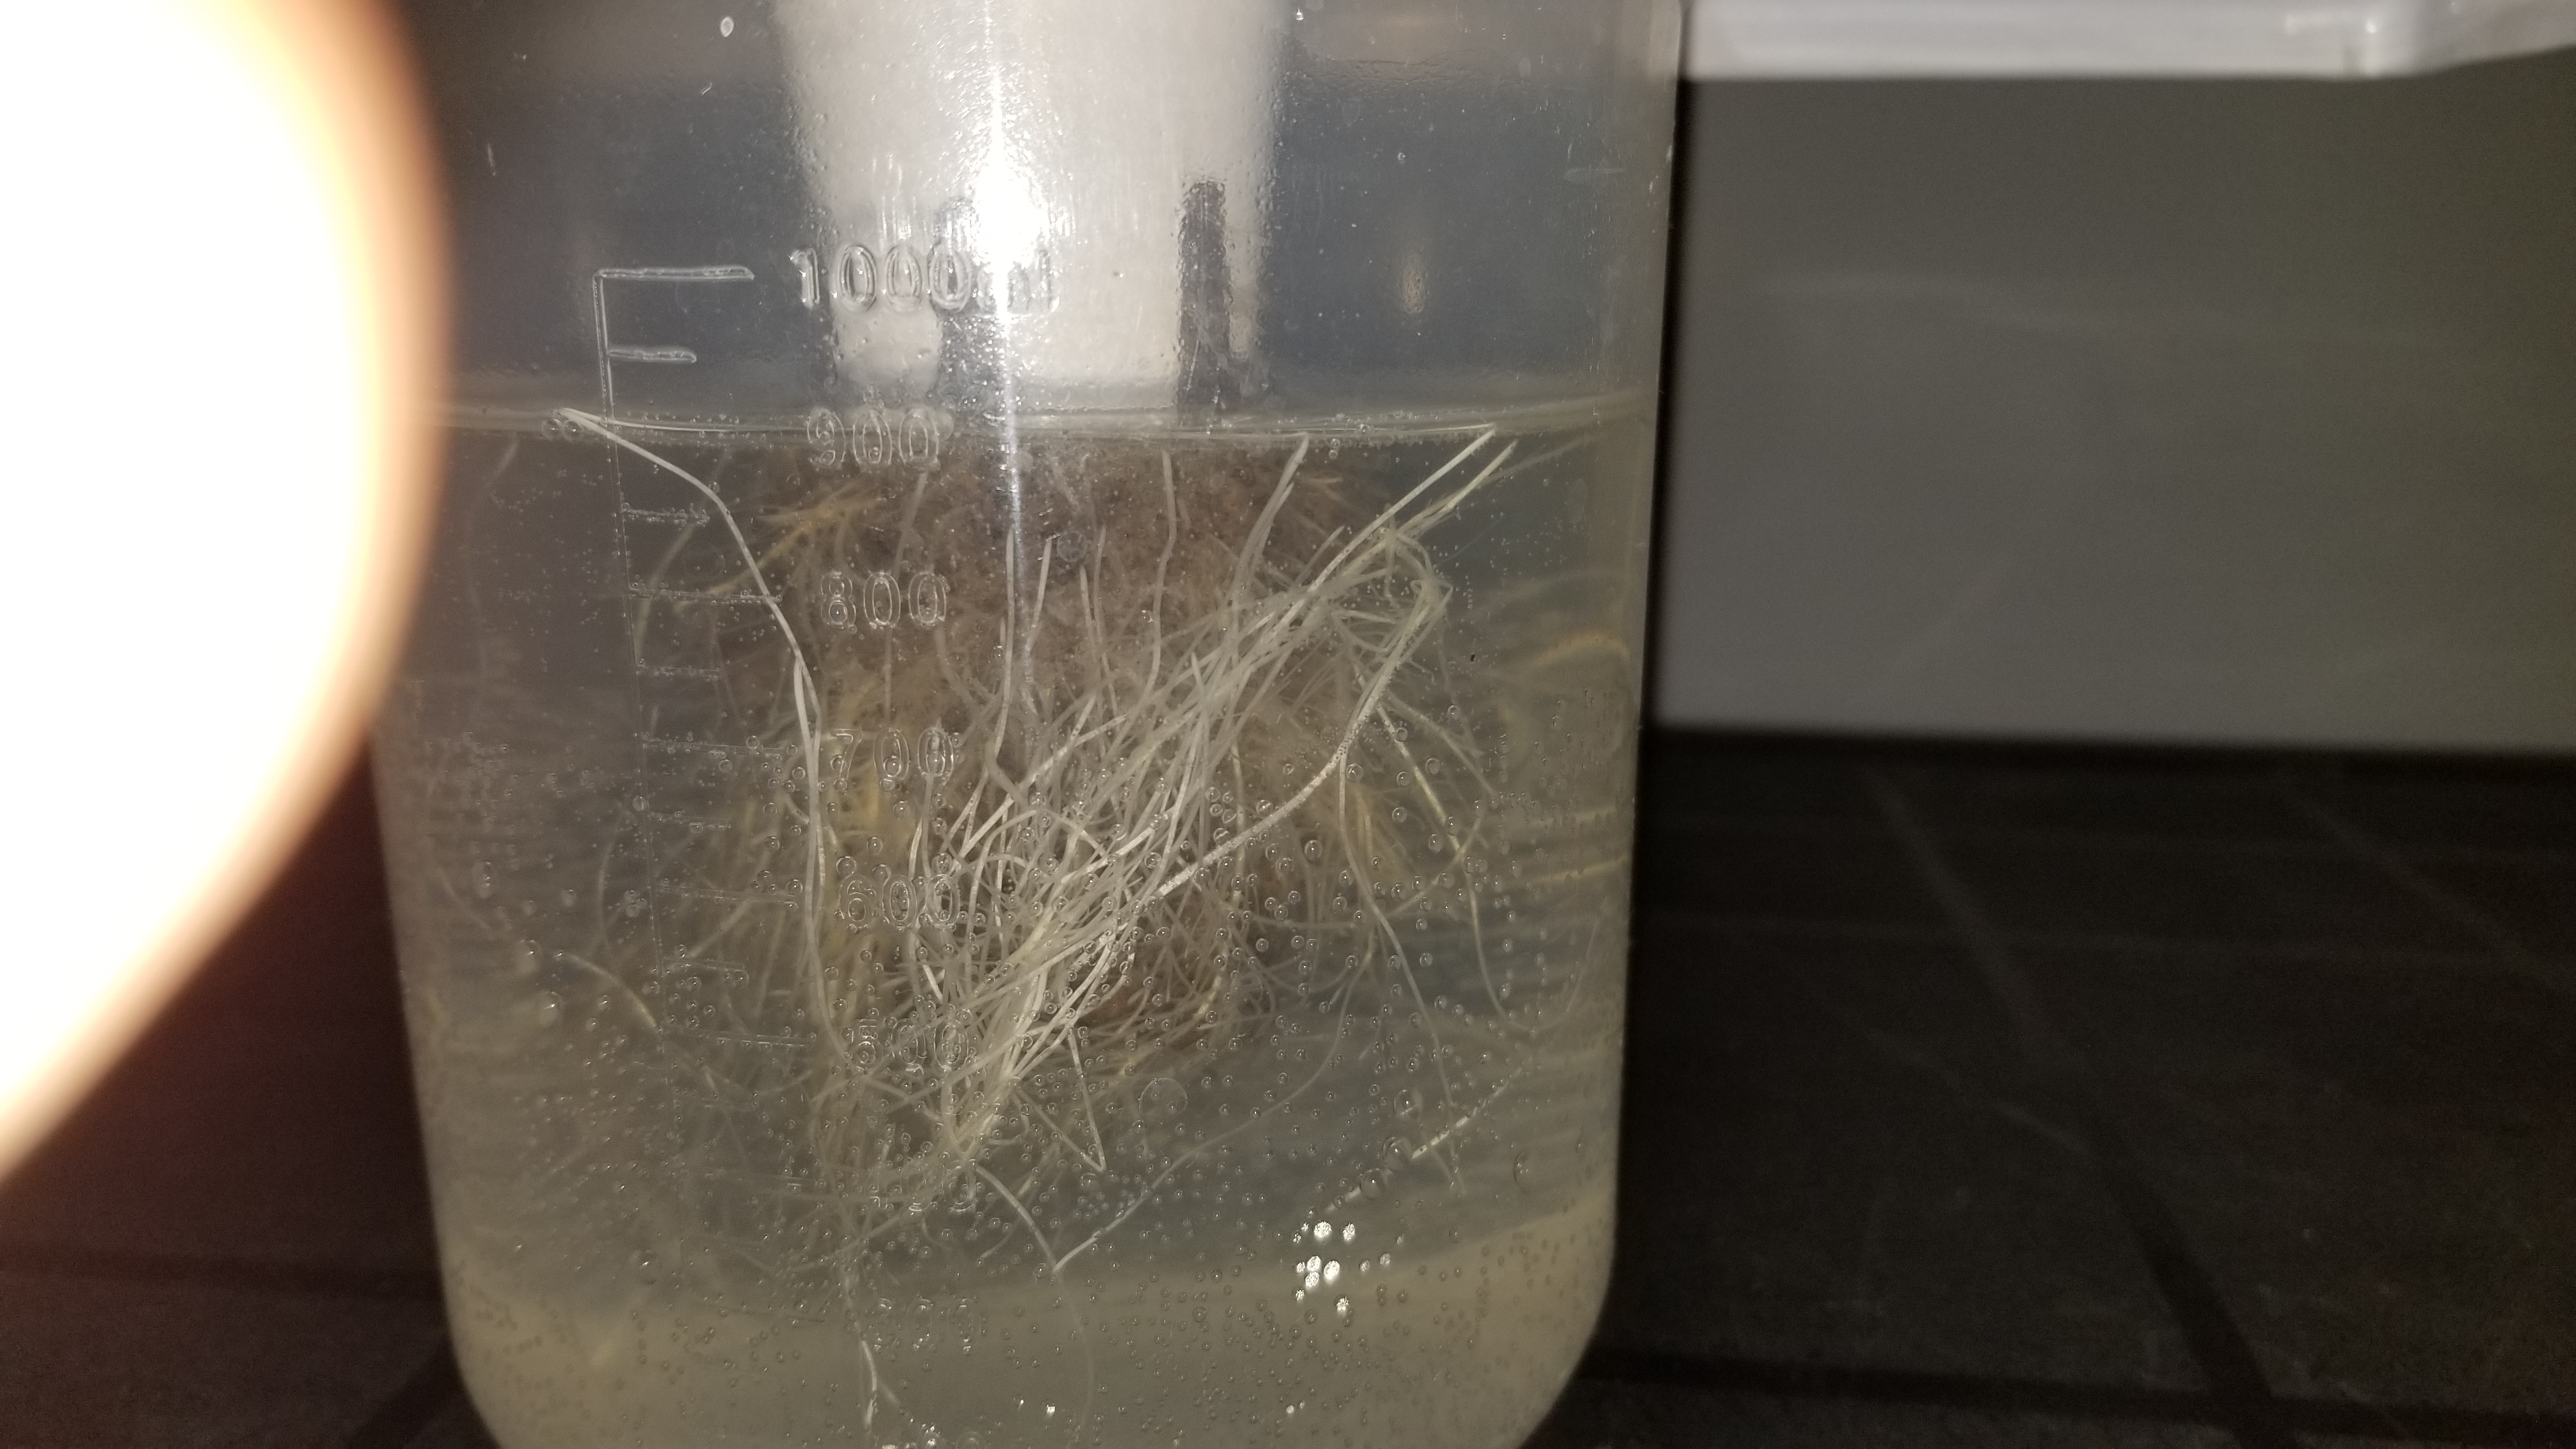
Pics of the roots a couple days later, still nothing to write home about. Those bubbles are the result of 2 added air stones powered by 2 separate pumps on top of the grobo’s default air stone, so even if a pump dies there’s still 2 air stones running - there’s definitely enough aeration:

Half a week later, she’s showing signs of improvement - there is some reach occurring:

I concocted a blend of 50 mL hydroguard + 1/4 tbsp great white + 1/4 tbsp root rescue (basically hydroguard + something “recharge”-like) in 1.2L of water and put it in a separate container to bubble for about 12-14 hours. I also mixed about 2-3 drops (about 2/13th of a mL) of molasses in the container. I added half of this mixture to each reservoir and poured some of it through the coco pod (slowly/carefully) to make sure it saturated that part of the root zone as well.
This is also when Armor Si was introduced to the res water.
I’ll be using both of these continually after seeing the results.
A week after that:


- That root growth can likely be attributed to the recharge-like formula that was added. I had similar results in the other grobo as well.
And here she is this morning just waking up:


5 Likes
Also, a word of caution to anyone planning to use silica (like Armor Si):
It will drastically raise the pH and quickly cause a drain of your #2 bottle if you simply dump the requisite mL into the reservoir and allow grobo to automatically adjust the pH.
My experience has led me to believe that it’s a must to 1) mix the water thoroughly after adding it, and 2) make sure to pH the water yourself before filling with it.
My suspicion is that until the bubbles mixed it enough there were highly concentrated amounts reaching the pH sensor and throwing off the readings, enough so it felt it needed to dump about 90% of my #2 bottle in over a 12 hour period. For comparison, it only takes about 20mL of pH down when doing it manually and mixing it well.
6 Likes
This might be happening to me. My #2 bottle is nearly empty, 1 month into grow. I add recharge, and hydroguard, right after my refill every week.
1 Like
I got a couple of 12L buckets cheap from the dollar store, one labeled D for dirty and the other C for clean. They’ve been working out better than just filling straight from the distilled water bottles.
The dirty bucket is for draining, and the clean bucket is for mixing and then filling.
I’ve been mixing in this order:
- room temp water (5 L, pH 5.8-5.9)
- armor si (12 mL)
- calmag (18 mL)
- stir
- pH down to get it back around 5.1 (usually from 10+)
- stir as needed to get the pH to settle, leave it sit for 15-30 mins and re-check pH/adjust if needed
- AN pH Perfect micro (48 mL)
- stir, leave it sit for 5-10 mins
- AN ph Perfect grow (48 mL)
- stir, leave it sit for 5-10 mins
- AN ph Perfect bloom (48 mL)
- stir, leave it sit for 5-10 mins
- pH down to get it back around 5.6 (observed 5.7-6.3 range at this point)
- fridge temp water (5L, pH 5.8-5.9)
- stir, leave it sit for 5-10 mins
- pH according to stage/preference, i.e. under 6.0 for seed/veg or above 6.0 for flower.
- stir as needed to get the pH to settle, leave it sit for 15-30 mins and re-check pH/adjust if needed
- add the “concoction” of hydroguard & recharge-like stuff
- stir it really well, for 120-180 seconds
The concoction is a really dark brown (looks black) color. When the water goes in the res it looks fairly dark/black, but coming out a week later it is very clear.
From the powder compounds added there is a considerable amount of sediment left on the bottom but it’s mostly just the filler material that they suspend the bacteria/fungi on/in. I’ve found that when cleaning out the res after a grow what works well is to stir the res water a bunch while it’s draining and “kick up the dust” to let the pump do the work - there’s less left on the floor of the reservoir (less left to wipe out) afterward if enough of it gets sucked out.
Since I started mixing mid-grow those values are what were used through end of veg to flower/present.
For soil, usually start nutes around 1/4 or even less than those current values and then gradually increase as it grows, which is what I’ll try when starting my next grobo grow.
3 Likes
You should add those to the water in a bucket first then ph, THEN fill. You will avoid the ph swings and use less of bottles 1*2:+1:
4 Likes
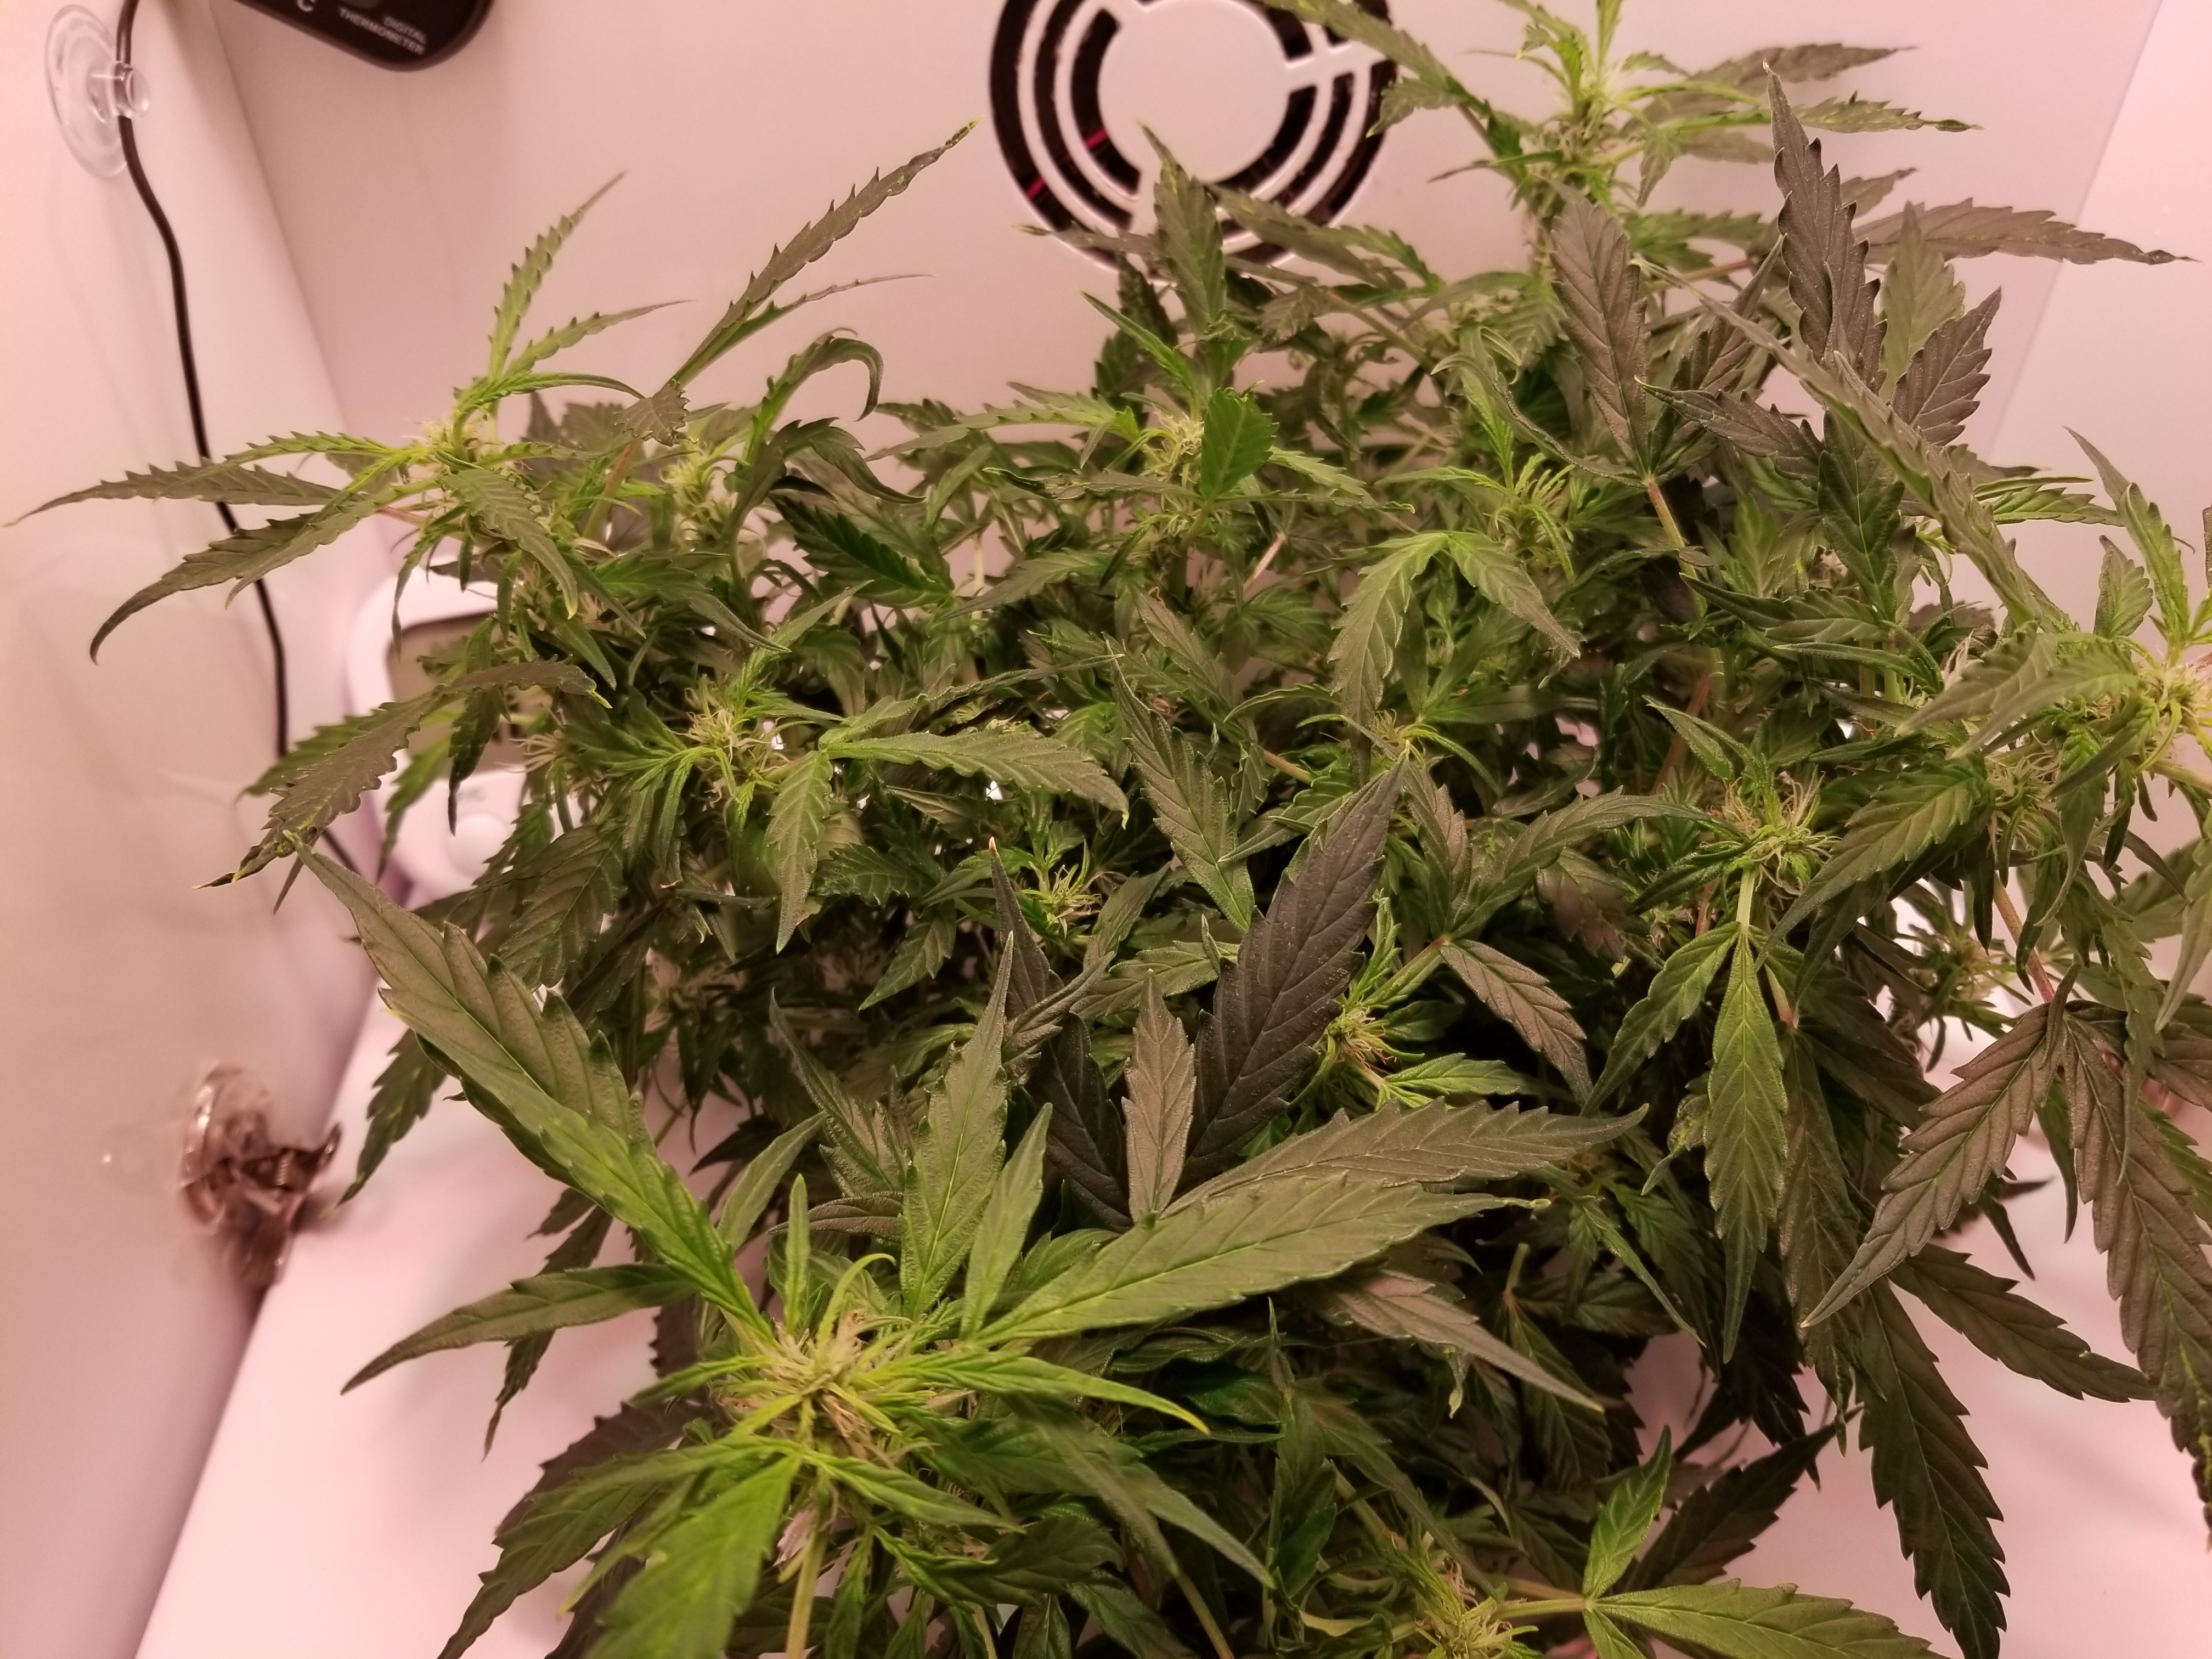
Here’s today, flowering like crazy everywhere she can:

Used some latex wire to stretch her out a bit and let more light in:

Some more pics:


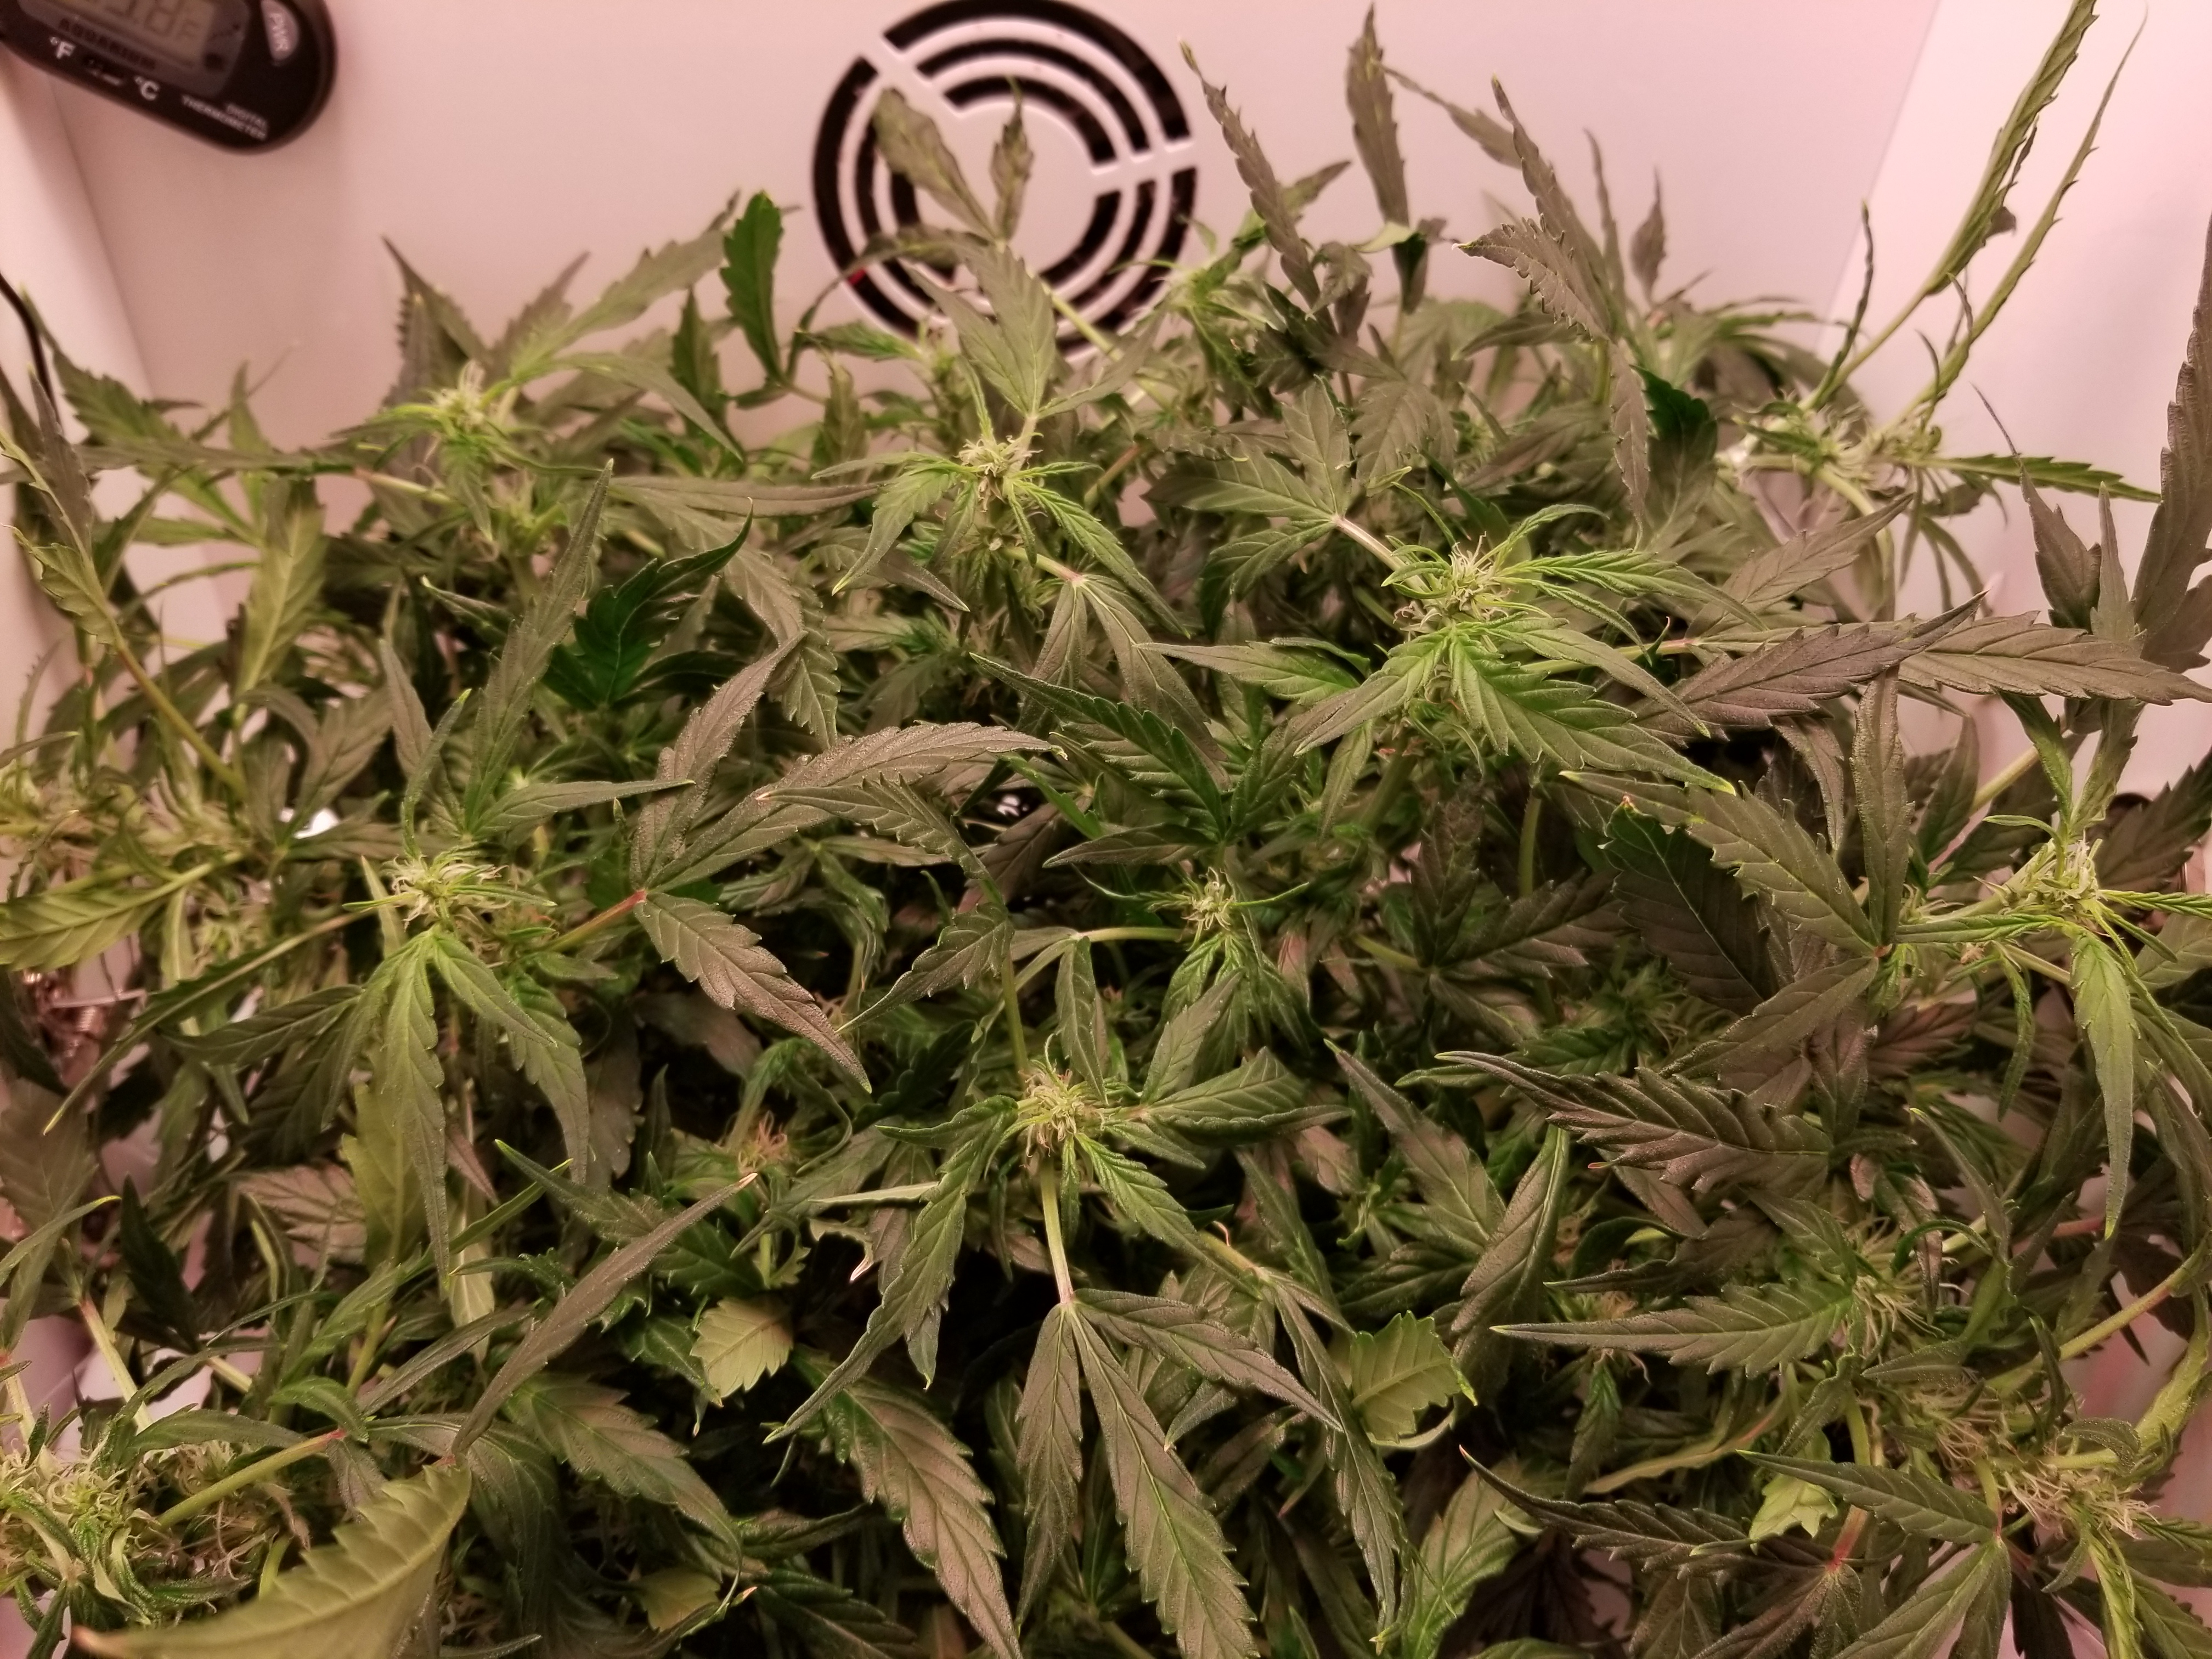


6 Likes
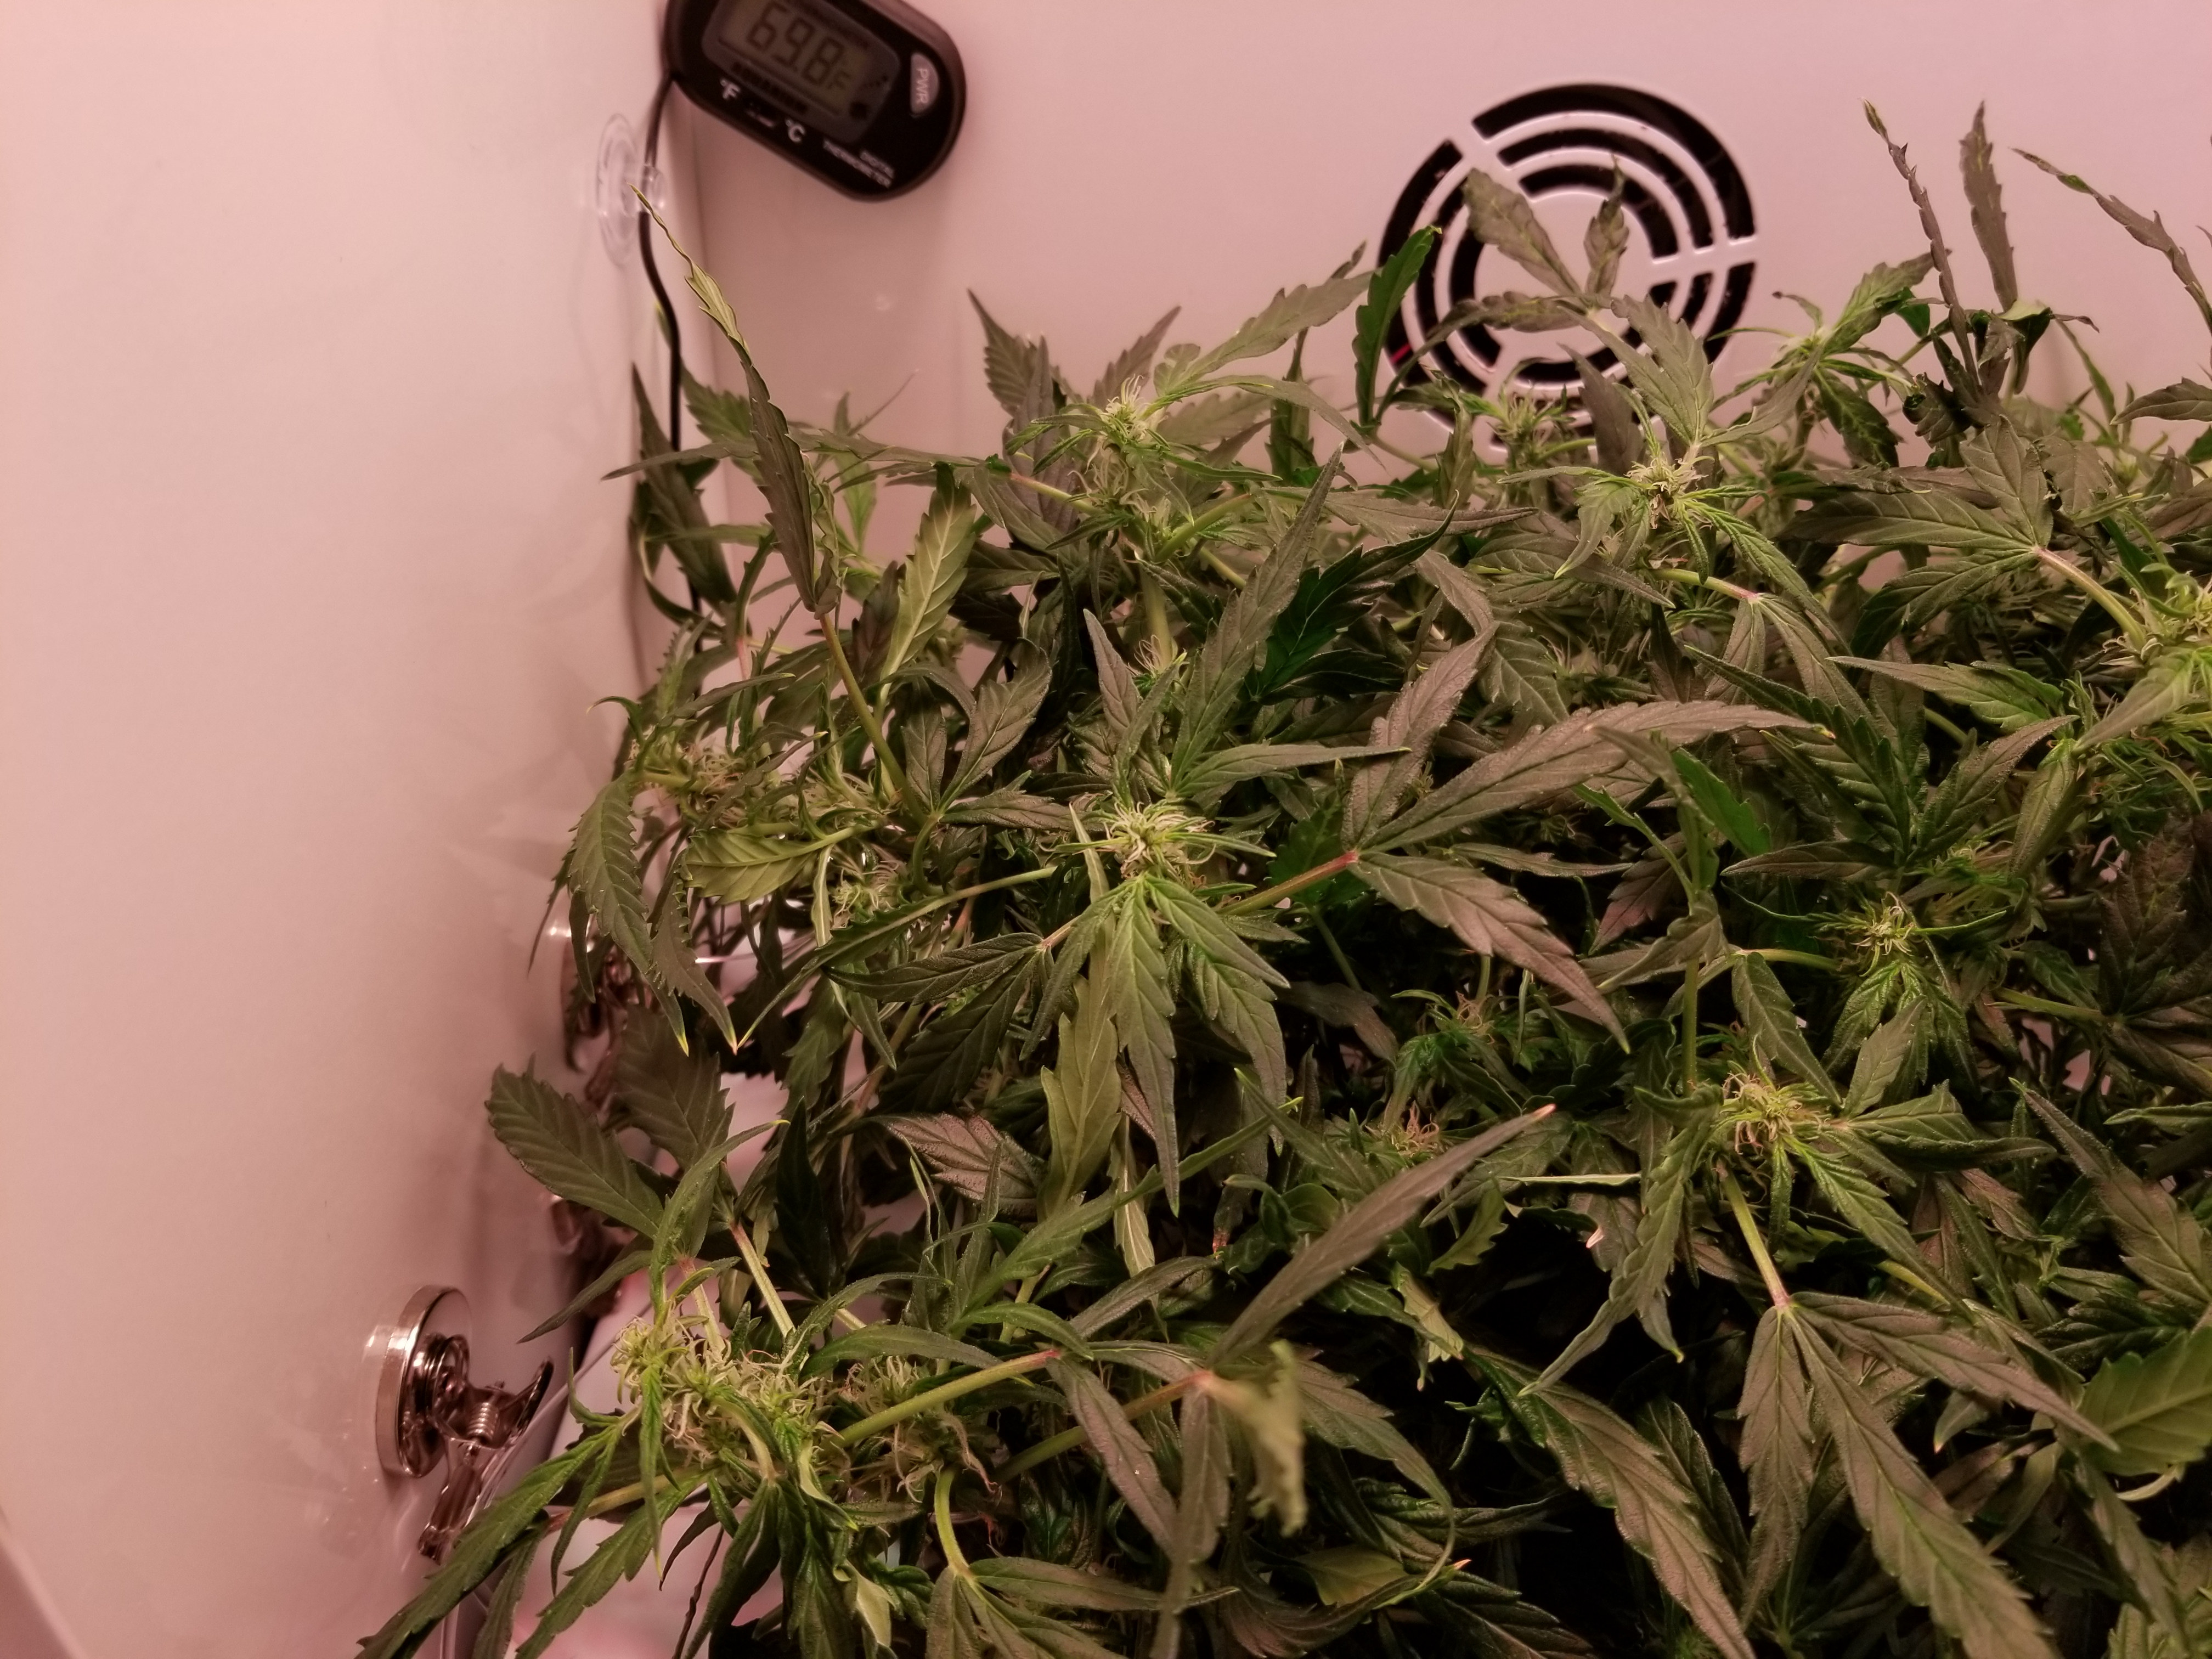
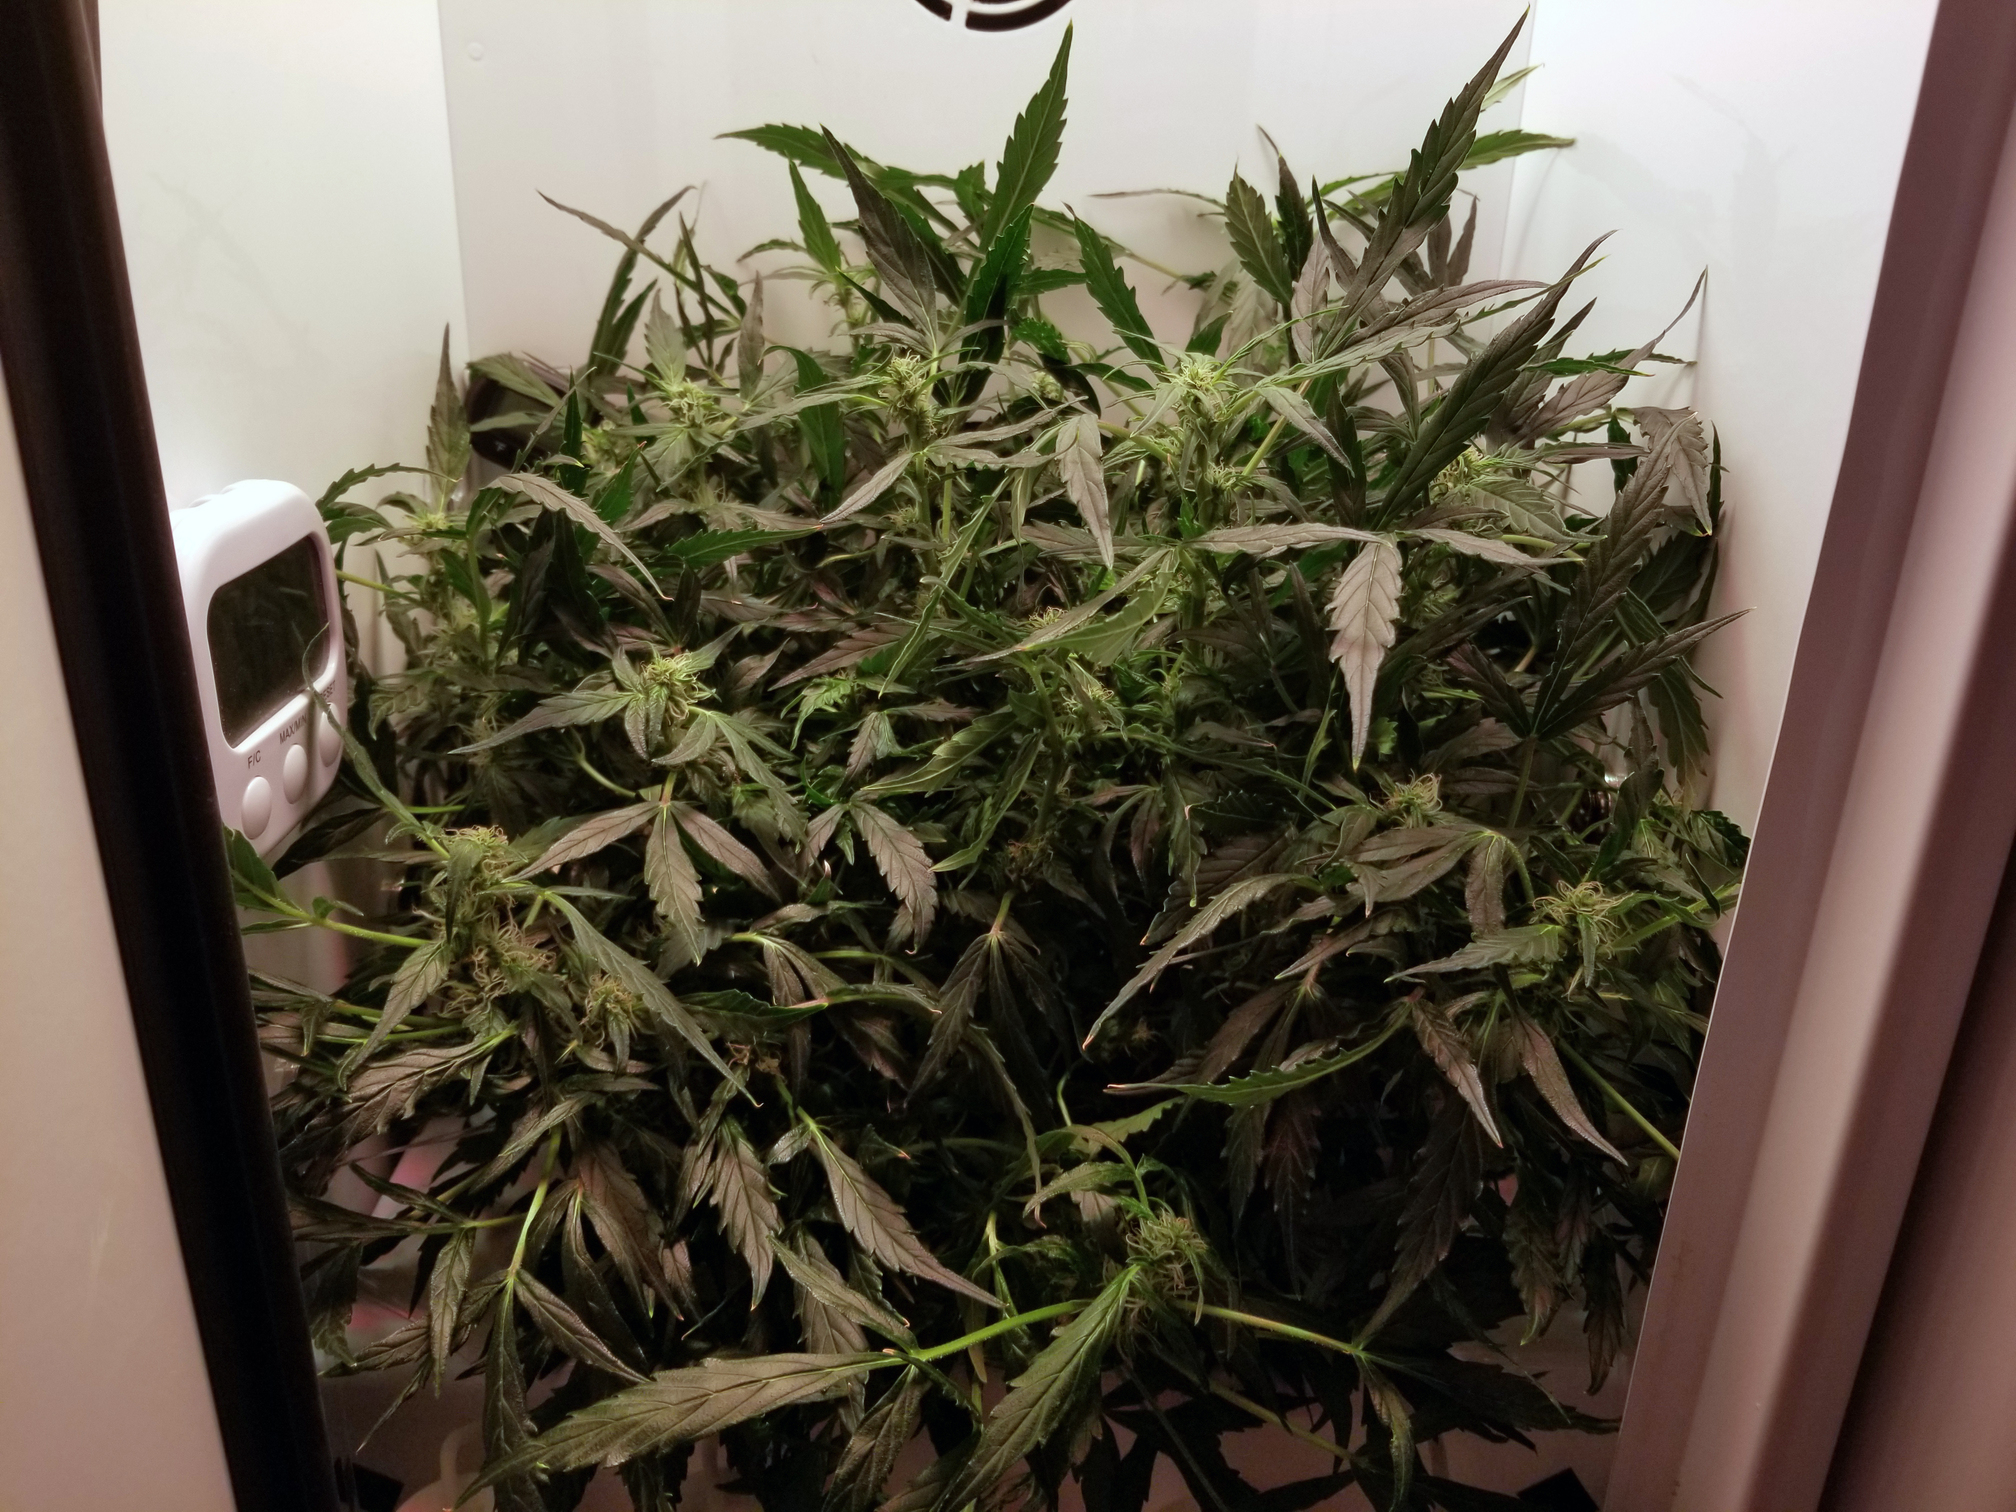
Was away for 4 days, came home to this:


Smells really good too!
Am thinking about defoliation but really don’t want to shock it, and the buds down below don’t appear to be stunted - there is a bit of light bleeding through to the lower leaves (it’s not entirely as dark as it seems in pic).
Edit: did some tucking


Looks like about 3 weeks max until flush, if the timing is similar to past grows.
Here’s another similar-sized of same strain around the same point in flowering:

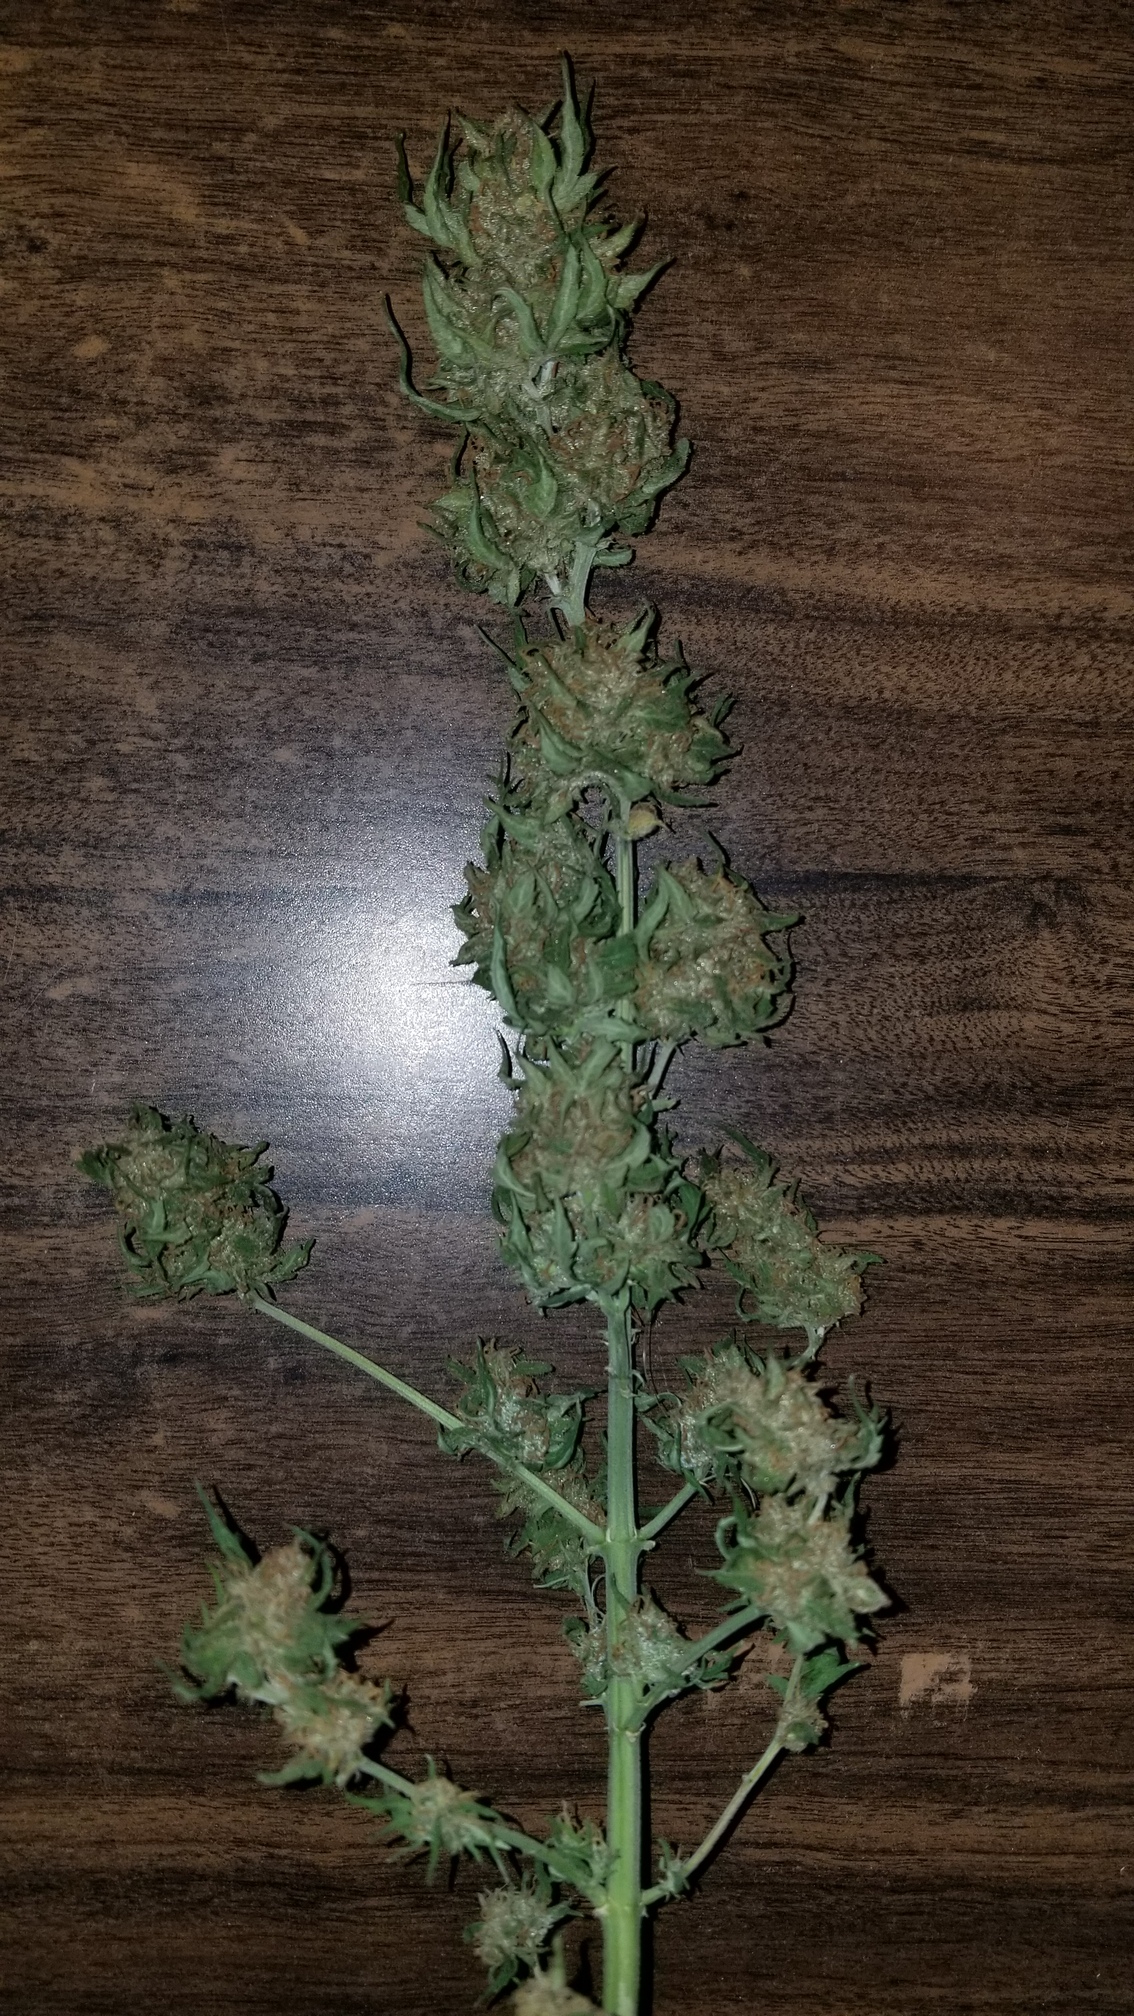
That one at harvest:

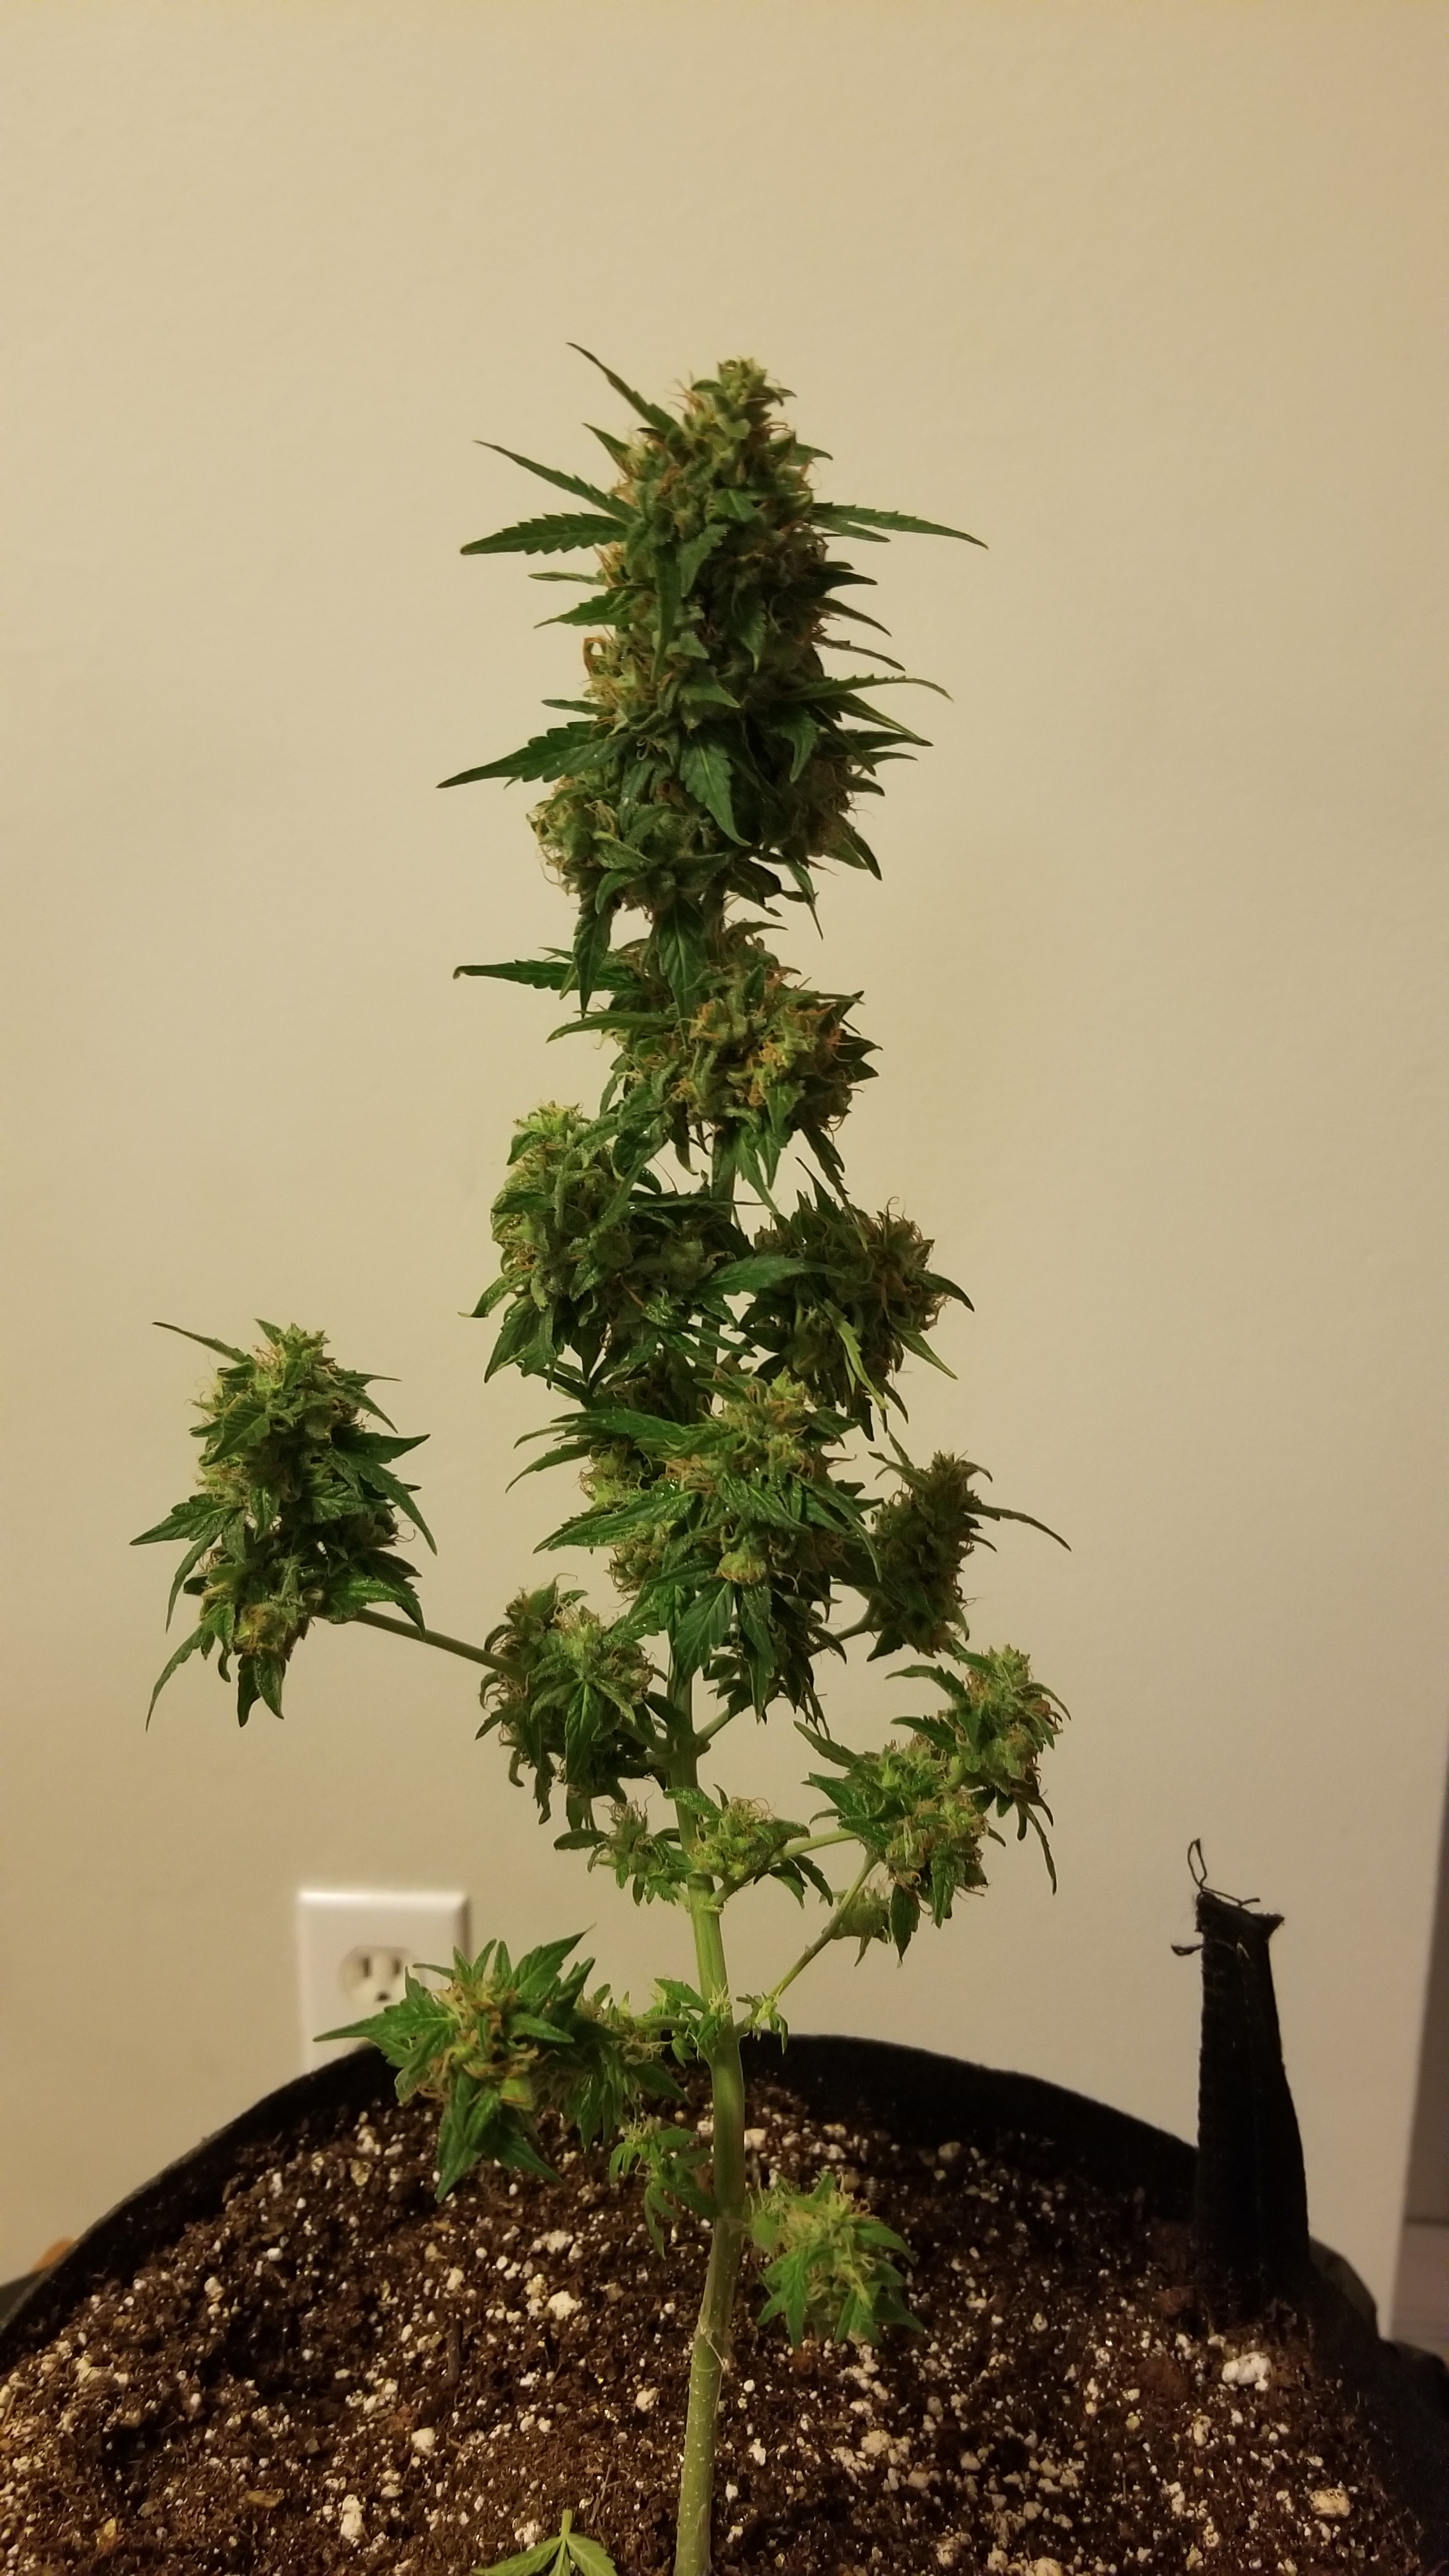
Which landed at 8g when dried and was quite potent for its size:
If things stay on track my guess is this current grow is about 4-5x bigger than the one that was harvested, which is very promising! There are a lot more (and longer) trichomes as well.
4 Likes
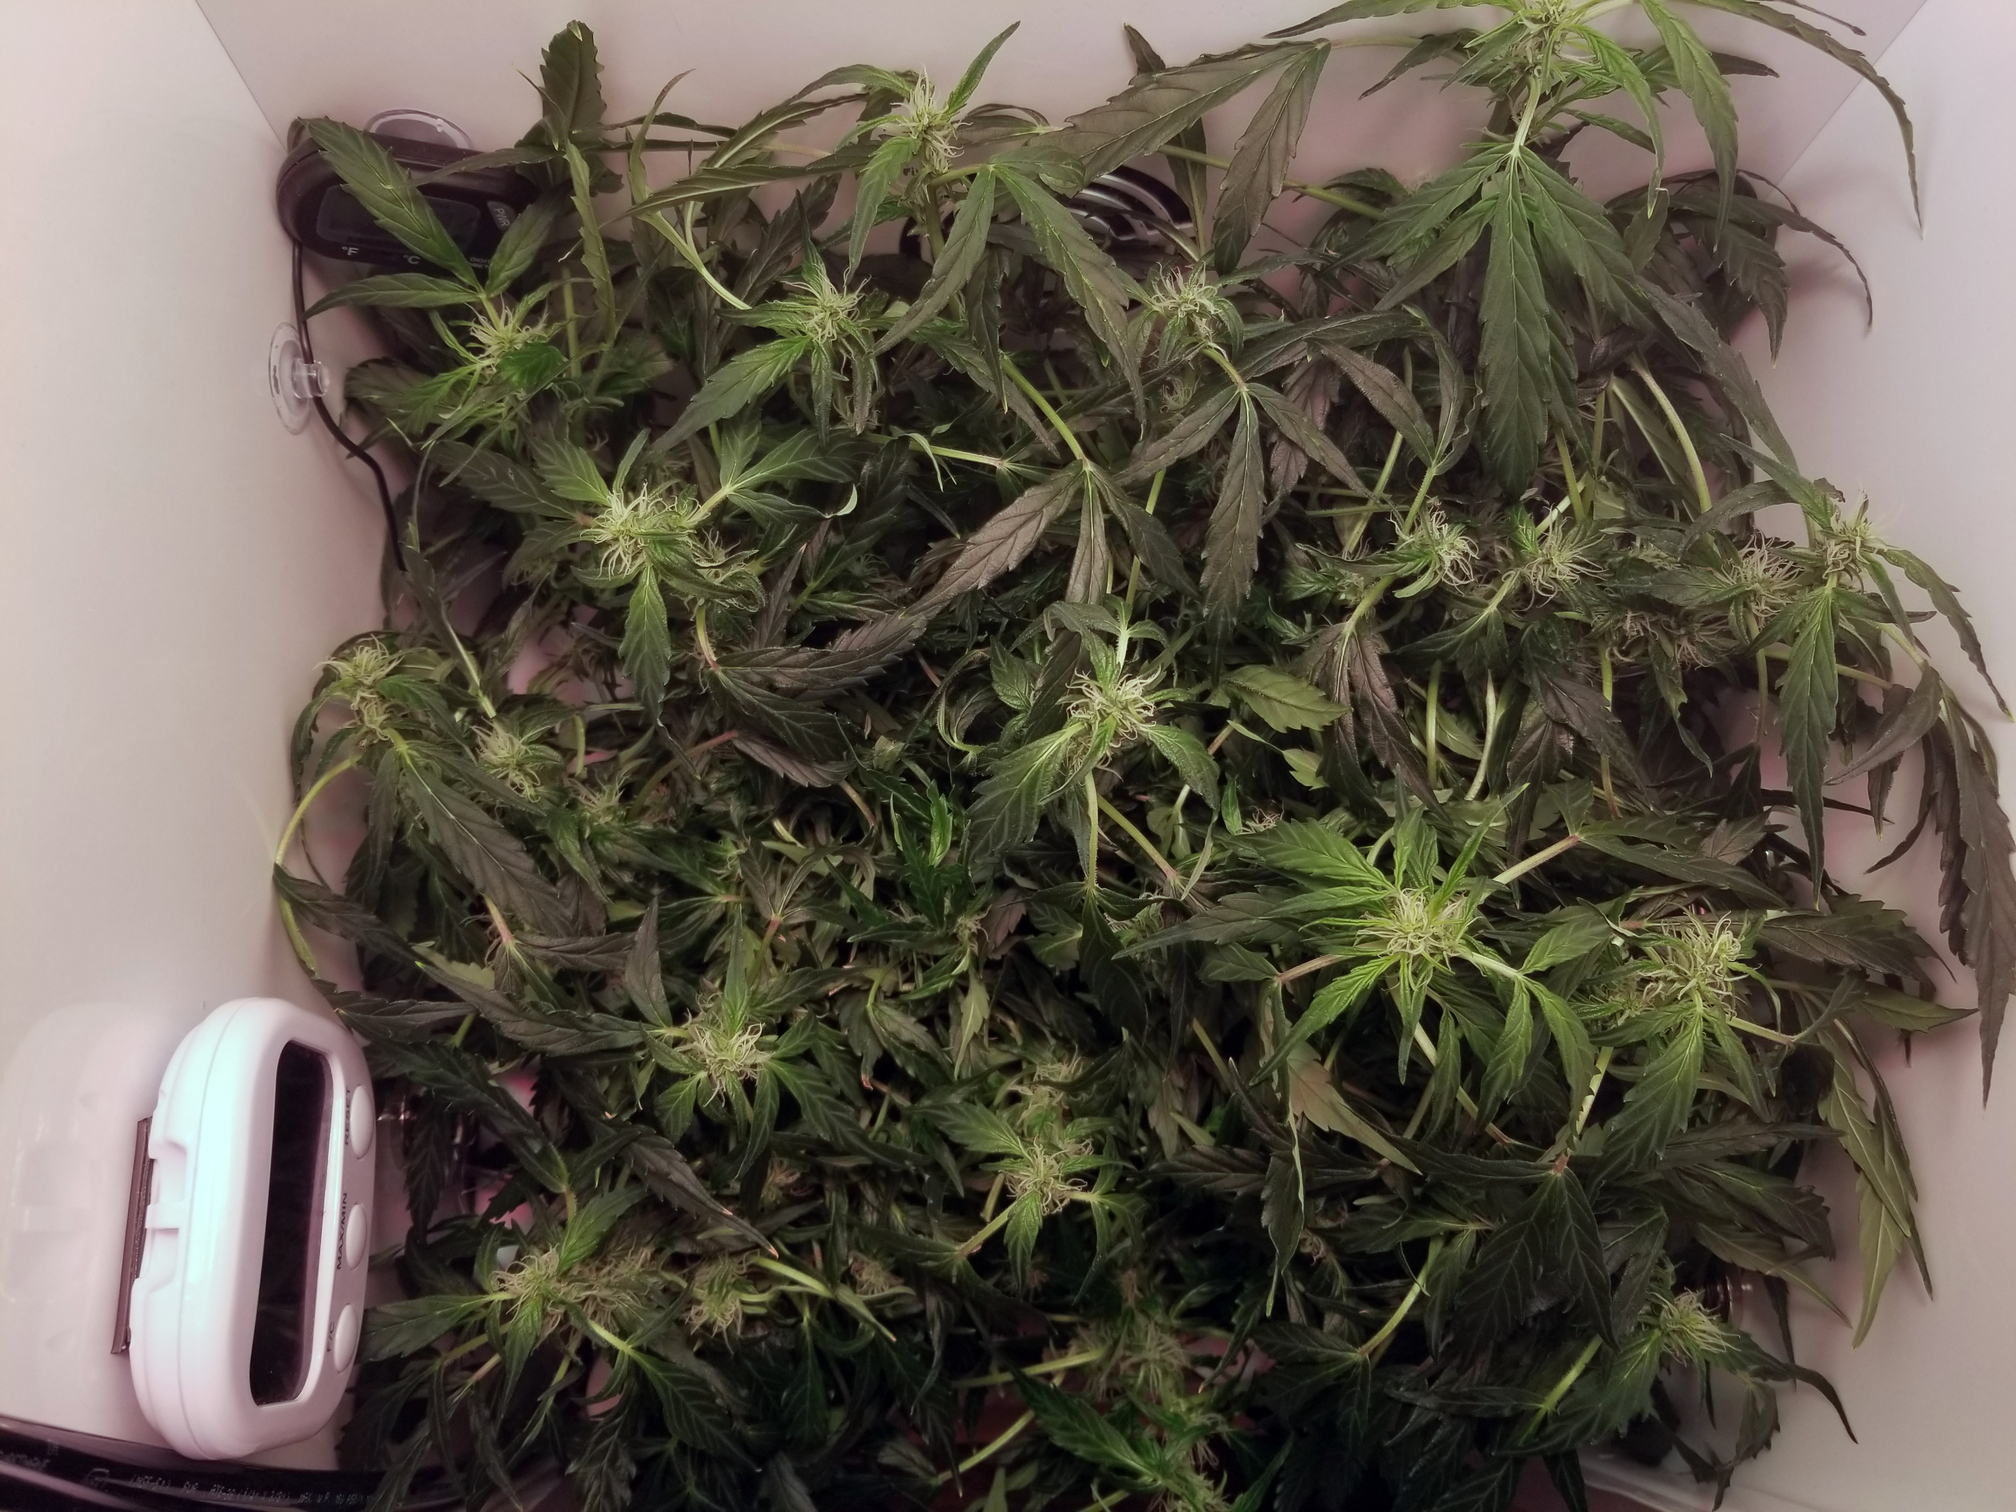
Looks good enough to eat as a salad!
1 Like
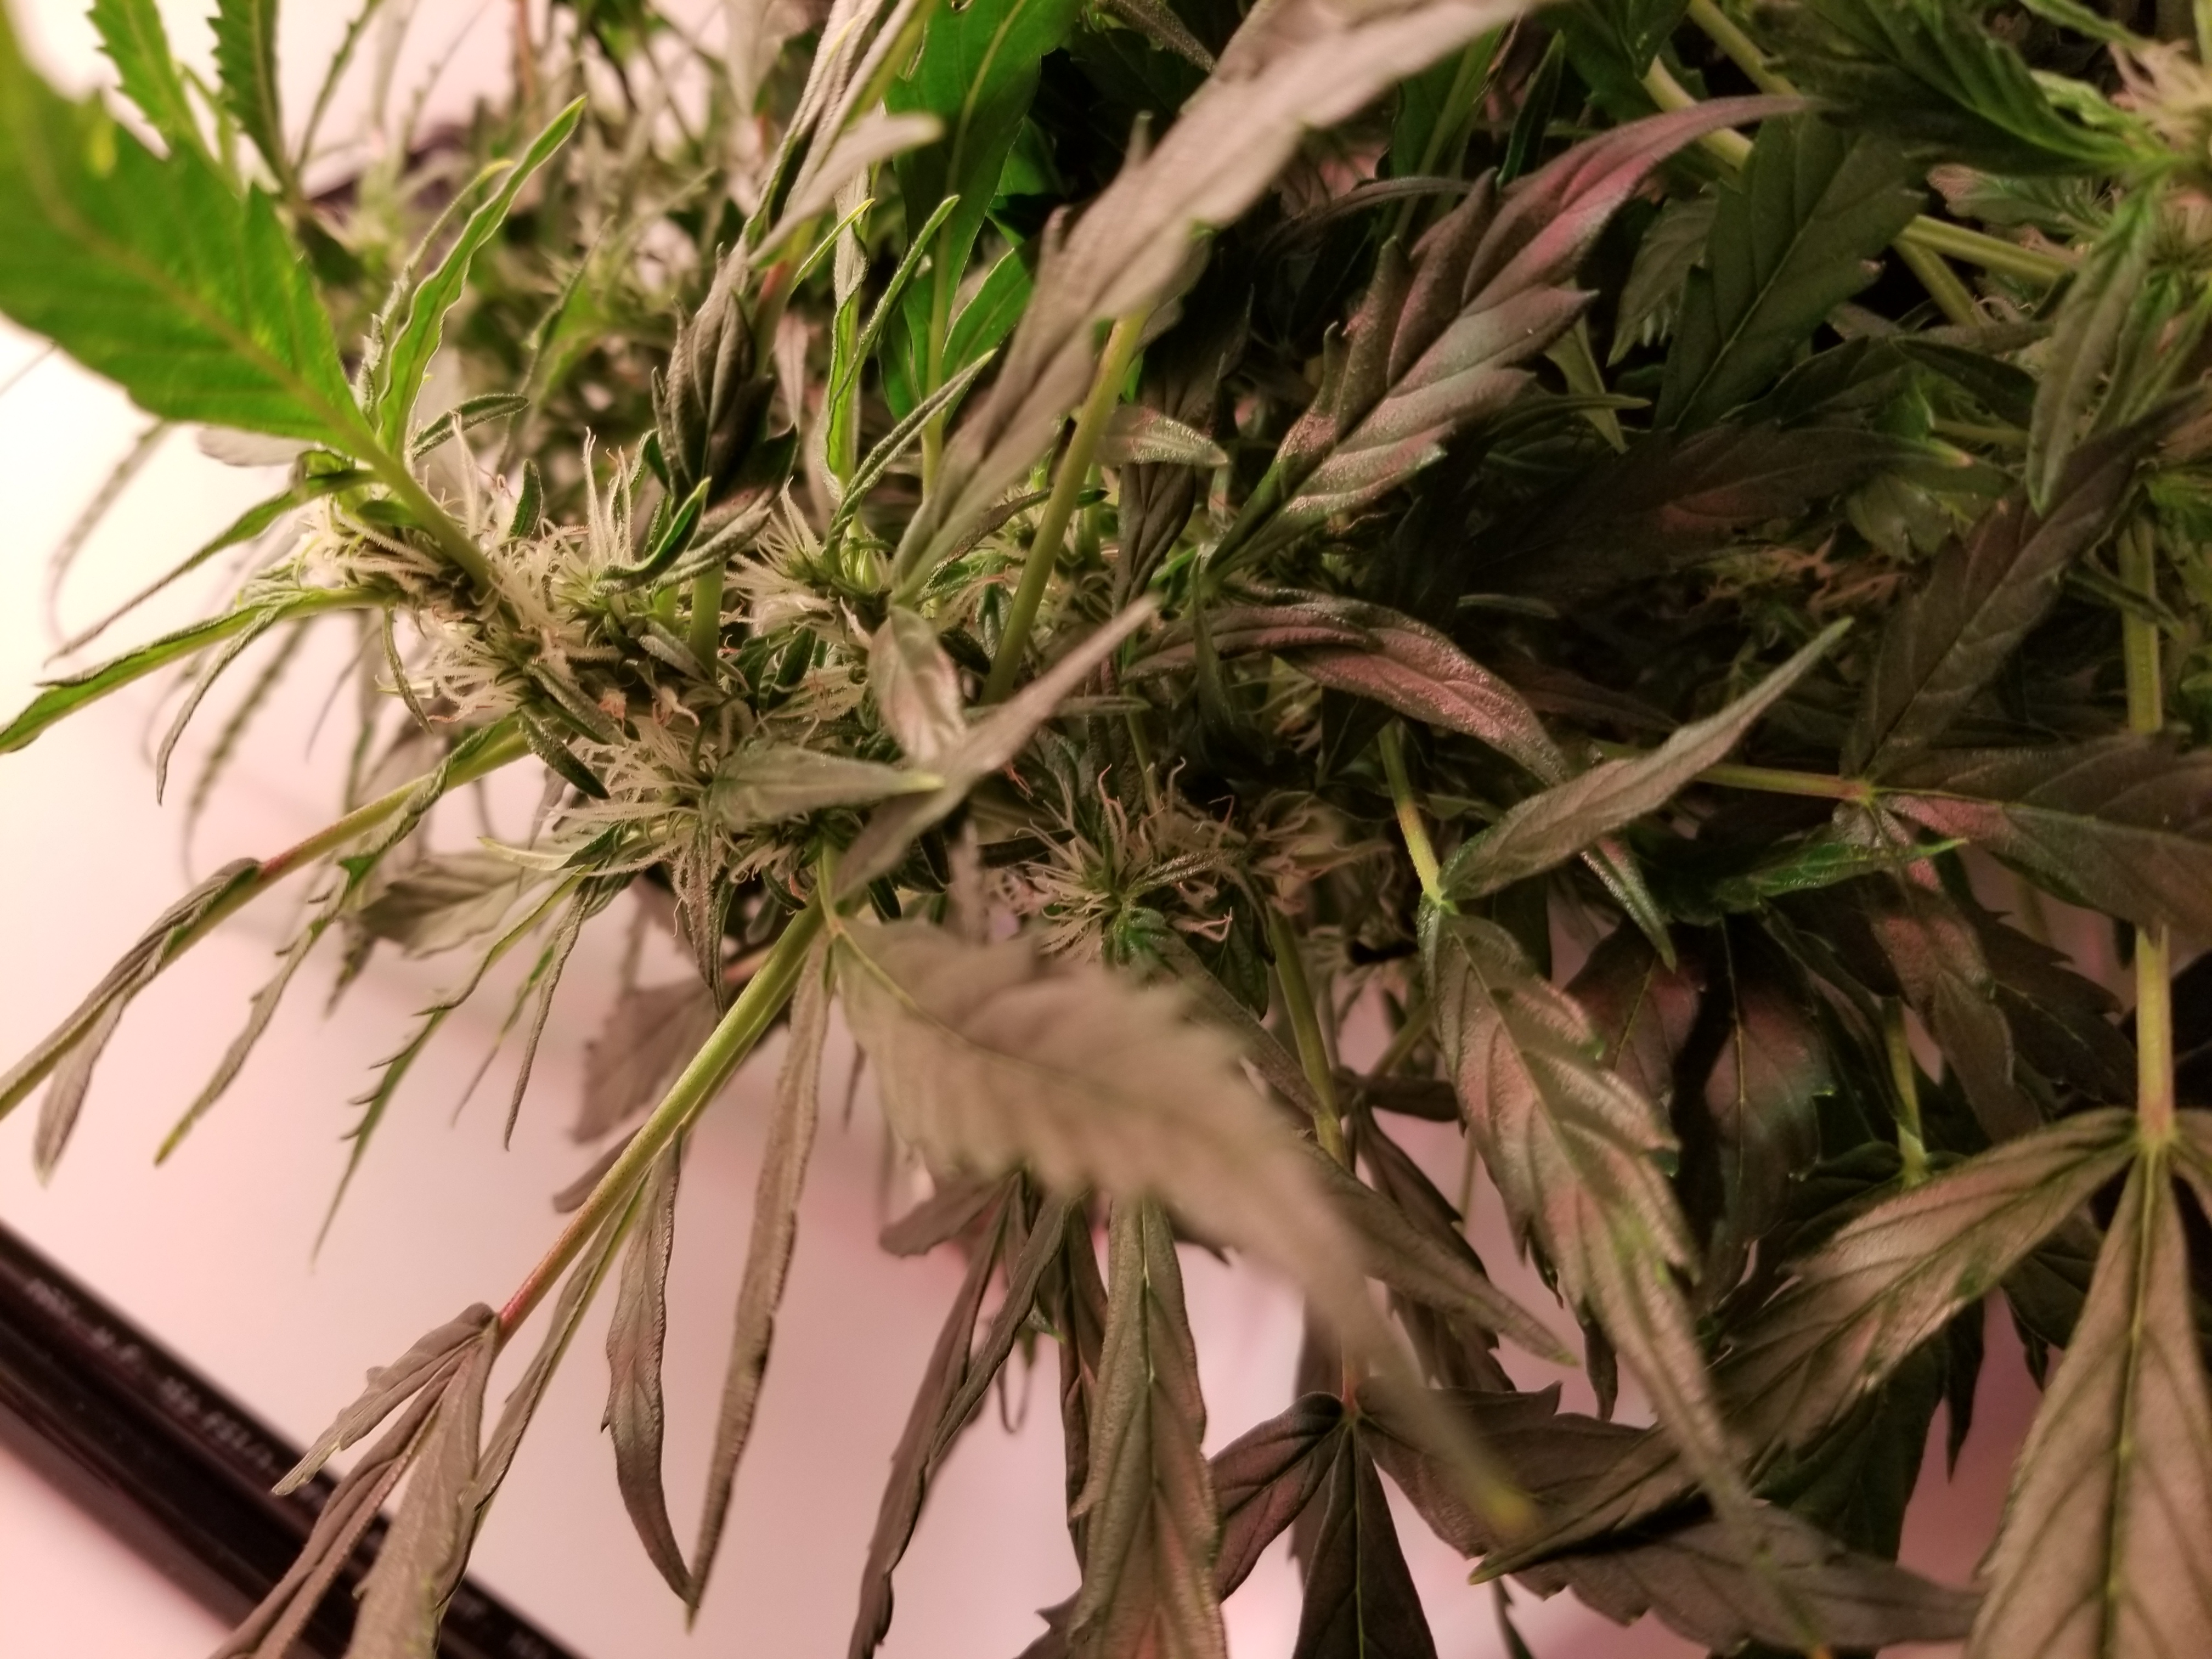
Flowering (Day 29 /39)
That bush was just becoming too much to tuck in. The last two times it was tucked there was a single leaf noticeably sweating a bit (touching another) and it’s been harder to keep RH down:

So, I decided to do one last defoliation:

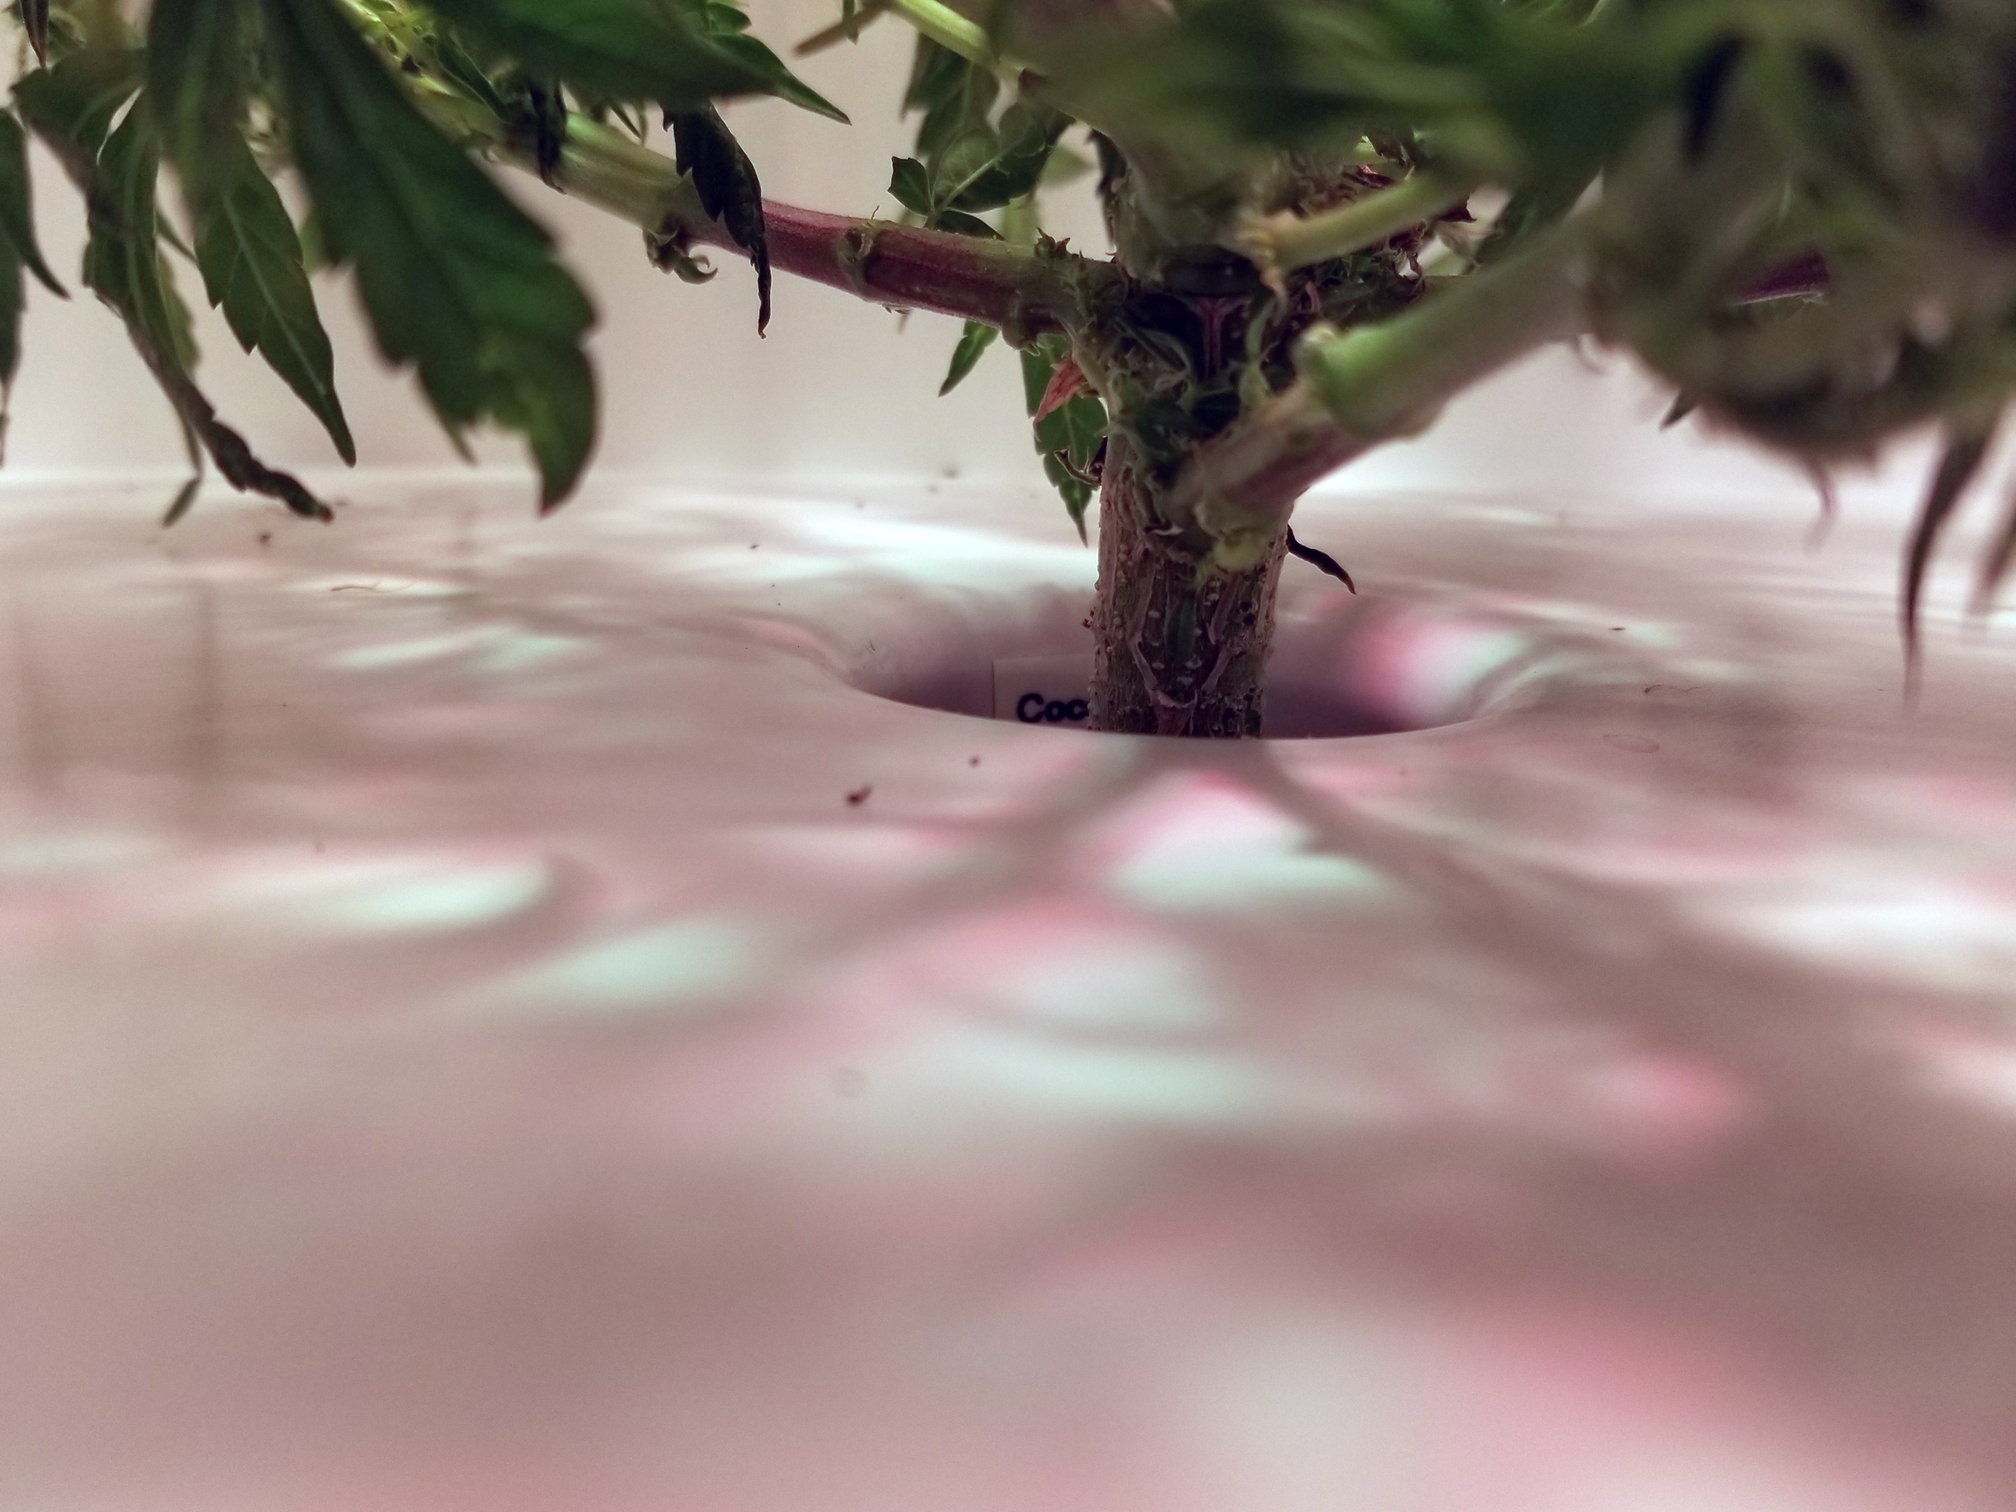
Haven’t seen the base of stem so clearly in a long time:

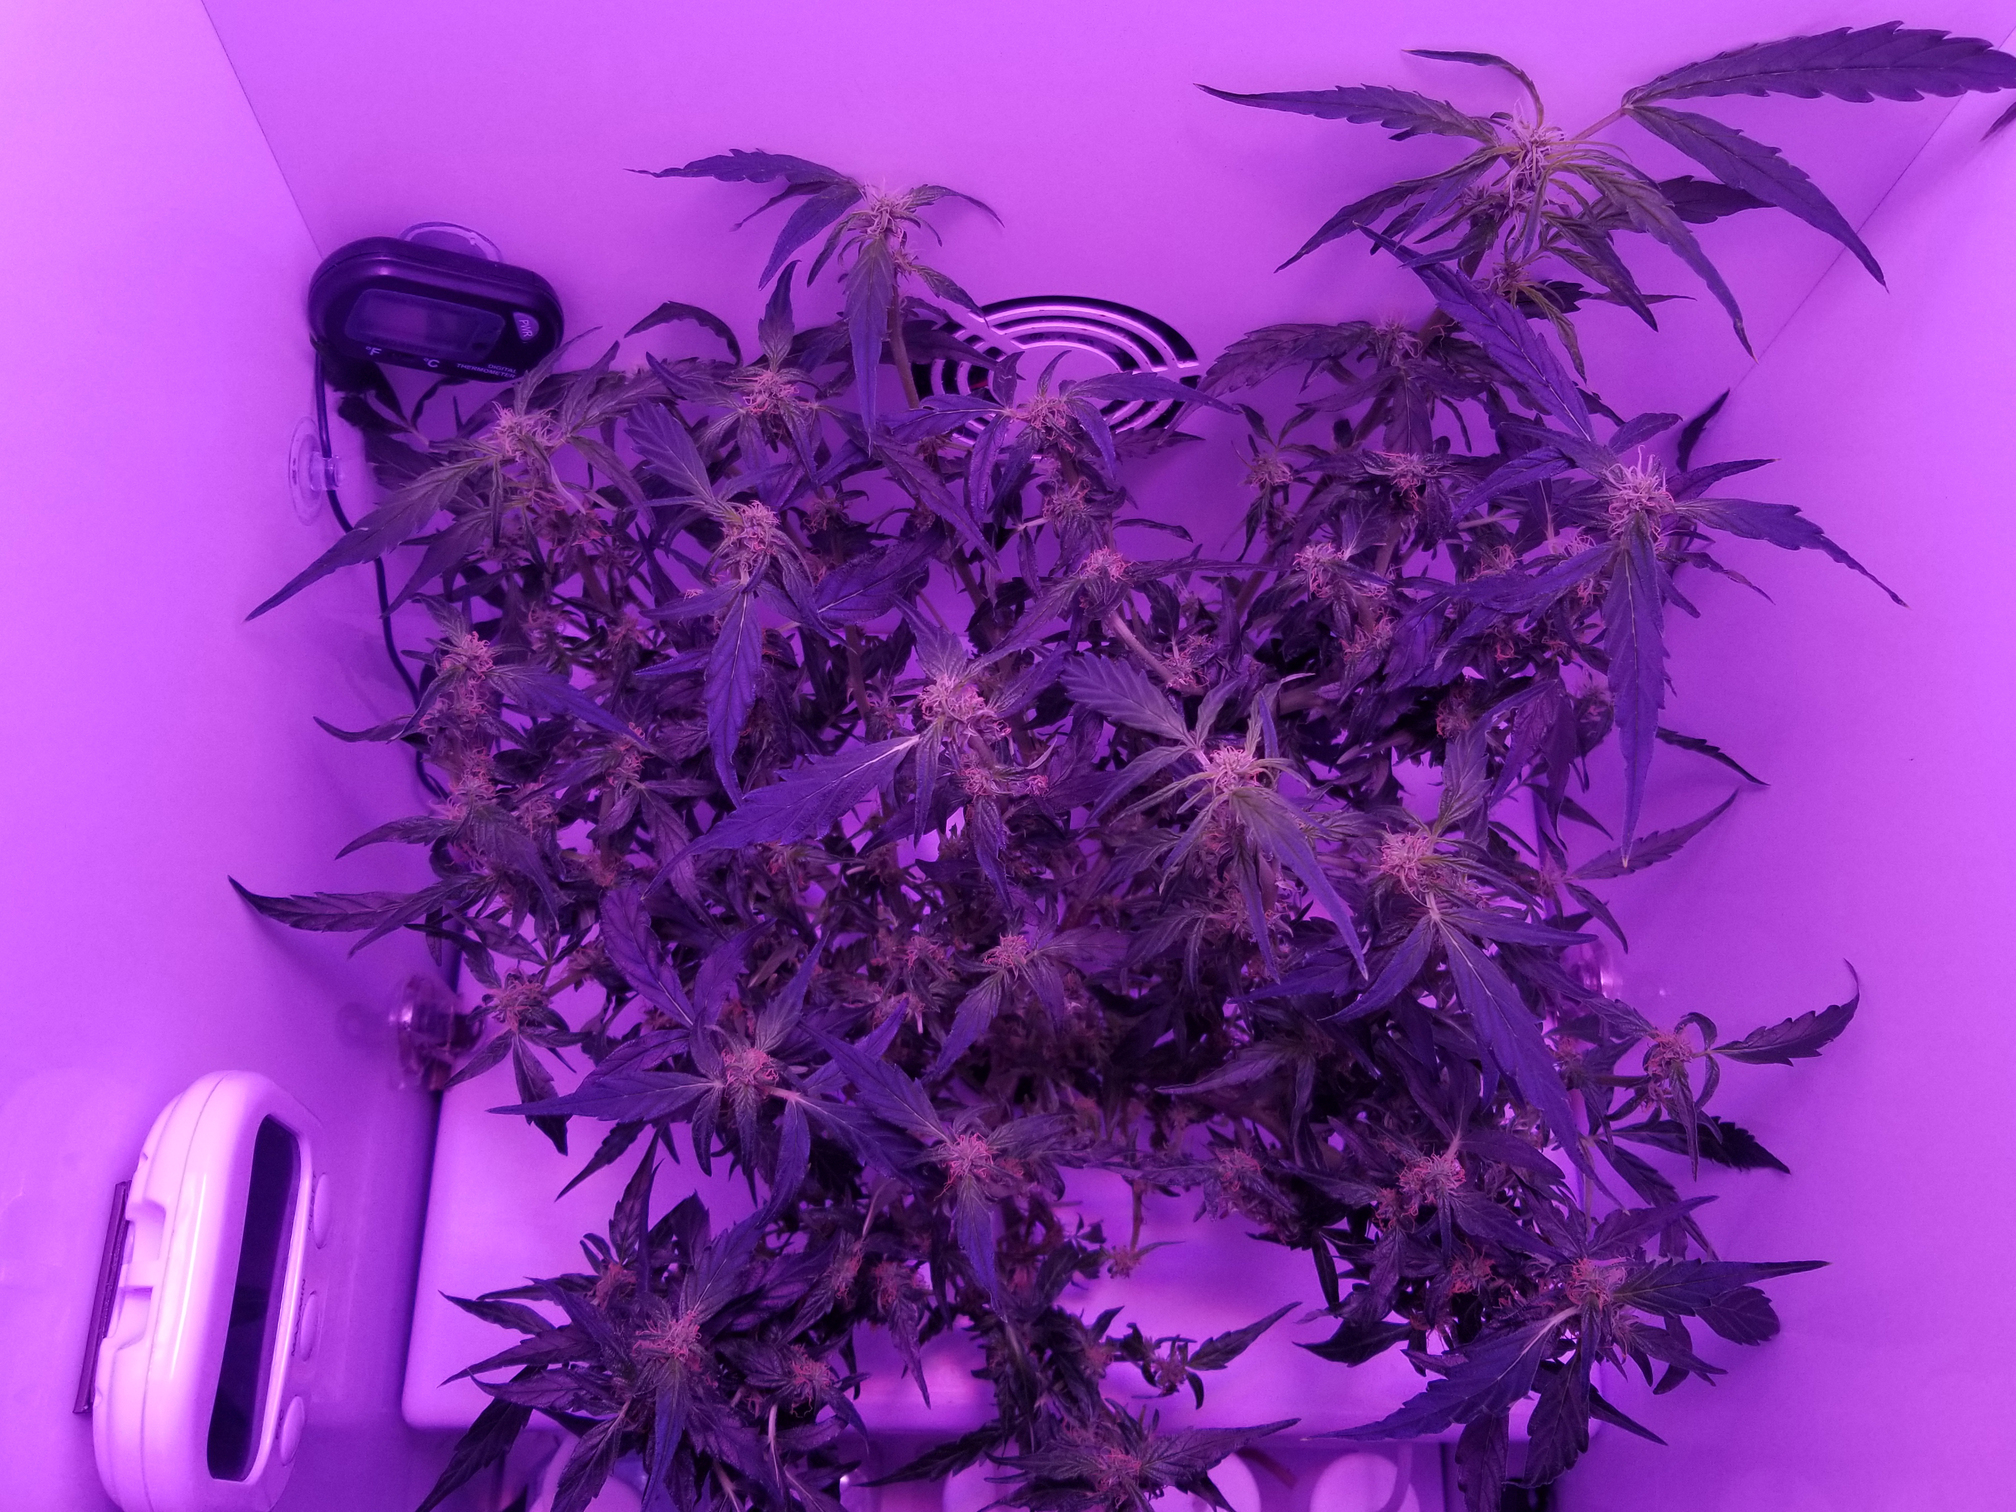
The buds stand out better under the purple light:
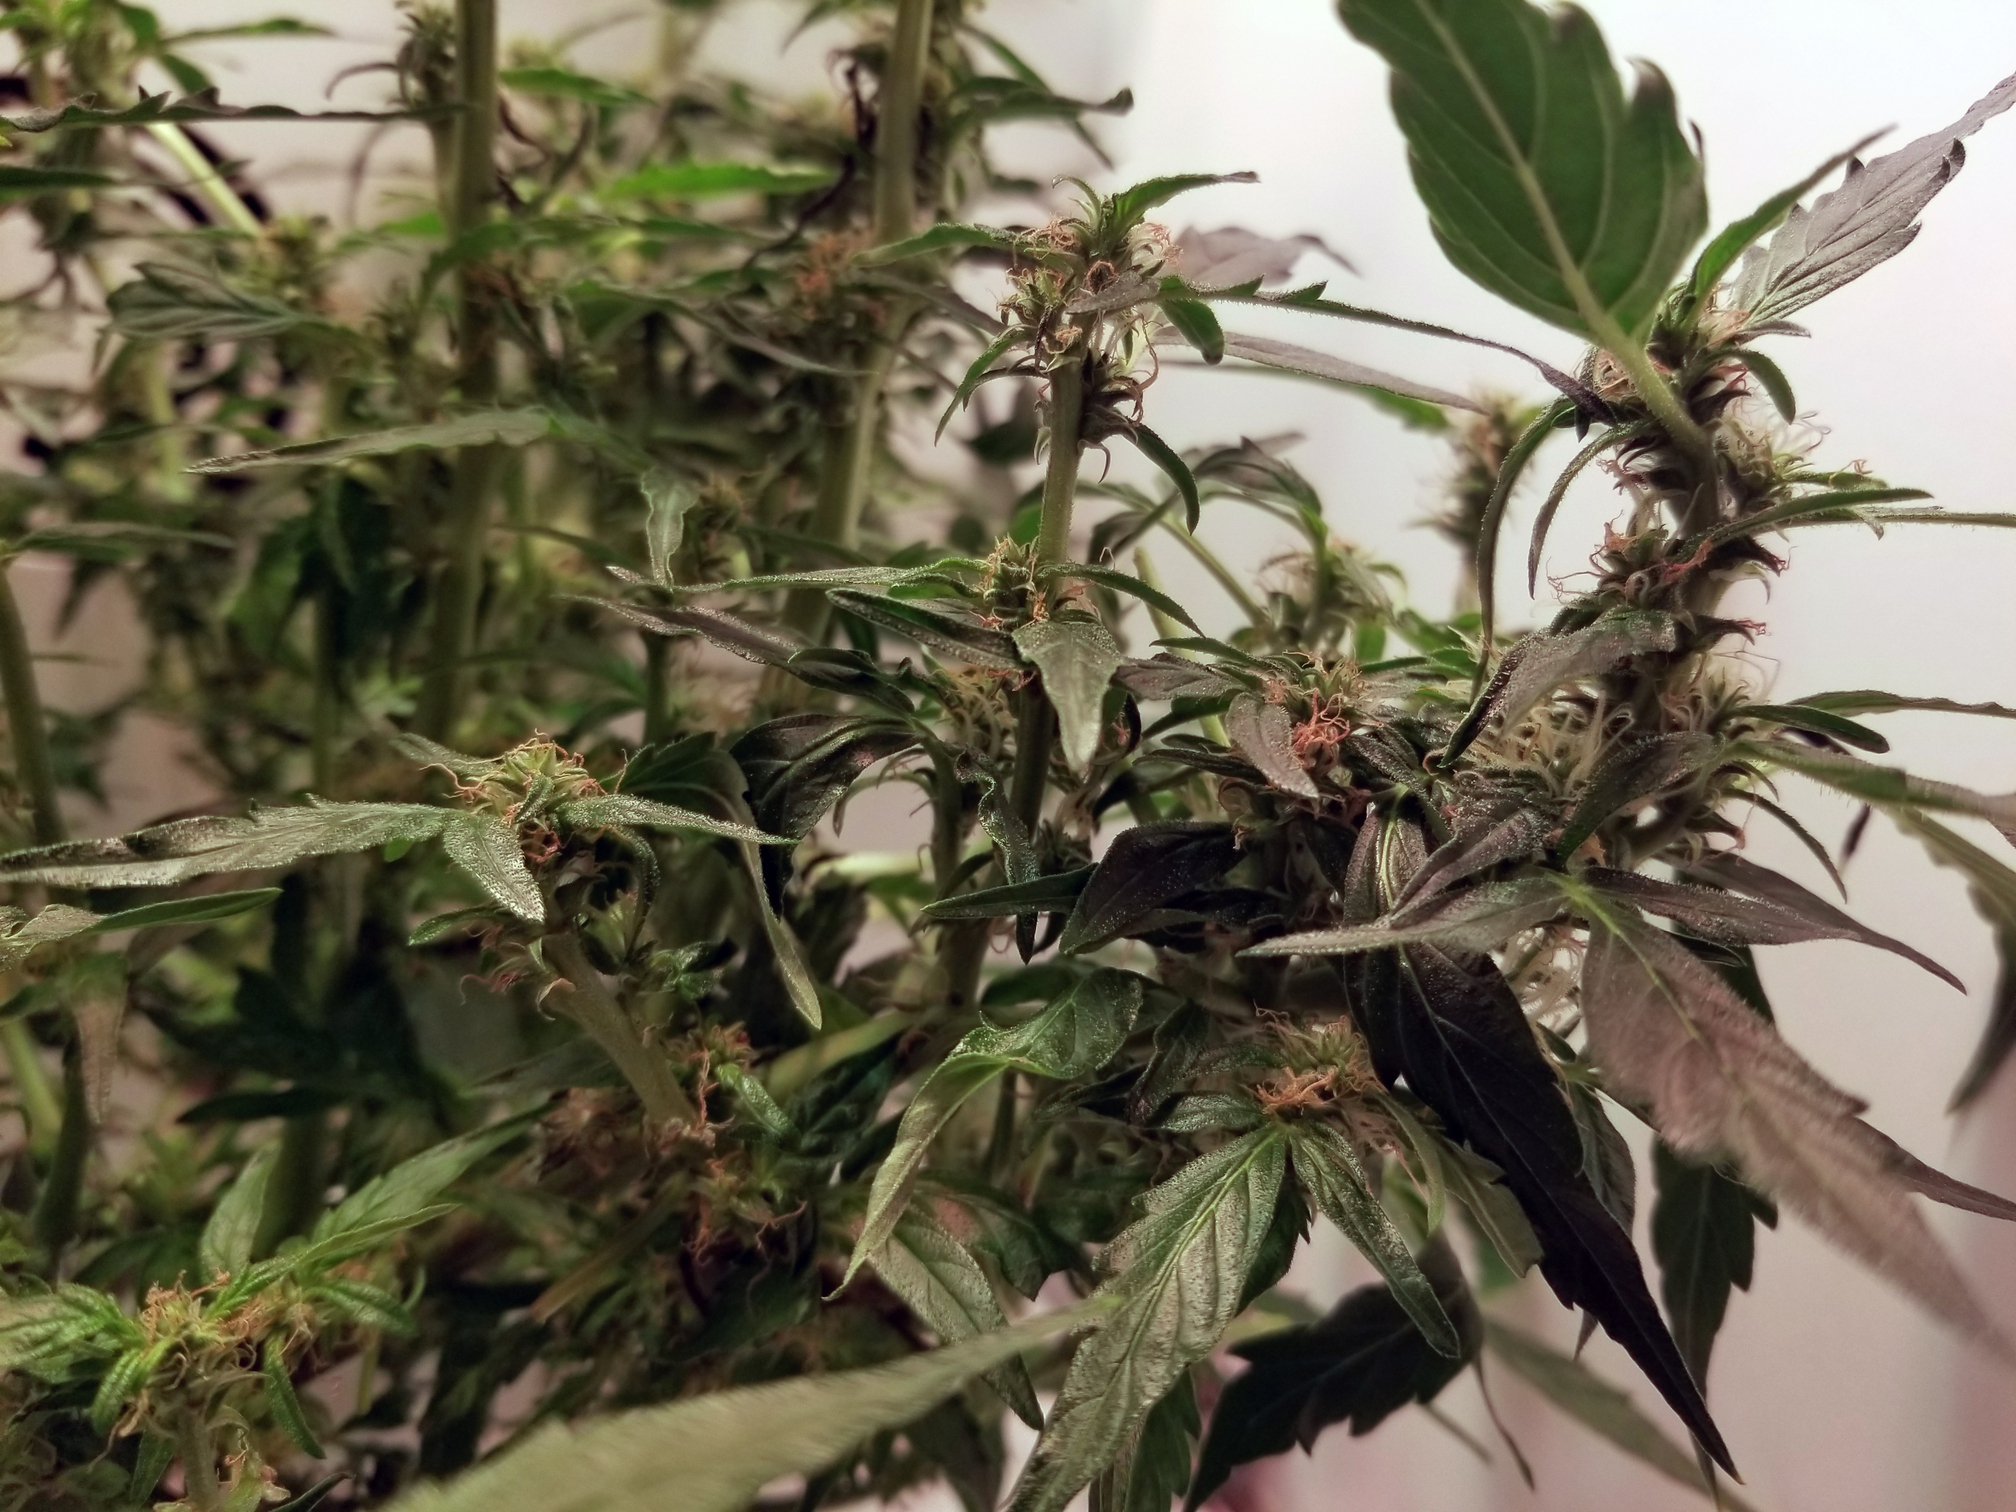
This is nearly 24 hours later, might be too early to tell but she doesn’t seem to be too upset:


5 Likes