
DISCLAIMER: PERFORM THIS MODIFICATION AT YOUR OWN RISK, THIS POST IS FOR INFORMATIONAL PURPOSES ONLY. THIS HAS NOT BEEN REVIEWED AND/OR APPROVED BY GROBO (The manufacturing company) AND I IN NO WAY AM RECOMMENDING THAT ANYONE PERFORM THE MODIFICATION UNLESS YOU ARE PERSONALLY WILLING TO ACCEPT ALL CONSEQUENCES INCLUDING BUT NOT LIMITED TO PERSONAL INJURY, AND/OR PARTIALLY OR COMPLETELY DESTROYING YOUR GROBO. ALSO, IT MOST LIKELY VOIDS THE 1 YEAR FACTORY WARRANTY.
Hello All,
Below are instructions, images, and links for my through reservoir wall water chiller install. It has proven to be extremely effective and is really quite simple to do. I will say it is not for the faint of heart. It requires moderate mechanical know-how and a fair amount of physical strength. READ AND UNDERSTAND THE INSTRUCTIONS IN THEIR ENTIRETY PRIOR TO BEGINNING.
Supplies:
-LED Head Lamp
-Grobo Reservoir removed from Grobo unit (SEE INSTRUCTIONS BEFORE YOU REMOVE YOUR RESERVOIR!)
-Water Chiller (I chose Active Aqua 1/10th hp)
-Water pump (with sufficient flow rate)
-1/2 inch or larger Step Drill Bit (see picture)
-2x Hydrofarm 1/2 inch water tight rubber grommets
-Hydrofarm 1/2 inch black tubing (Comes in 25 ft. length, should be more than enough for any set up.)
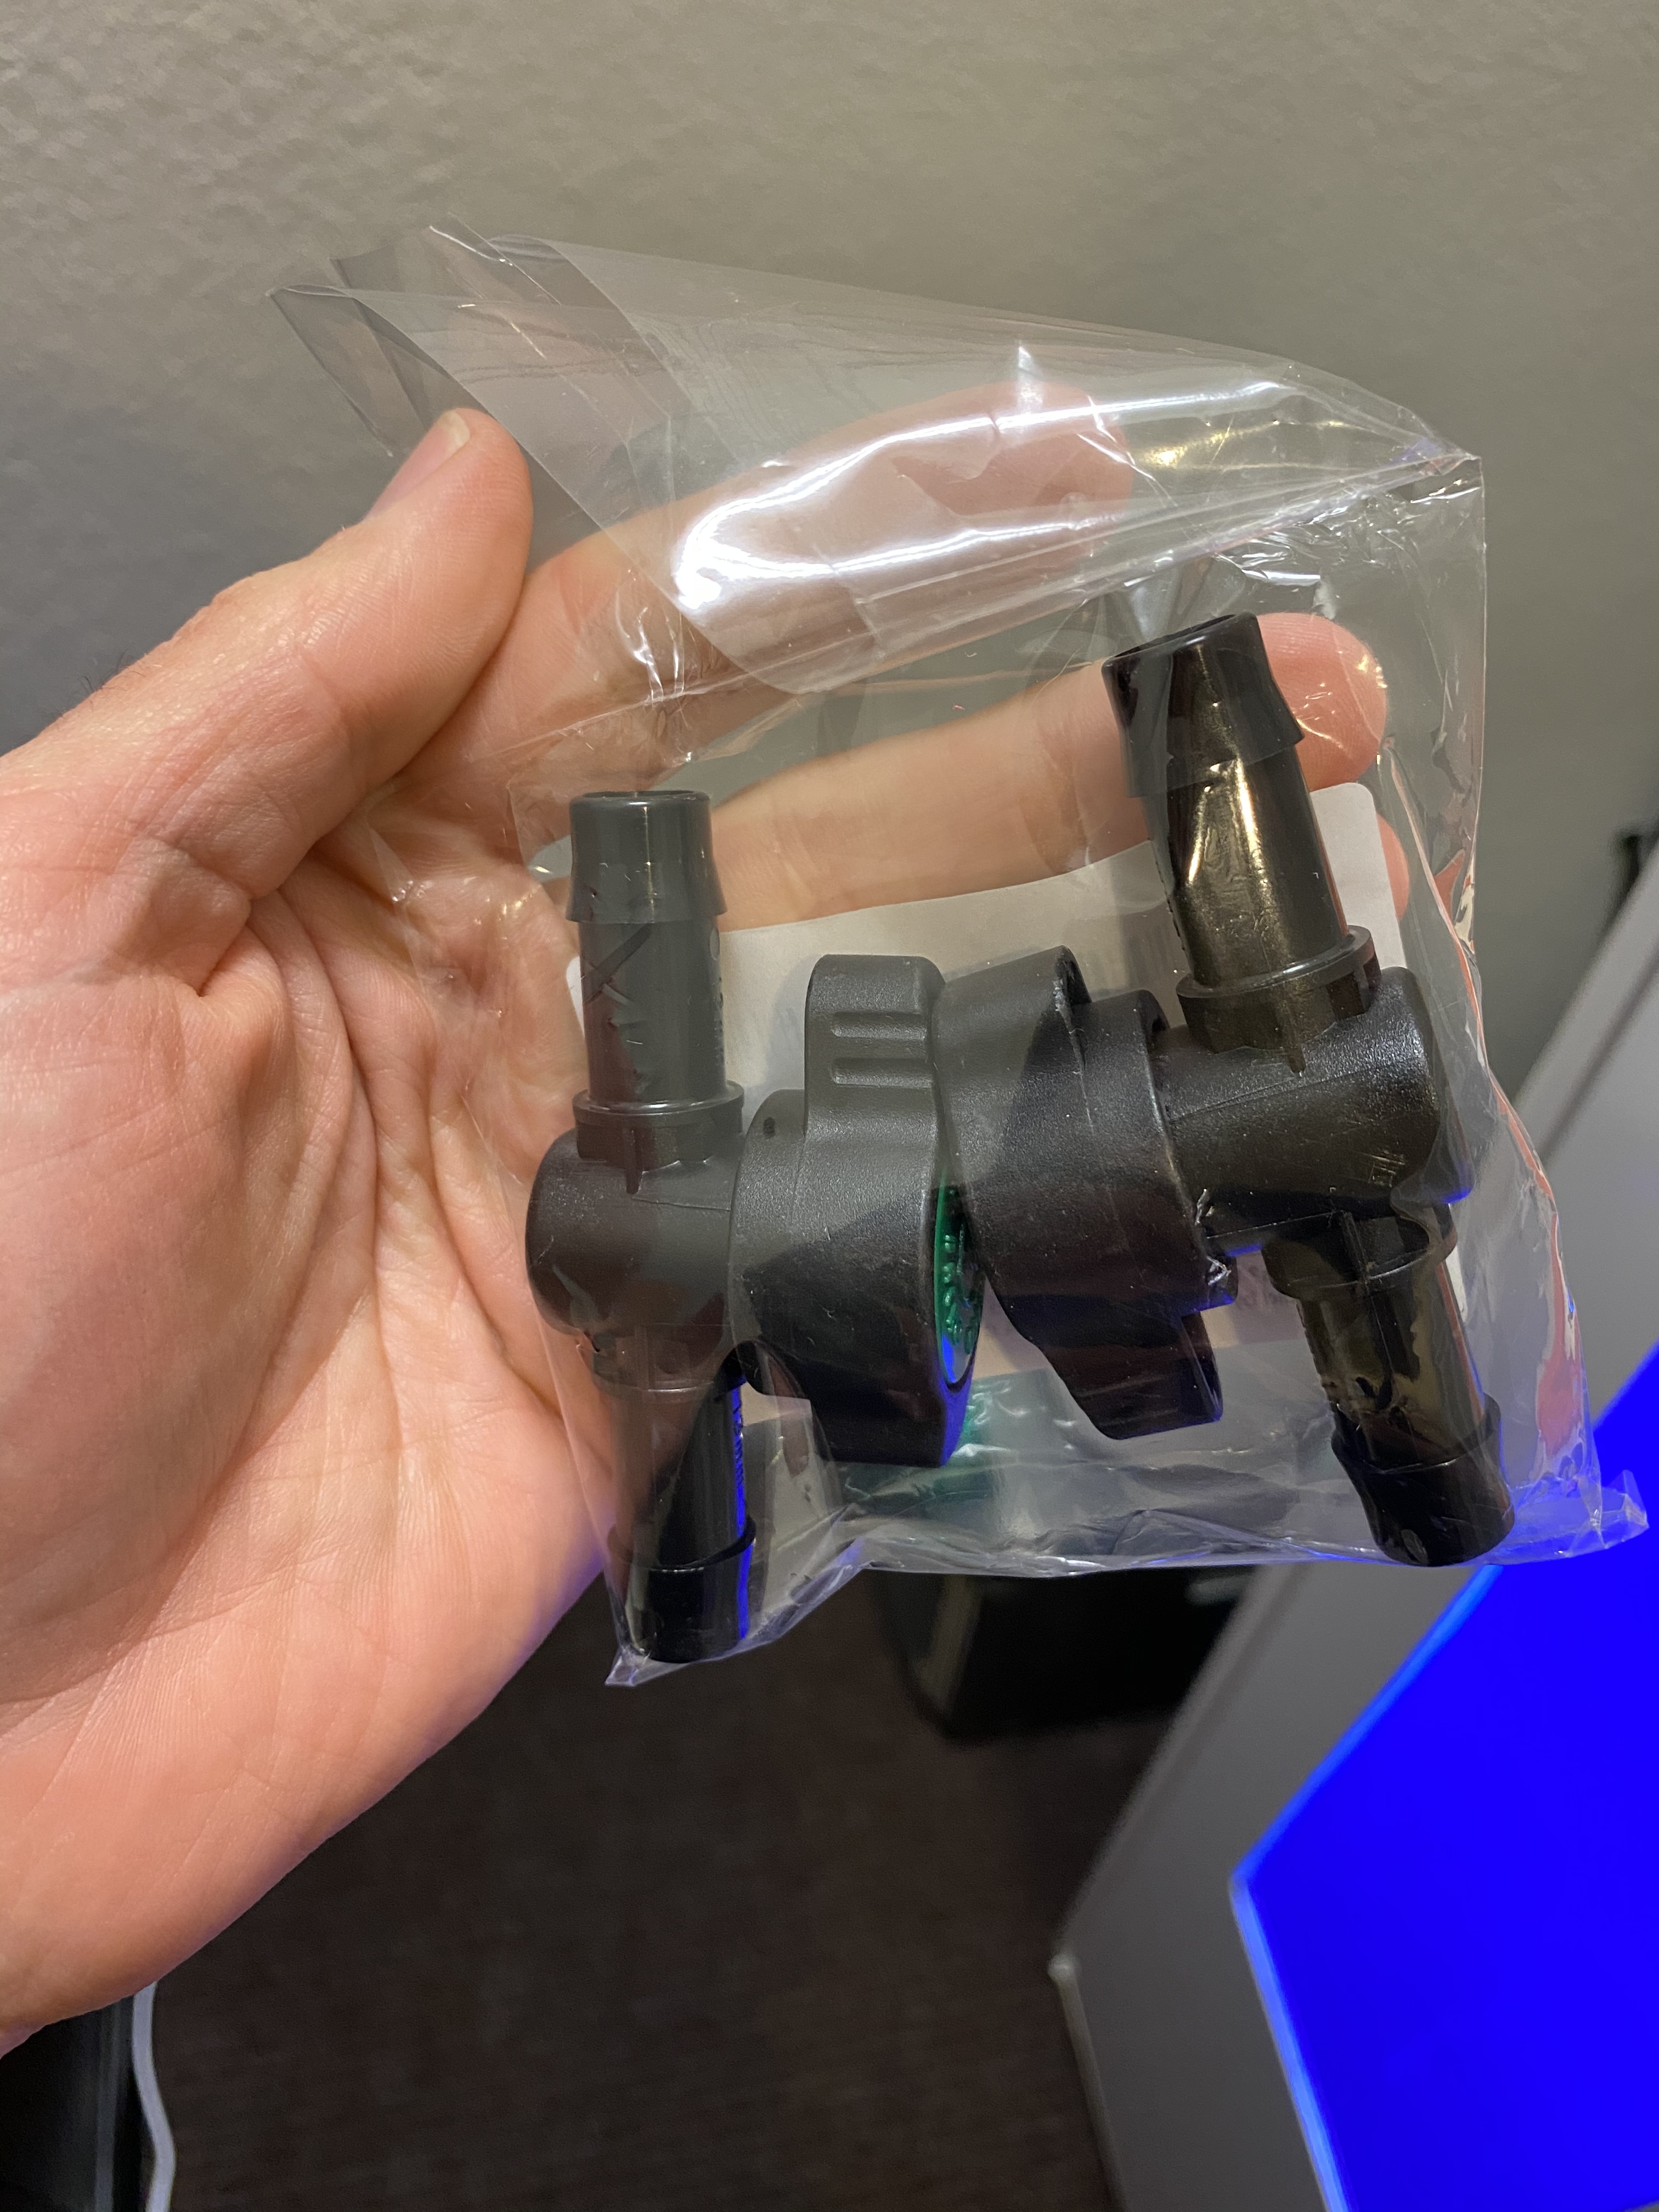
-3x in-line on/off valves
-Hydrofarm 1/2 inch elbow fitting
-Outflow root guard
-14x Hand tightening hose clamps
-1/2 inch barbed “T” adapter
-Funnel with spout that fits in 1/2 inch tube
-4 inch zip ties
Instructions:
-
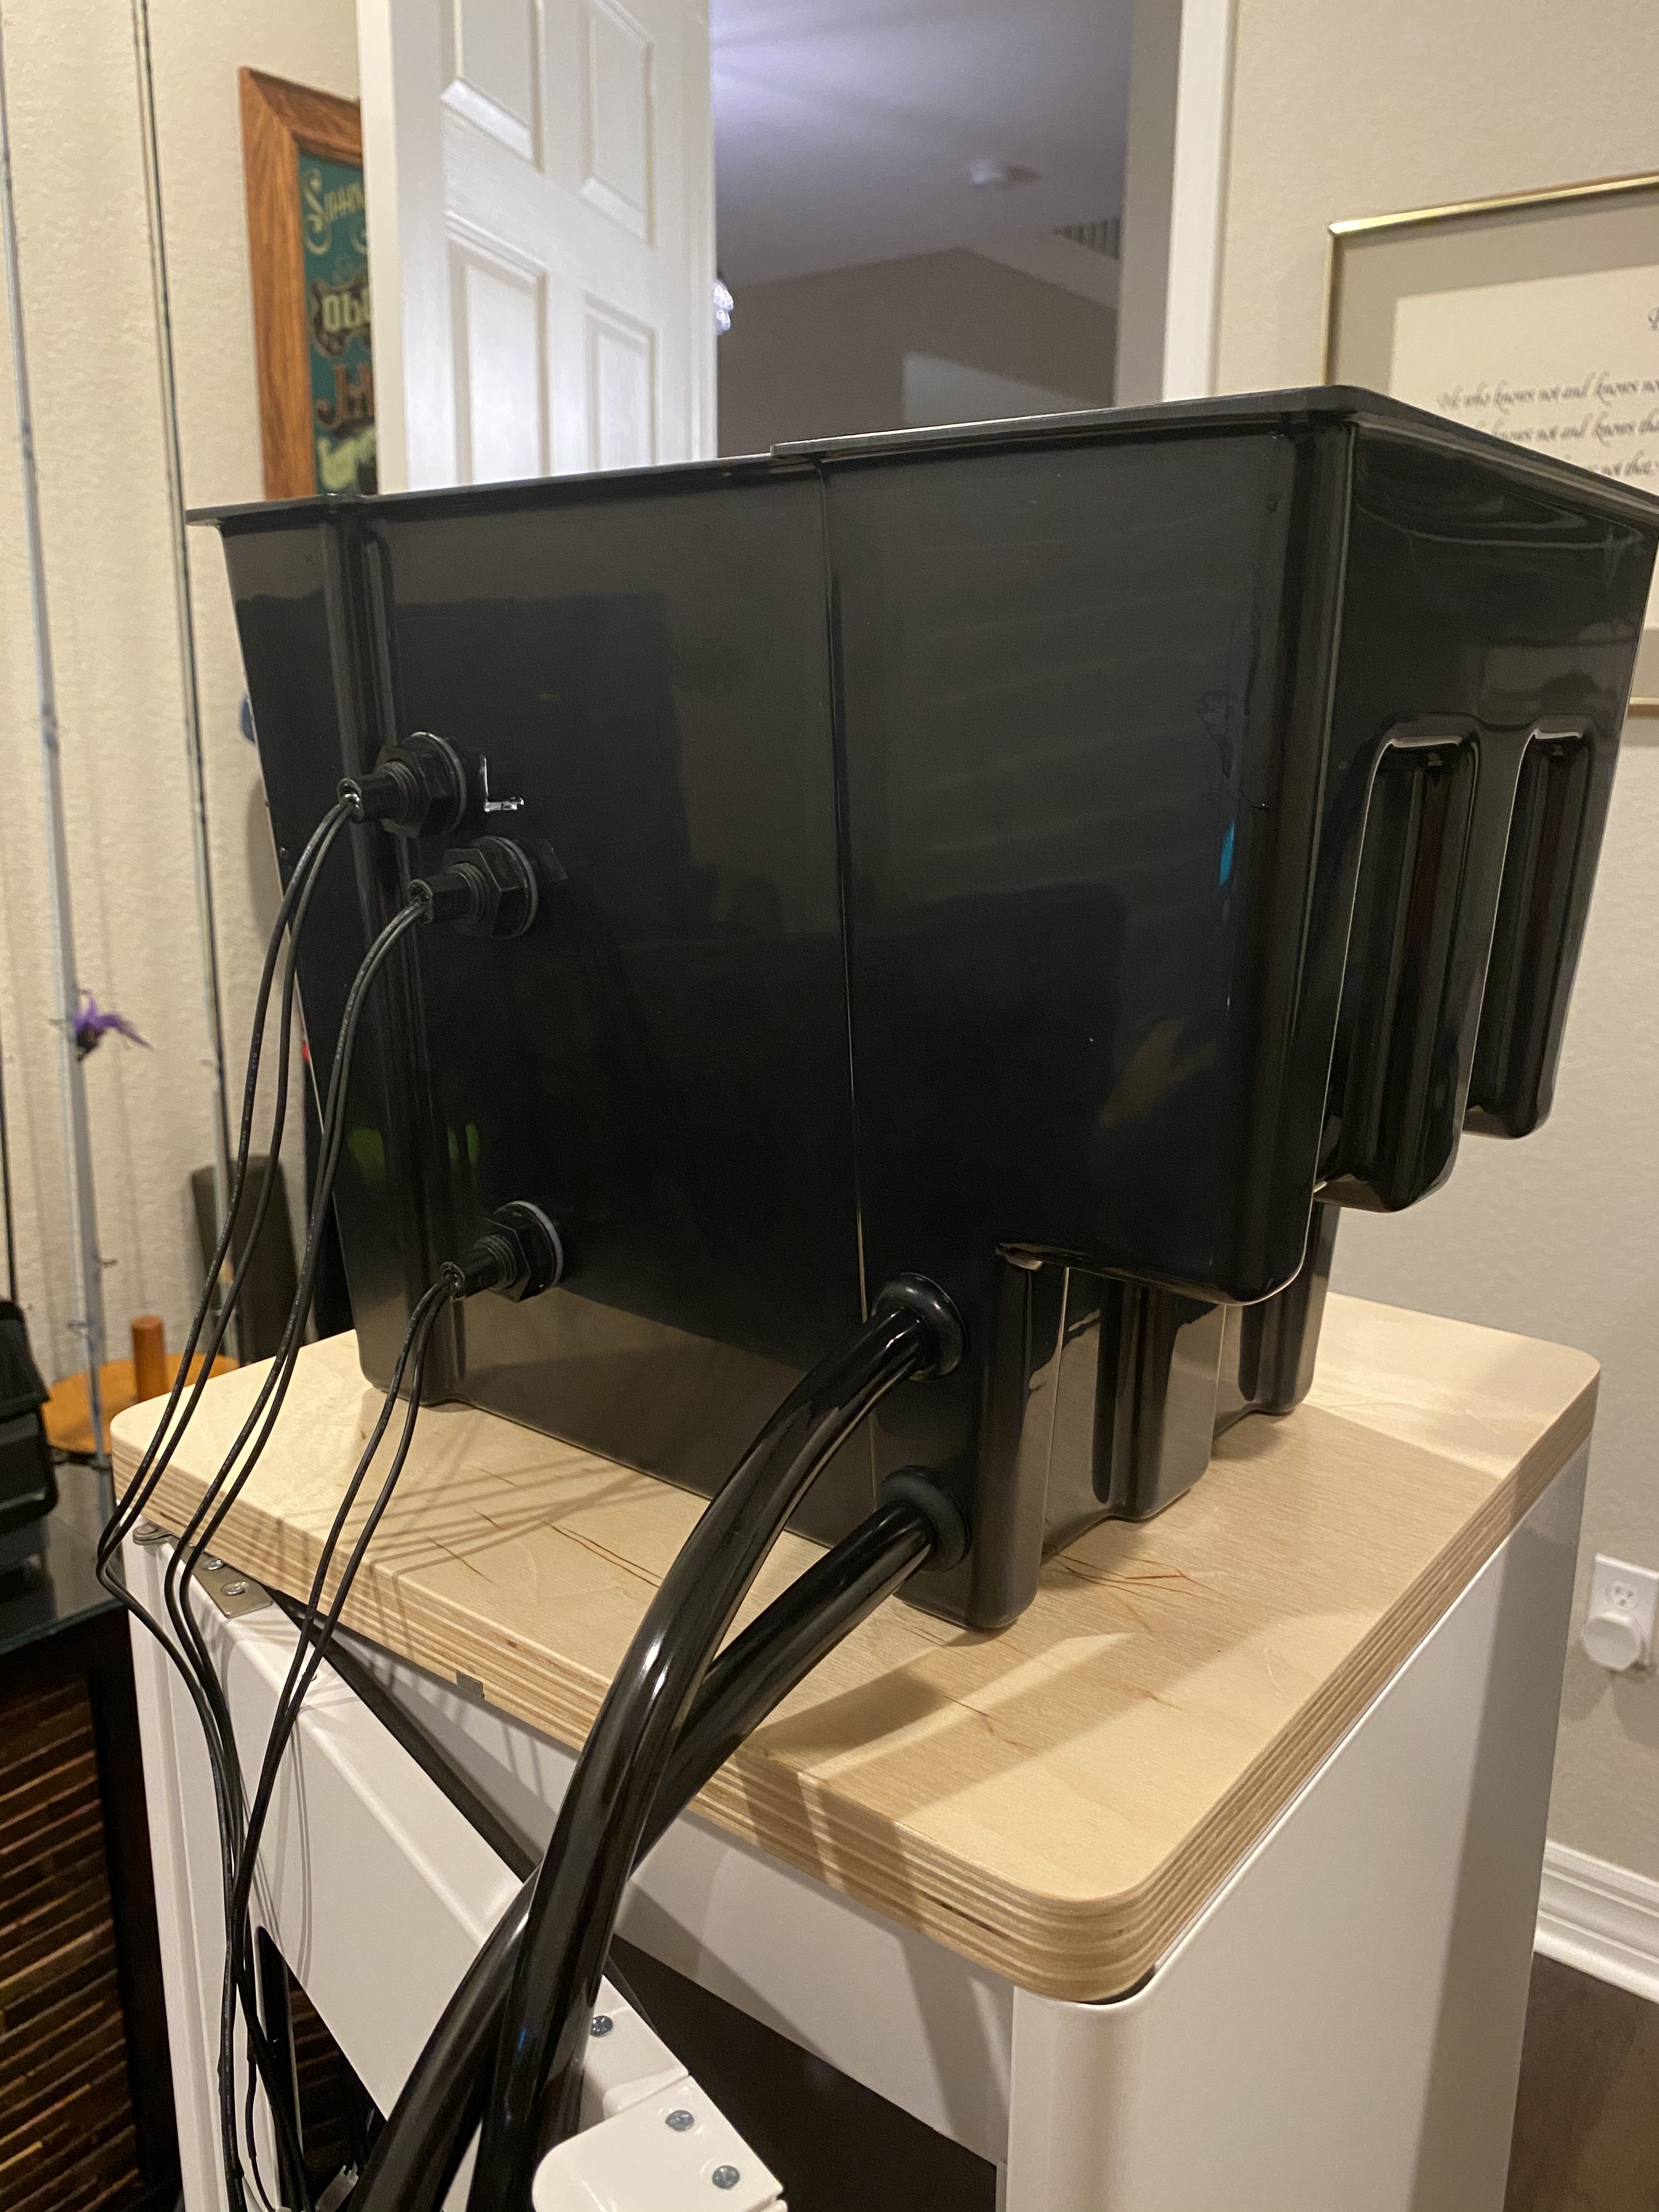
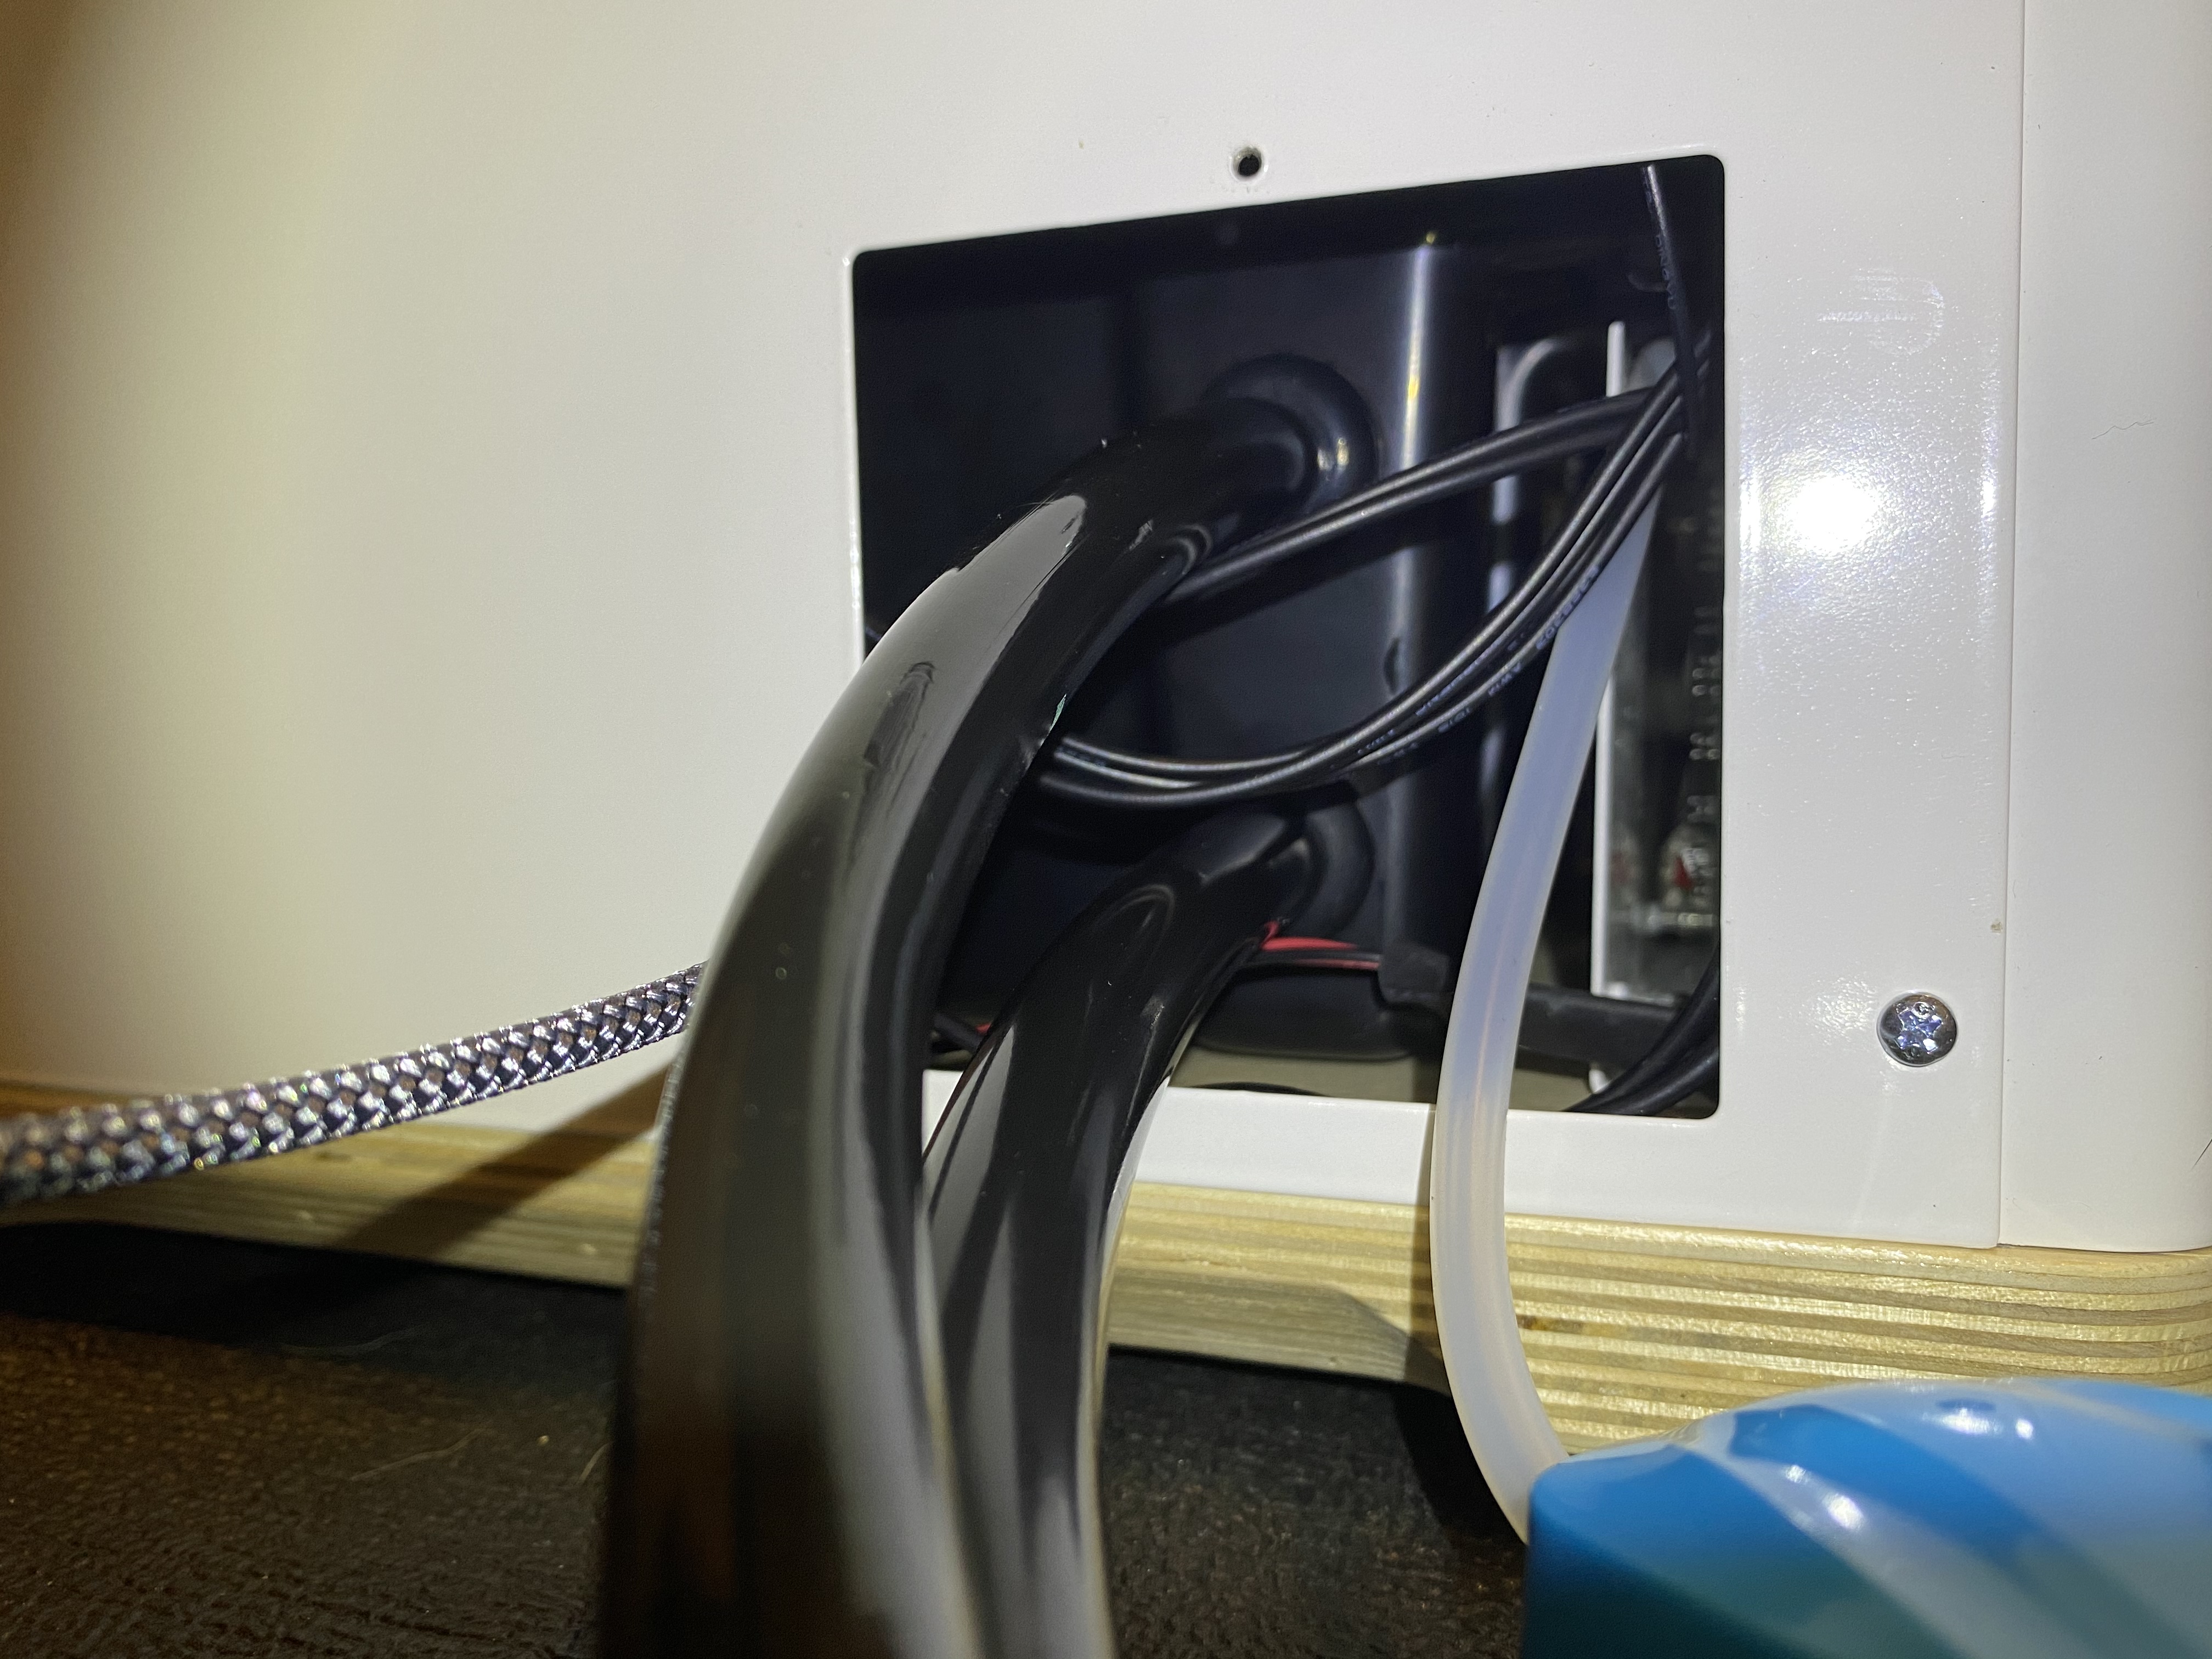
Remove the port cover on the lower rear of Grobo using the thumb screw. This will not be going back on your unit. Using a metallic marker inserted into your 1/2 inch tube measure out 2 places where you will cut through the reservoir wall vertically one on top of the other on the portion of the wall that protrudes closer to the back of your unit. (See picture below for placement example). I inserted the marker into the tube to give me a better idea of where tubes would be entering/exiting the port on the rear of the Grobo.
-
Remove Grobo drain/fill lines (cut zip tie, you can replace afterwards) and nutrient tubes from holder inside reservoir and place your EC and PH meters out of the way. Next with your headlamp turned on, VERY CAREFULLY lift the reservoir, there are three wires that connect the water fill float switches to the Grobo mother board that will need to be unplugged. I found it easier to reach in and disconnect the wires from the mother board instead of disassembling and reassembling the switches. Take note of which outlets the plugs correspond with (Low level plugs in closest to the front, mid-level plugs in middle, high level plugs into furthest rear) mine were marked with permanent marker from the factory “L, M, H”.
-
Once the switches are disconnected from the mother board lift the reservoir and tilt it so that the top (open portion) of the reservoir faces the back wall of the Grobo and the bottom of the reservoir faces out.
-
Twist the reservoir turning it vertically so that it will fit through the Grobo’s door way. This does take some force, take care not to break your reservoir. When I removed mine it did not crack nor did it leave any permanent marks on the walls. Once you have the reservoir removed place it on a solid work space
-
Using your 3/4 inch or larger stepped drill bit (see picture below). Cut two 3/4 inch holes in the places that you measured and marked. Once cut, clean off/deburr the holes with a razor blade if necessary.
-
Insert grommets into wholes angled side first. This takes some muscle from the outside and finagling from the inside.
-
Cut tube in half so that you create two 12.5 foot pieces. Insert your 1/2 inch tubes through the grommets into the reservoir. I used water as a lubricant for this step. It took a lot of muscle, and I found that if you pinch fold the wall of one side of the tube it fits through much easier and it straightens out as you pull it though.the bottom will be intake tube going to the port on the side of your water pump, the top will be the return coming from your water chiller and into your reservoir. Pull the bottom tube in about an inch, pull the top tube in about 3.5 inches.
-
Reinstall your reservoir. Pull the tubes through the port hole on the lower rear of the Grobo and insert the reservoir with the top (open portion) facing the back wall of the Grobo, and twist it horizontally (again this will be a bit tough but it did not leave any marks on the walls of my unit nor did it crack my reservoir, take special care to do the same). Once reservoir is horizontal tilt the top up so that it is ready to fall into place properly. Continue feeding the tubes all through the port and lower reservoir to the point that you can just fit your arm in underneath it. Using your headlamp once again, run the float switch wires in-between the two tubes and plug them into the appropriate outlets. Once complete feed tubes all the way through simultaneously setting your reservoir into place. (This step was a bit frustrating and takes some finesse). Once in place reinstall your drain fill lines (secure with 4 inch zip tie) and nutrient tubes.
-
On the inside of your reservoir install the root guard on your intake (bottom) tube and install the 1/2 inch elbow fitting in the top tube, aiming it toward the opposite side of the reservoir (this helps to better circulate the water in your reservoir and allows it to cool evenly). On the outside rear of your Grobo cut the tubes about 6 inches out and insert two of your on/off valves. Then connect the remaining tubes to the opposite ends. Secure all of these with tube clamps.
-
Move your Grobo back into place (where it will stay during your grow.
-
Remove the guard from the side of your water pump exposing the intake port. Place your water cooler and water pump in position where they will stay during your grow.
-
Once positioned, cut intake tube to the appropriate length and plug it into the port on the side of your water tube securing it with a hose clamp. Run return tube to water chiller return port cut it to the appropriate length and attach it with a hose clamp. Next measure the distance between the top port on your water pump and the height of the intake port on the water chiller and cut a piece of tube the same length then plug the tube into the top of the water pump. Turn your “T” adapter on its side so that the long portion is vertical the short portion is facing the intake port on your water and plug bottom outlet into tube coming from the top of your water pump. Next cut a 1 foot portion of tube and a 3 foot portion of tube. Plug the 1 foot portion into top outlet of the “T” adapter, then insert your last on/off valve and then attach the 3 foot portion on top of it using tube clamps to secure. Insert funnel at top of 3 foot tube (this is used for priming the water pump when necessary. Last, measure the distance from the intake port on the water cooler to the side port of the “T” adapter, cut a piece of tubing in the appropriate length and attach one end to the “T” side port and the other to the water chiller intake valve securing with tube clamps.
Next I will explain the initial filling process step by step. (You will repeat this every time you
First fill:
With the 2 on/off valves set to open setting at the rear of the Grobo and the on/off valve on the “T” adapter leading to the funnel set to the closed position, run the Grobo’s fill operation. Once full, open the on/off valve above the “T” adapter and pour in about a cup and a half of water into the the funnel at the top, then close the valve. Next plug in your pump and ensure that water is circulating by feeling both the intake and the return inside the reservoir with your hand. Once circulation is confirmed go ahead and plug in your chiller and set it to your desired temperature.
See images of my process and the items I used below:


Product Links:
2-Pack in-Line Barbed Ball Valve 13mm for 1/2 Inch Tubing .520 ID - Regulate and Shut-Off/On Water Flow Habitech 2-Pack In-Line Barbed Ball Valve 13mm For 1/2 Inch Tubing .520 ID - Regulate and Shut-Off/On Water Flow: Amazon.com: Industrial & Scientific
Hydrofarm AAEL50 Active Aqua (10 Pack), 1/2" Elbow Connector, 1/2-Inch, Black Amazon.com : Hydrofarm AAEL50 Active Aqua (10 Pack), 1/2" Elbow Connector, 1/2-Inch, Black : Patio Lawn Garden : Garden & Outdoor
Use the guard piece of this kit only:
Lifegard Aquatics 1/2-Inch… Amazon.com : Lifegard Aquatics 1/2-Inch Bulkhead Fitting Kit : Compression Bulkhead Fittings : Pet Supplies
Hydrofarm HGGR50 (25 Pack), 1/2"… Amazon.com: Hydrofarm HGGR50 (25 Pack), 1/2" Rubber Grommet, Black: Garden & Outdoor
Cable Zip Ties Nylon Self Locking… https://www.amazon.com/dp/B07VRSQ6YL?ref=ppx_pop_mob_ap_share
Valterra RF843 1/2" Barbed Tee… Amazon.com: Valterra RF843 1/2" Barbed Tee Adapter: Automotive
Active Aqua AACH10HP Water… Amazon.com: Active Aqua AACH10HP Water Chiller Cooling System, 1/10 HP, Rated per hour: 1,020 BTU, User-Friendly,Black: Home Improvement
YDS Butterfly Stainless Steel W2… Amazon.com: YDS Butterfly Stainless Steel W2 Hose Clamp, Turn Key, 12-20 mm (1/2" to 3/4") Diameter Ranger, 9 mm Bandwidth (Pack of 10): Home Improvement
EcoPlus 290 GPH (1098 LPH, 17W)… https://www.amazon.com/dp/B0012UZYMG?ref=ppx_pop_mob_ap_share
Hydrofarm HGTB50GF 1/2-Inch… Amazon.com : Hydrofarm HGTB50GF 1/2-Inch Black, 25 Foot Roll Tubing, feet : Pond Filtration Tubing : Garden & Outdoor
This concludes the installation. Congrats!
 my ultimate Grobo setup continues to evolve. This has become my main hobby
  .
.


 . I can’t afford an AC bill to keep the house at 70F. I’ll just have to hang the tubes for now but once this grow is over, the permanent fittings will go in.