Water Level Sensor Shield and Drying Rack (Prototypes)

Update: Pictures of the Water Shield inside the reservoir.

@OGJ the water shield worked perfectly this morning! Definitely think working on the overall size can be improved, but this thing is a must moving forward.

@Chris I haven’t forgotten about you, I’ve just been busy! Expect to see something from me by Monday!

6 Likes

@Rich I’ll keep my eyes peeled :slight_smile:

I notice the right side isn’t over the water tanks. Is this because of the thickness you mentioned? We’re reduced the thickness of material to 1/16". We’re still going to maintain the clear material for sensor visibility but I’m really glad that they are working.

3 Likes

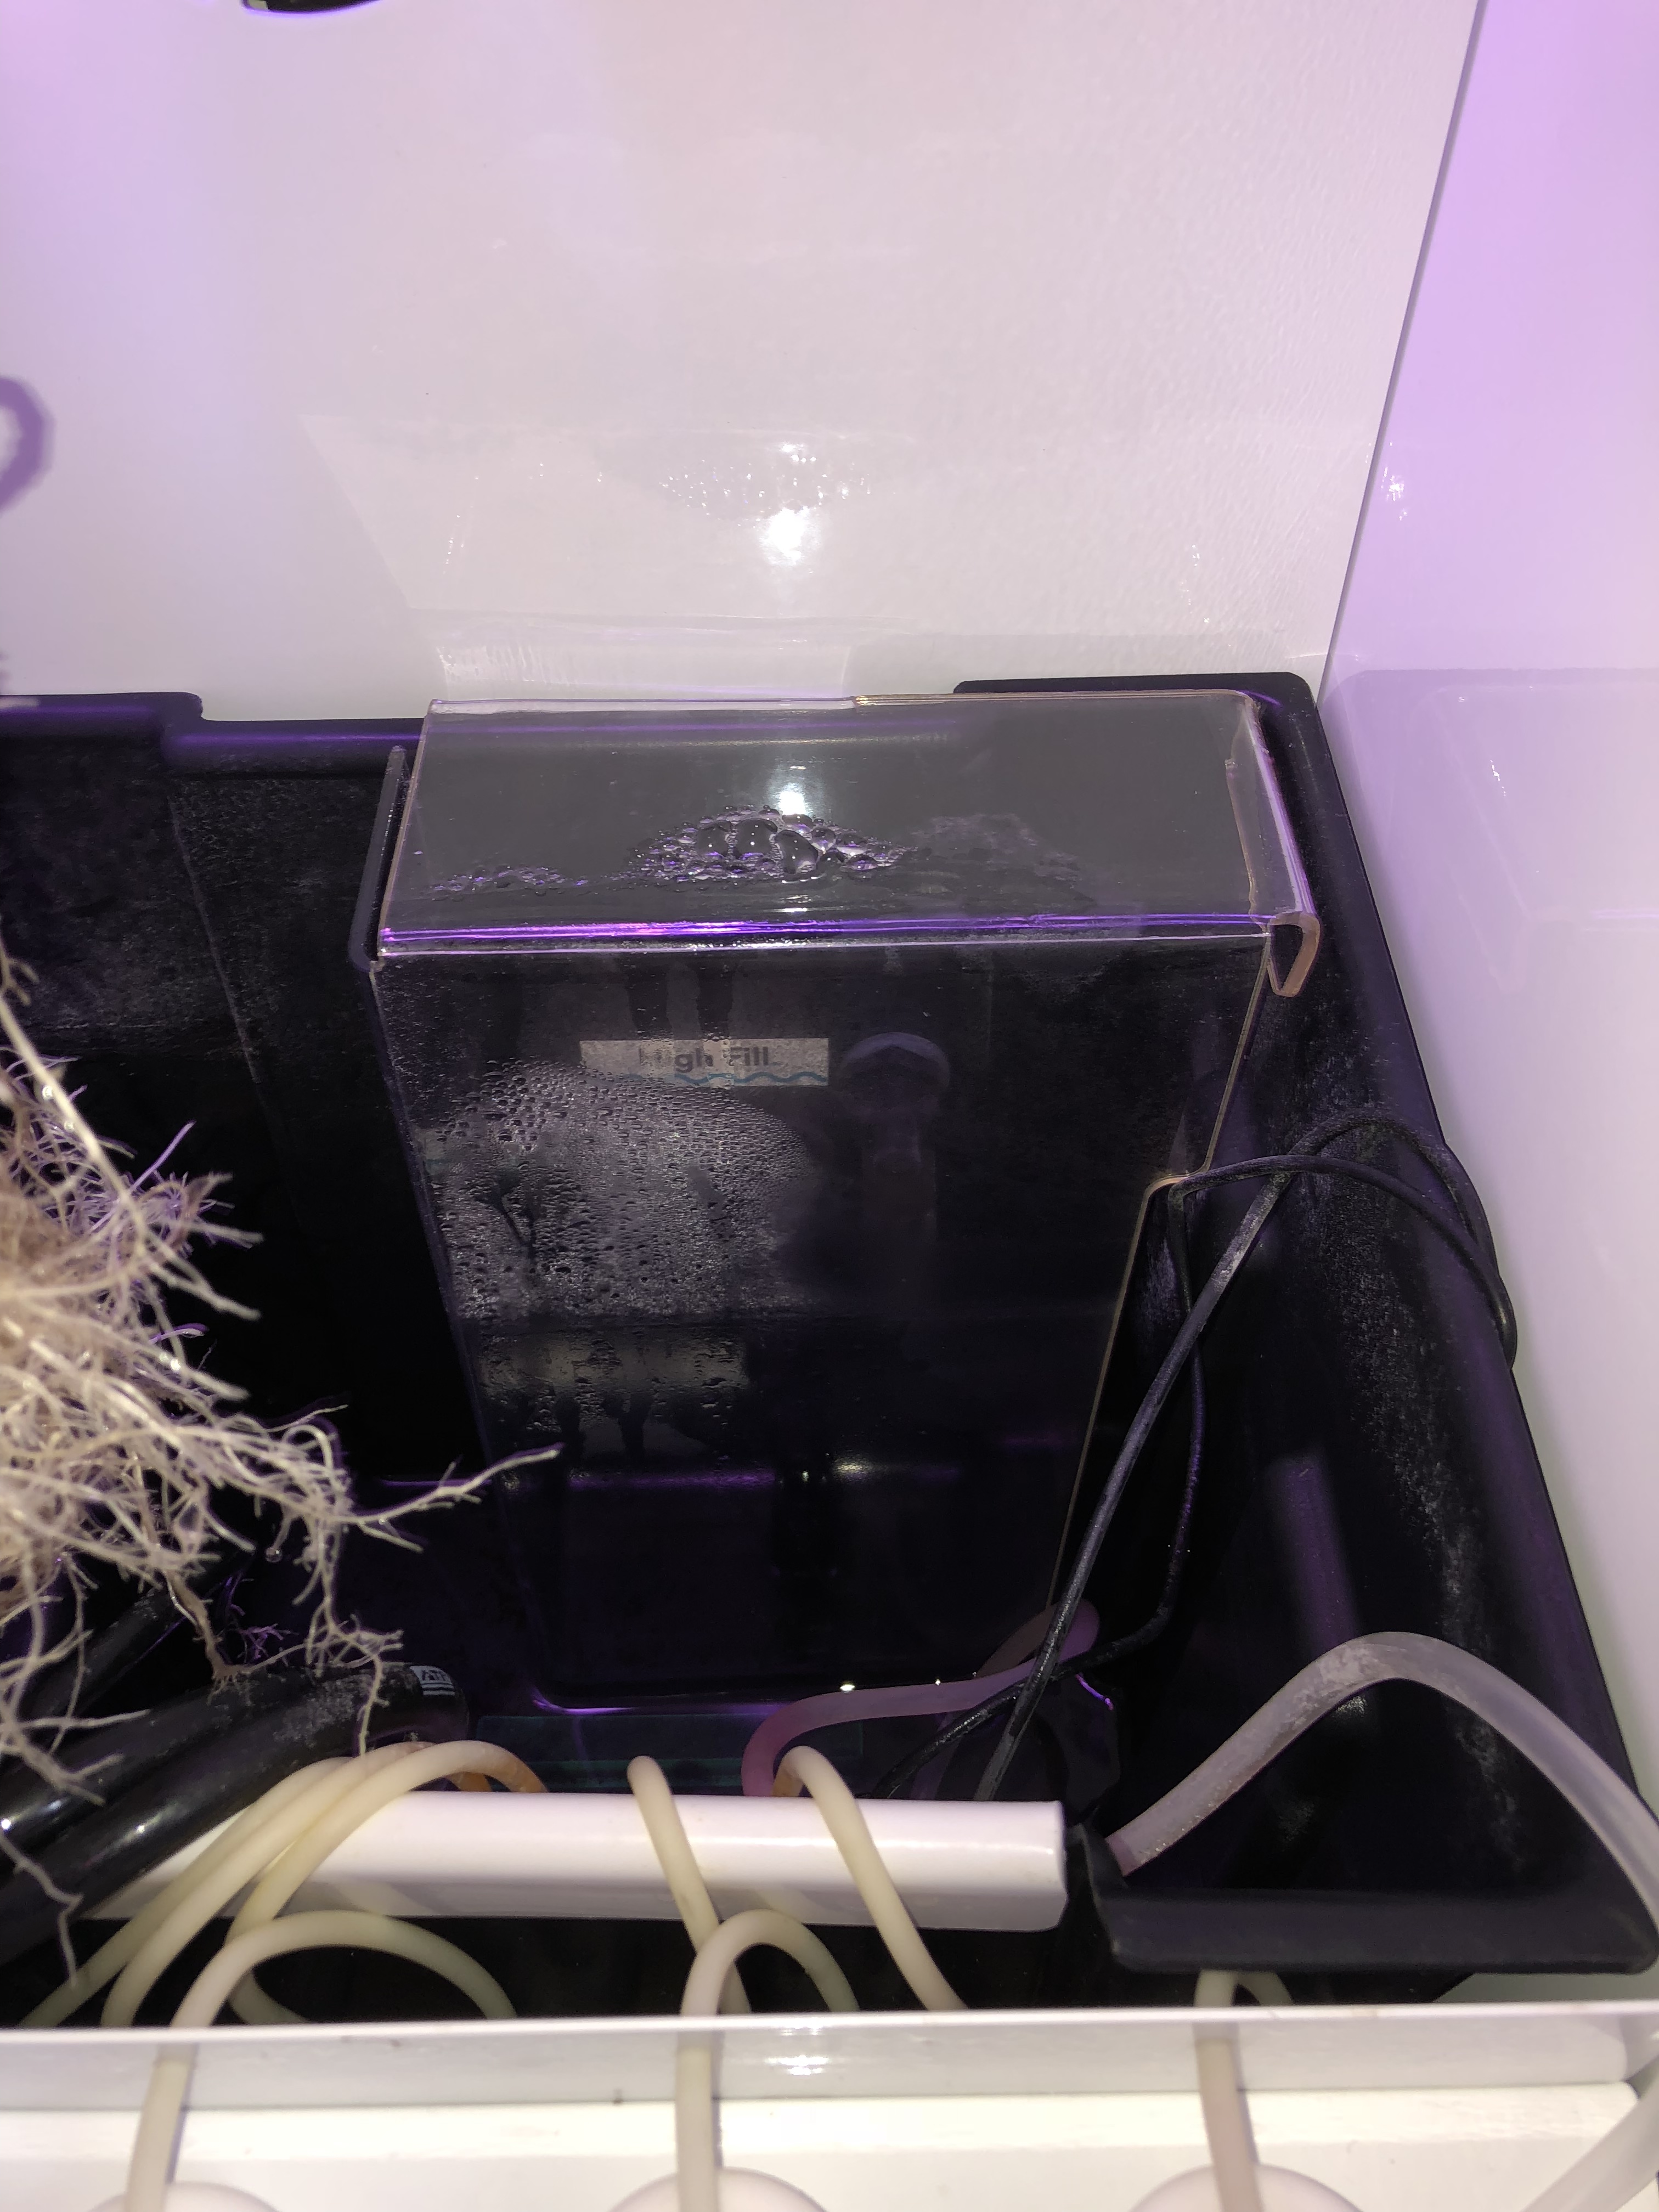
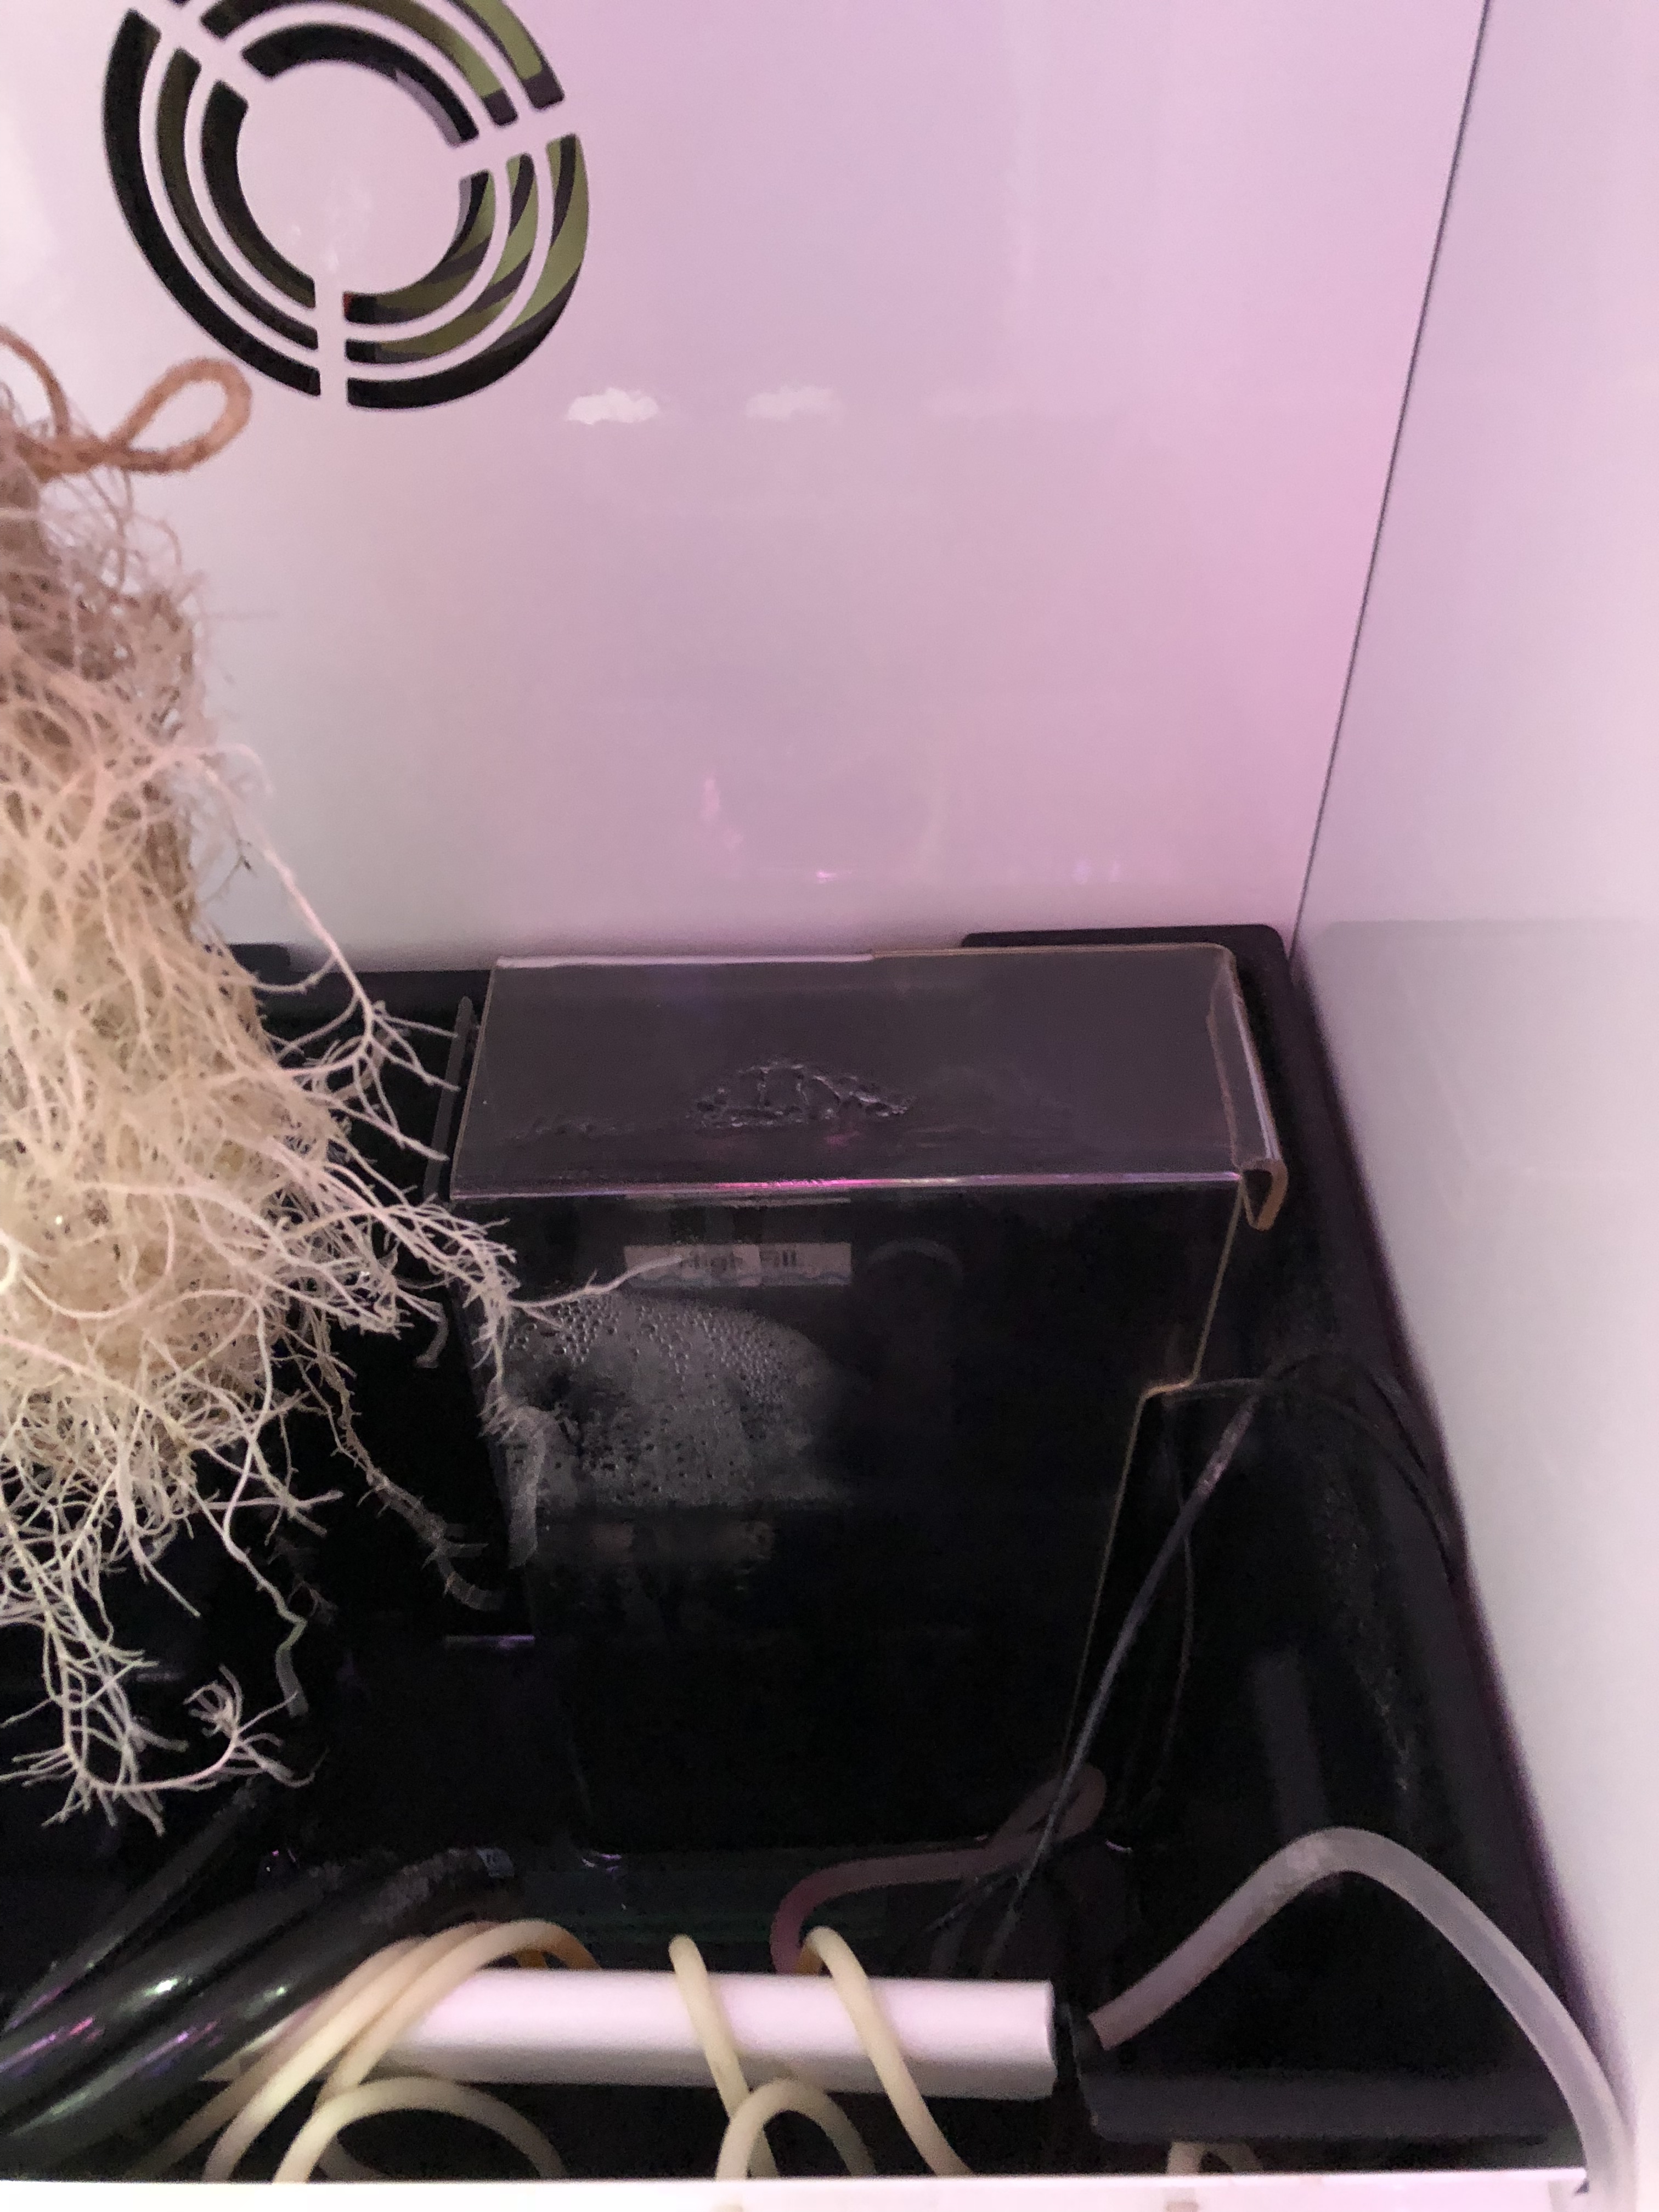
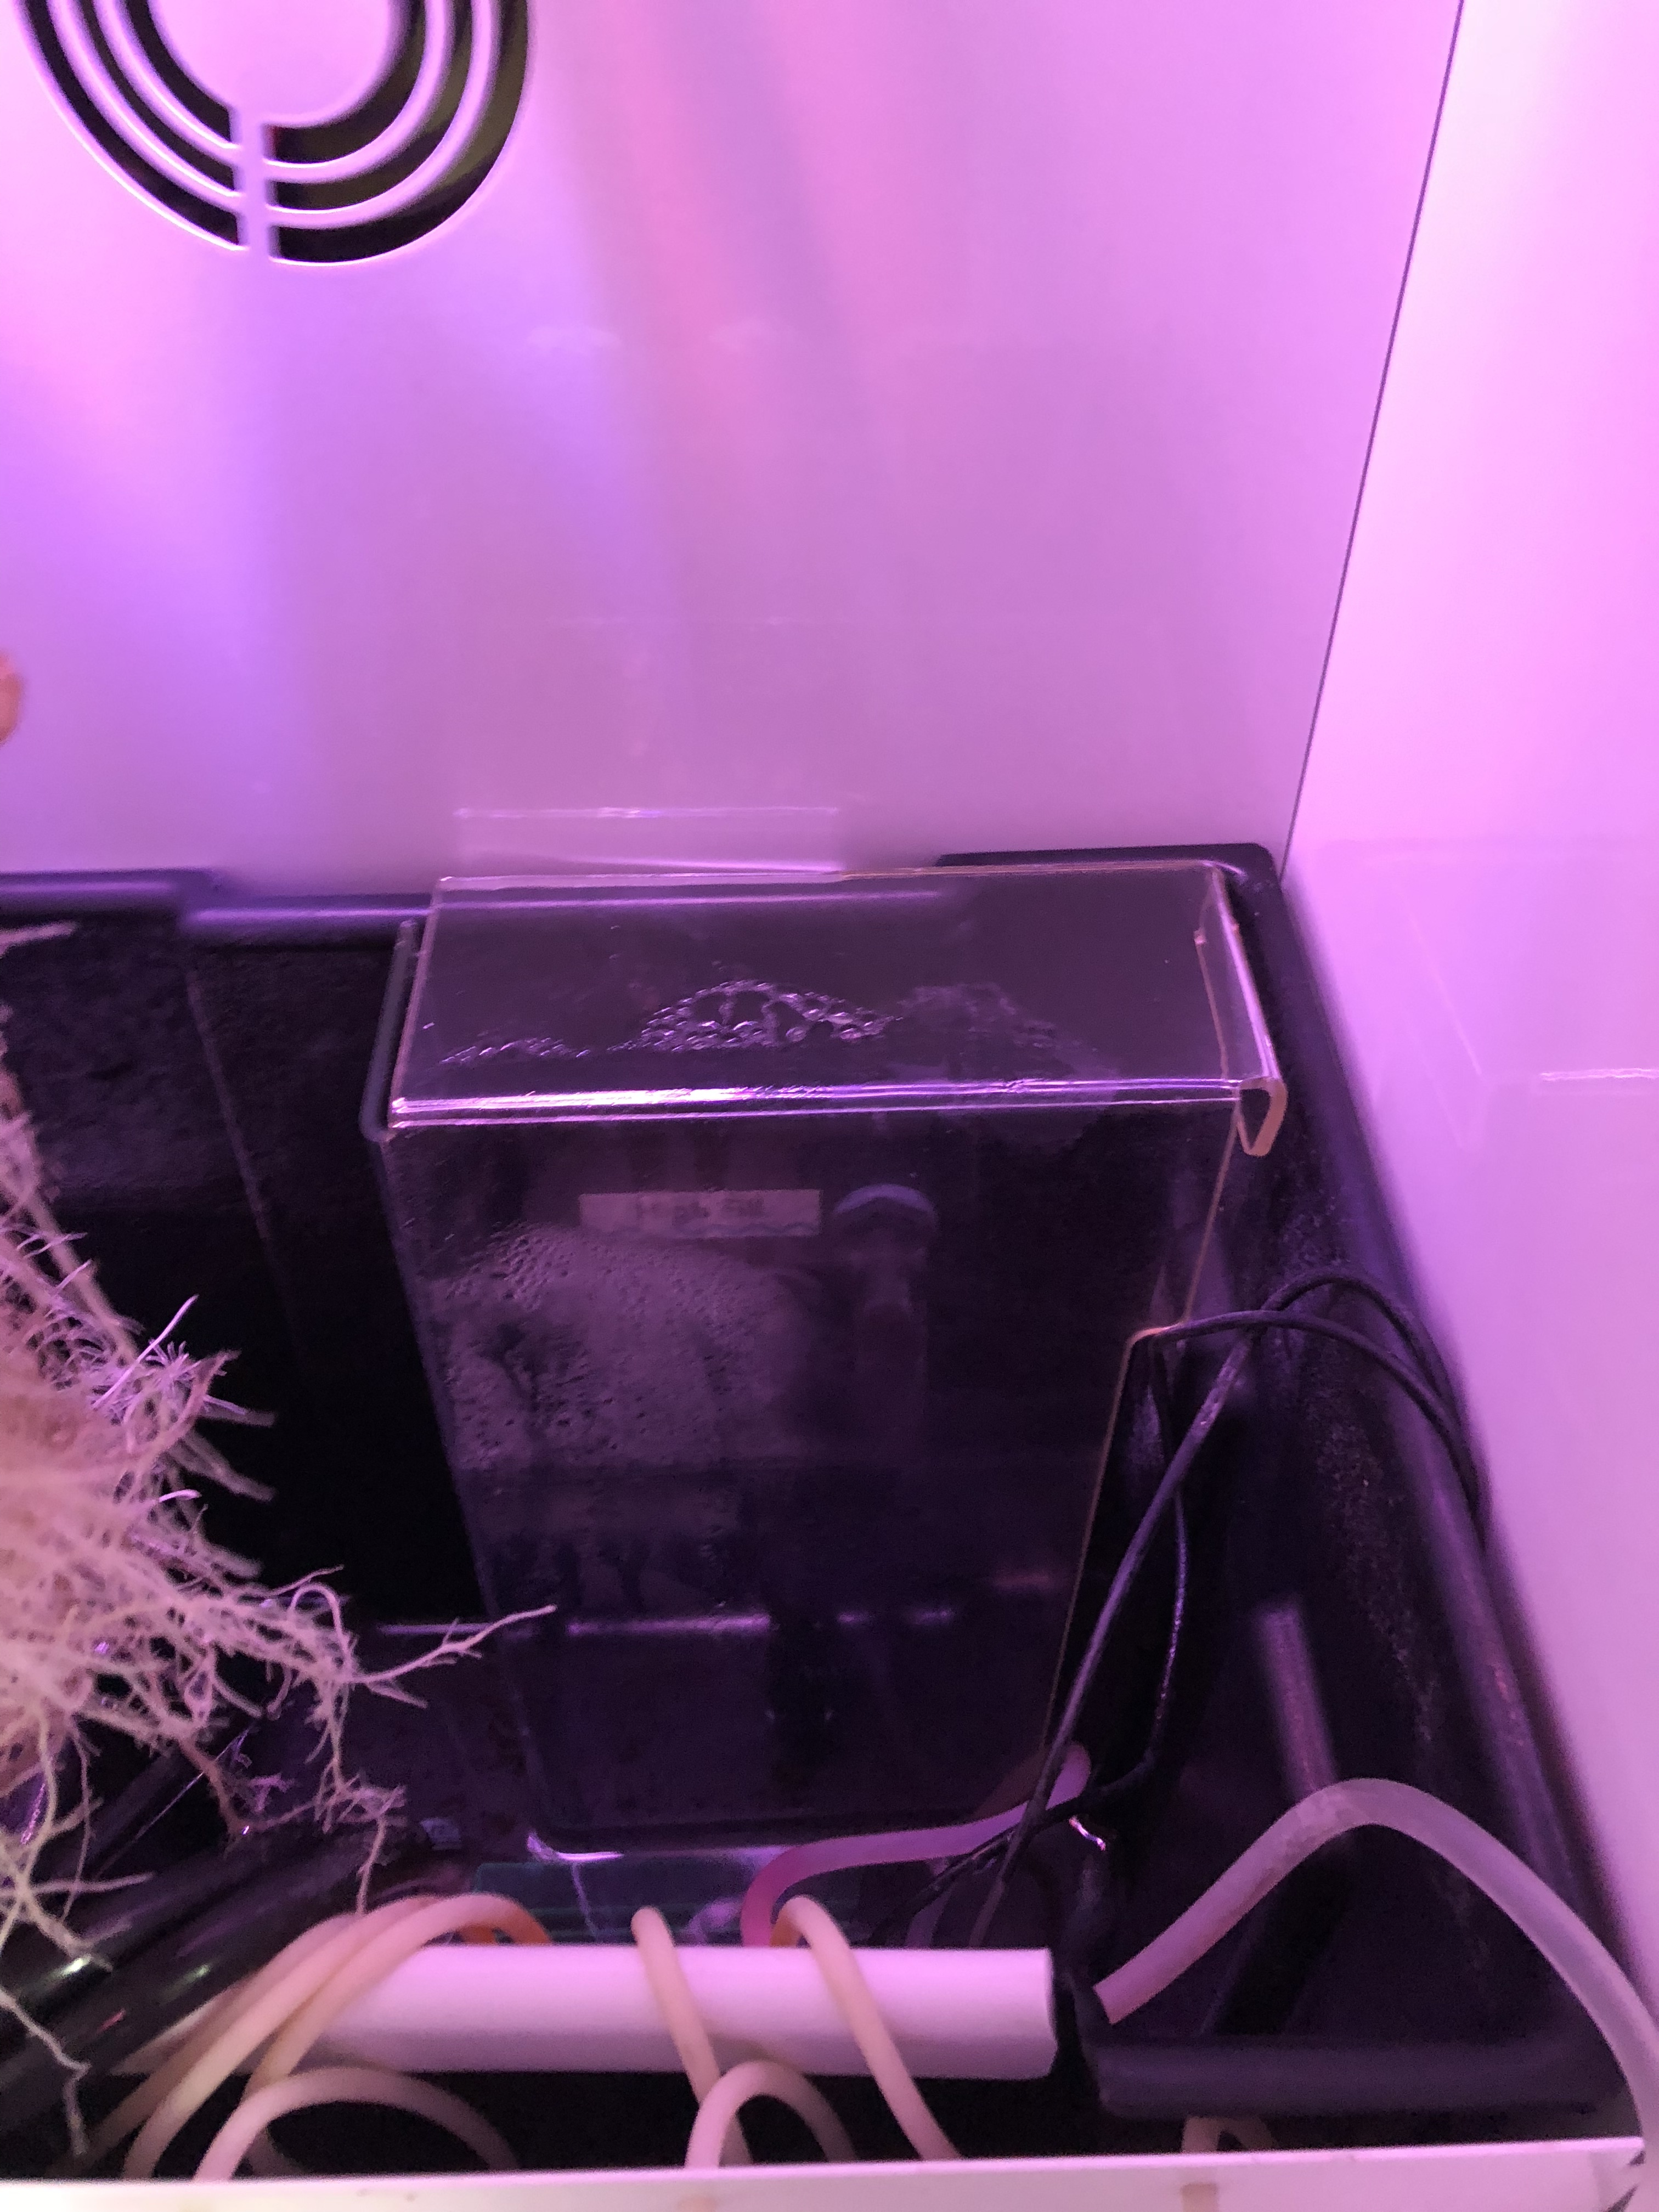
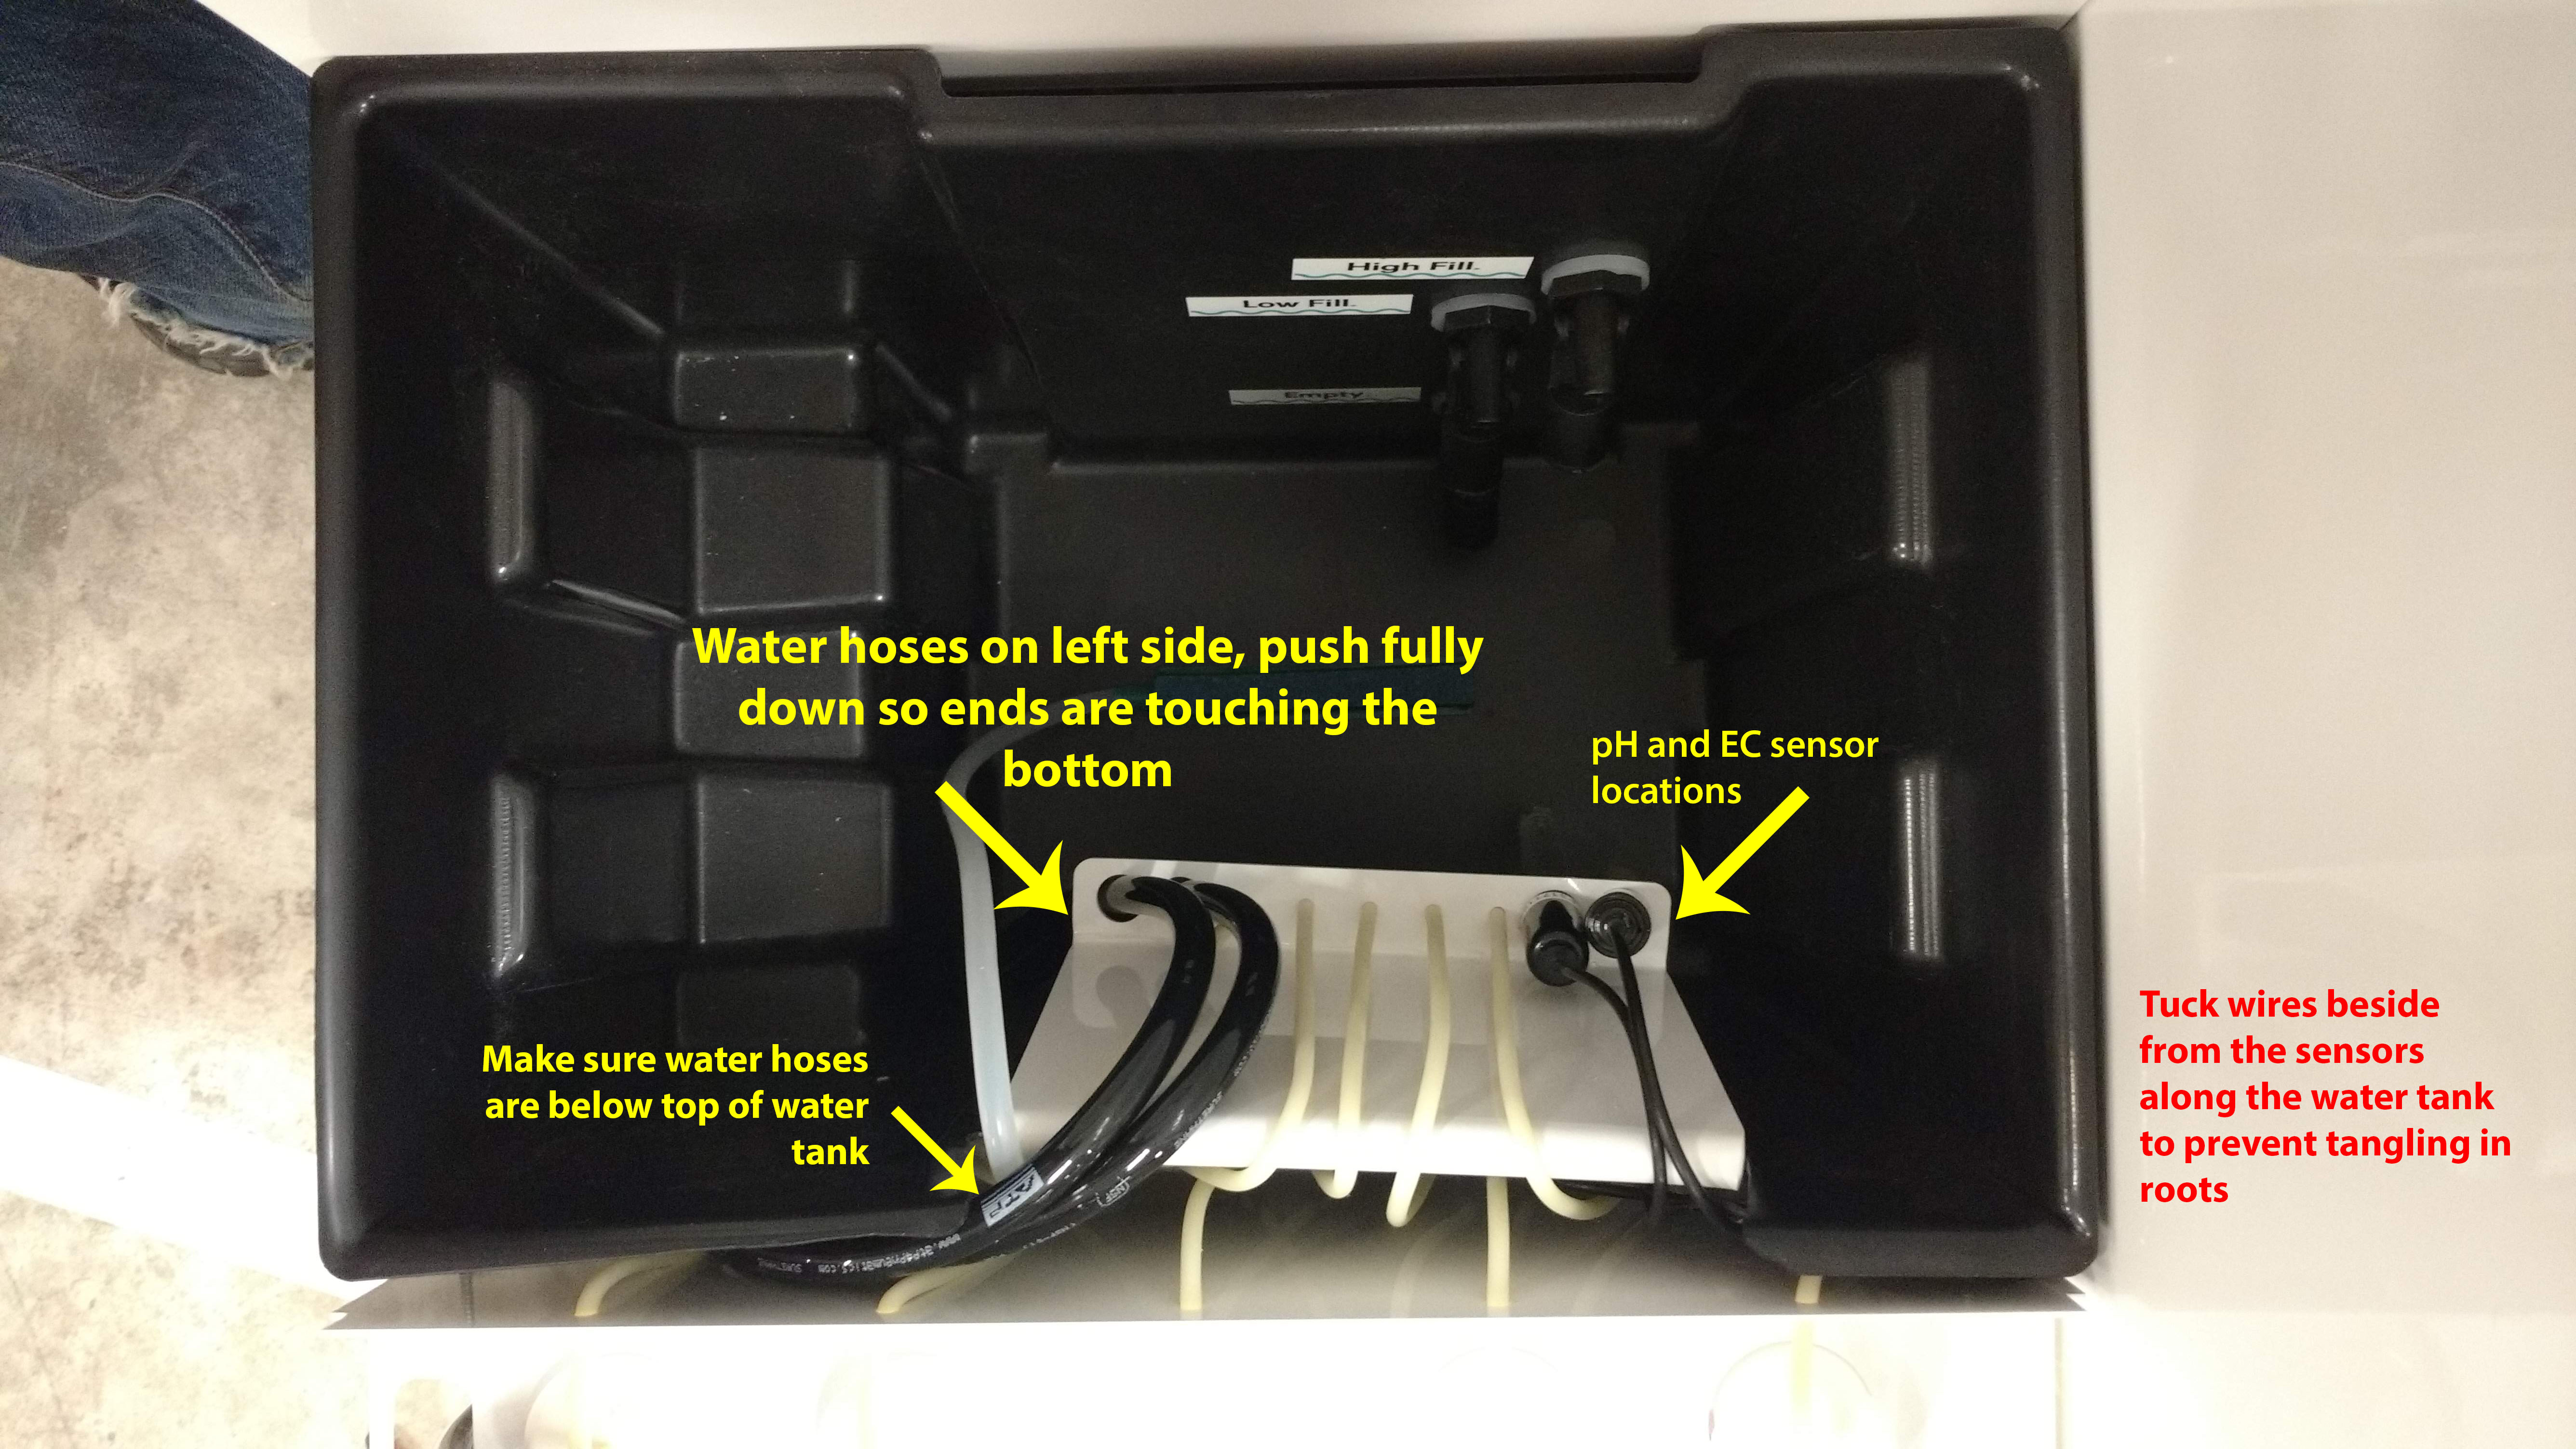
@OGJ you are correct! I was thinking of cutting the overall width of the cover as it’s simply just to stop the tangling of roots. Thickness improvement will definitely be most helpful!

Have you explored using the location of the impression where the shield currently is hanging from? Rather than making it so wide, place the focus on just the sensors location without taking away any additional space from the plant inside the reservoir. Maybe overall width 4” (this is just a quick thought, I’d love to discuss further ideas though) would suffice more than what we’re looking to achieve. There isn’t a large need, in my opinion, to take away as much space as we currently are with the prototype shield.

I can put together a sketch of what I’m trying to get across if this is not making sense. Things tend to get lost in translation at times or I’m just confusing the hell out of the reader. So if that’s the case please let me know!

Appreciate the feedback!

1 Like

Hi Rich,
A sketch would be great.
The reason for the size and location is to prevent the shield from being pushed around by the roots and causing issues with the sensors. I’m always open to exploring suggestions.

1 Like

New to this forum and just came across this post! I too, just received the drying racks and water level sensor shield.

The drying racks are killer. What a great idea, and I’m happy to see that possibly thicker/darker filaments on them is in the works. Would definitely make them easier to see.

The shield fit perfectly in our reservoir and I imagine that it will work great at keeping creeping roots away from the sensors.

7 Likes

Hi rainstorm3, Just a quick tip. Run your pH and EC sensor wires along the right side of the water tank towards the front of the tank. This will prevent roots from tangling themselves into them once your plant gets big. I’ve uploaded an image of how the wires and hoses should look for reference.

6 Likes

Thanks @OGJ I’ll do that next time I’m in the box. Cheers

1 Like

Hi Jason! That’s a great screen shot of how to arrange the wires. I didn’t see a tube for your air pump in your screen shot, how should that be arranged? (Just curious since I have a ticket in with support)

Hi SterlingNico - I’ve run the air hose line along side the flush fill hoses. Just make sure not to restrict the air flow. Hope this helps. If not, let me know and I’ll post another image with hoses specifically.

1 Like

Ahhhh! I see that now. Your air pump hose looks a lot different than mine. Mines a smaller black air hose. Yours looks more bulky and white. I’m guessing you guys changed the hosing out at some point in later units.

1 Like

Is there a way to remove the bin and see the underworkings? I’m trying to save myself some time between support request. Either my air pump appears to not be working because the air hose isn’t connected… or the air pump really isn’t working. I figure I can eliminate at least the air hose being disconnected if I can physically see it. I’ve tried to feel for vibrations by removing the back access panel and don’t really feel any, so of course my tinkering mind wants to dig in further to try and fix it. (And hopefully not void any warranty)

@SterlingNico I know the team was working with you, is this all sorted now?

Hi @bjorn

I think so! They’re sending me what I need on Tuesday I think!

Very excited!!

Thanks for checking in!

1 Like

@OGJ and @Stephen I have dumb request. can u guys point out where exactly is the water level sensor on the unit? I don’t have a water level shield at he moment. Robyn is sending it when they are done manufacturing it. Robyn suggested it might be the cause of why my grobo is stuck in drain mode.

I’m assuming it’s the high and low fill tubes? What do u guys suggest to keep that area clear of the roots until the water shield arrives?

HI Jamminbear

The sensors are at the back right of the unit. Please see this image

They are the black levers on the top right of the image, labeled High Fill, Low Fill, and empty
Gently pull your roots away from the sensors and that should help with the unit being stuck in drain mode.

2 Likes

Another dumb question. So if there are roots tangled in the sensors? How should I remove the roots from the sensor? Remove the plant entirely and cut off the tangled roots or leave the plant inside and untangled the roots without cutting any roots? *she is in day 83 I believe and she is pretty big.

2 Likes

Hey @Jamminbear,

You can gently remove them by hand, at this stage loosing a bit of root on a big plant like this won’t slow it down much. Just be careful and try to not tear a large amount off. You could remove the entire plant for your next drain/fill in preparation for your water level shield install once it arrives. I put mine in a 5 gallon bucket if the need to transport or remove the plant from the unit arises.

Best,
Stephen

2 Likes

@Stephen I put in a ticket with Robyn and she wanted u too look at what’s happening? Is it nutrient burn or she is yellowing towards the end of her life cycle?

4 Likes