Germination

Hi everyone,

I’m often asked about germination, that exciting time where your young seedling breaks out of its shell and begins its journey to the light. The healthier and more viable the seed, the quicker you will see it emerge from your coco pod. If you have not seen anything within the 1st week, it’s time to dive in and investigate. You will find one of 3 things.

  1. My seed has not popped. Ensure that the coco pod is moist and that the seed has not rotted. You can give it a couple more days, but more than likely it’s time to start a new seed.

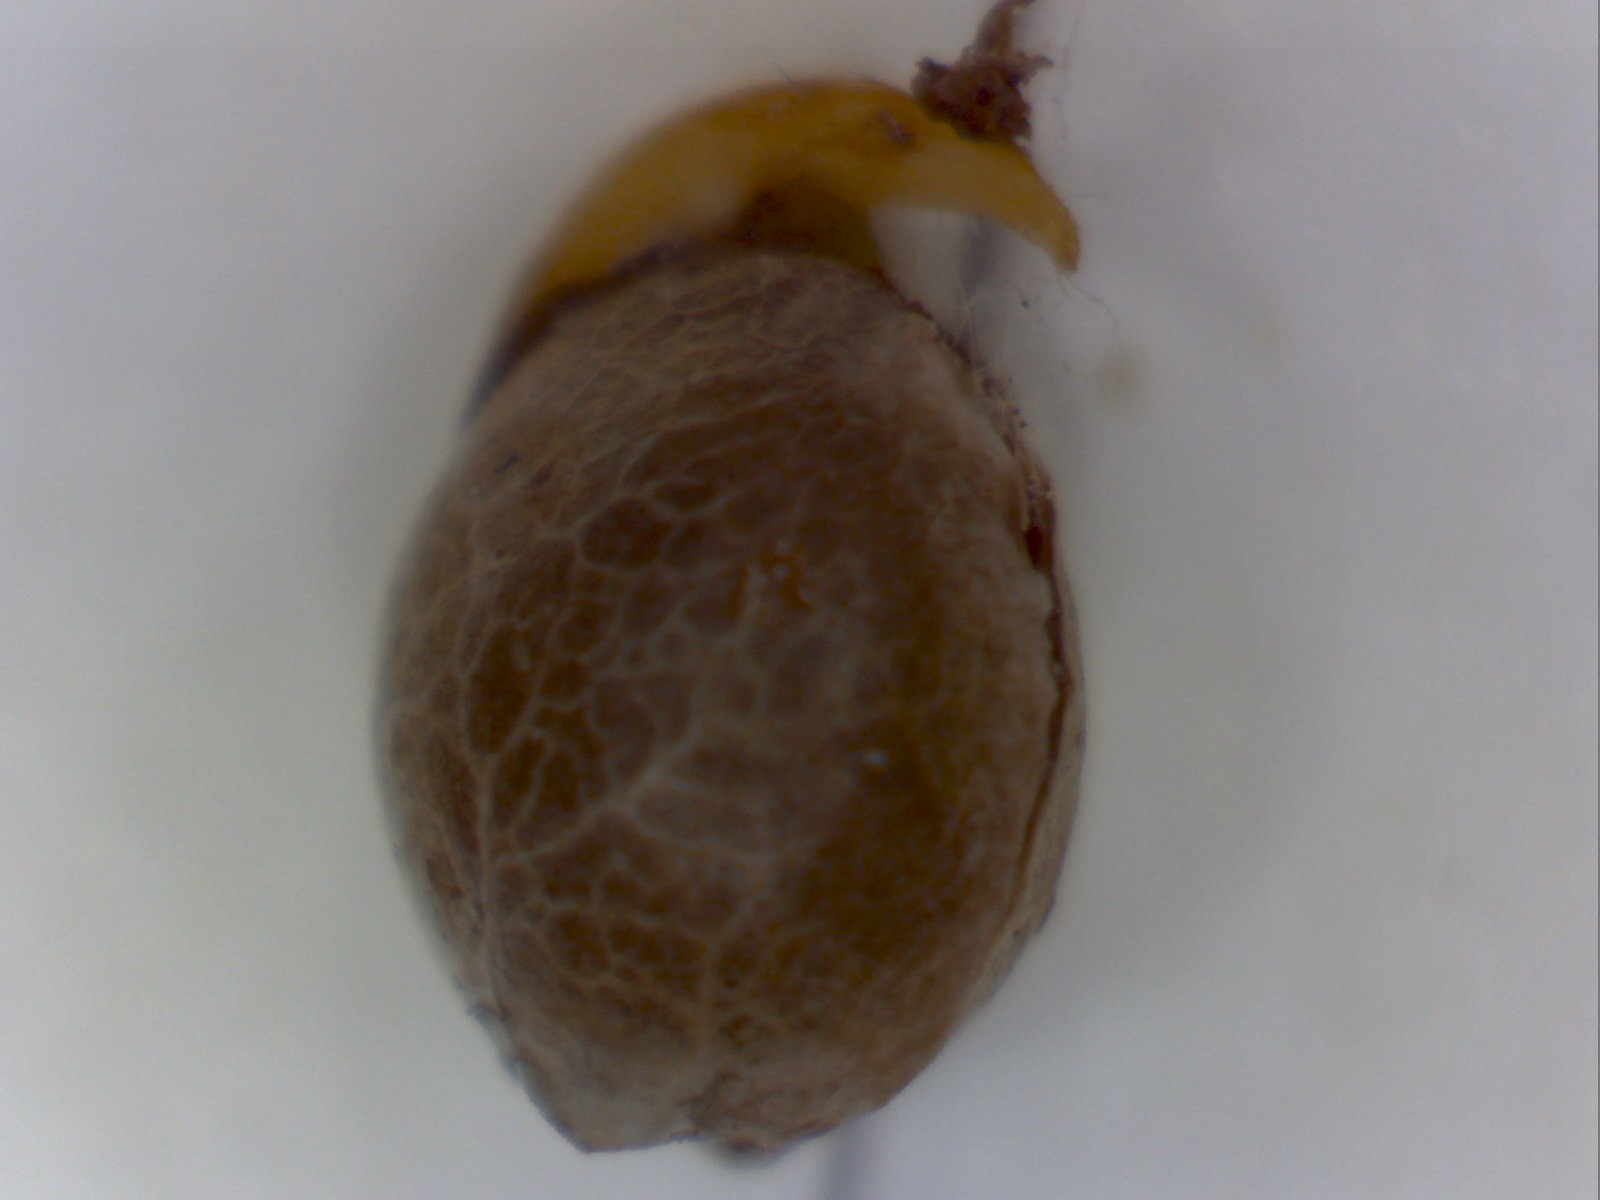
  2. My seed cracked and then stopped. You will see that the seed cracked and a root began to emerge, but it has stopped and the root is brown. It will look something like this.


    Time to start over, as this seed has lost the energy to continue. (Mold being one of the top contenders here)

  3. My seed cracked and looks white and healthy. Tuck the seed back in the coco pod, ensure it’s moist and replace it into the Grobo. Just needs a bit more time to begin the journey.

Good luck!
Stephen

5 Likes

Hi Stephen,

I have had trouble getting three different seeds to pop now. I do notice the pod drying out the top. As it turns out, it typically happens after a weekend when I’m not home. The seeds do not crack. Do you think that it is just not damp enough in the pod? Would you recommend germinating my seeds in the fridge (wrapped in damp paper towel) I have tried this with other plants…

Thanks!
N

Hey Nick,

Sorry to hear that you are struggling with germination. Here are some tips to help you succeed:

  1. Push your coco pod down into the lid about an inch. We have found that the lid isn’t sitting flush due to the hose connector, so placing your coco pod lower in the lid will help ensure it’s damp.

  2. Top up your reservoir. You should be receiving a notification to top up after 3 days. If you are in a hot or dry area, you may want to top up on day 2 and 4.

  3. Drain and fill your unit on day 7. Not only will this begin your systems dosing, but this will ensure you are keeping your coco pod moist.

  4. Put a small pea sized part of your coco pod into the hole the seed went. We are trying to keep the seed moist on all sides, so a gentle finger push after adding a small bit of coco pod helps put a ‘roof’ over the seed to protect it.

  5. Keep an eye out for roots emerging from your coco pod. This should happen a couple days after you see a green shoot emerge.

Good luck!
Stephen

3 Likes

@Stephen am i suppose to receive notifications via email? Didn’t get any yet… Its the third day. I put a thermometer/ relative meter in the grobo to check. its around 40% humidity and 83 degrees in temp… Shouldn’t it be higher in humidity and slightly lower in temp?

Hi Jamminbear,

Currently you will receive a notification on day 3 prompting you to simply top up your unit. Keeping your coco pod damp is the goal. After day 7, you will receive a drain and fill notification. This begins your nutrient dosing and also ensures your coco pod stays damp through the 1st week.

Overall, cannabis seeds germinate in temperatures from 70°F–90°F (21°C–32°C) and grow best at 78°F (26°C). Temperatures below 70°F (21°C) and above 90°F (32°C) impair germination. Low temperatures delay germination. High temperatures upset seed chemistry causing poor germination. Many growers make the mistake of thinking that they need a high ambient humidity for germination or seedlings. The high humidity and lack of fresh ventilation quickly causes fungus in the soil or growing medium and the seeds rot!

The seeds need a well aerated growing medium to germinate well. Seedlings also cannot tolerate high humidity and can easily be attacked by fungus such as fusarium and pythium. Only the soil or growing medium should be moist for optimal germination and seedling growth. Ambient humidity is best below 50%.

In short, you should be just fine with your current temperature and humidity.

Best,
Stephen

2 Likes

@stephen thanks for explaining RH/temp. Grew explanation. Thanks brother

1 Like

I got another question @Stephen. (Sorry about y millions of question and thank you so much for answering them btw) What is the current light cycle for grobo using a photo period liefecycle. I’m assuming we are using the 18/6 for germination and vegetation and 12/12 for flowering? Can we set the timing such as off at 11am and on 5pm? I noticed the LED turning on at random times.

Hey Jamminbear,

You have it right, 18/6 for veg and 12/12 for flower for the photoperiod recipes. The software team is currently working to integrate the ability for the user to select the on or off time. (Duration will not be adjustable at this time).

When you say the LED is turning on at random times are you referring to small user indicator LED or the actual lights inside the grobo? The user indicator LED will change from time to time to let you know what the current unit status is, but the internal LED’s should not be going on/off randomly. If they are, please contact support@grobo.io and report this issue.

Best,
Stephen

@stephen Sorry let me correct what i m saying… The Grobo LED is turning on in the middle of the night i believe and not turning on sporadically. I currently have the grobo setup in my room and the purple door lights jolts me awake sometimes ( I am assuming when the door panel turns purple that means the LED grow light is on?) Since we can not select the time it turns on and off (LED) at the moment, can i ask what time is it currently scheduled to go off and on?

1 Like

@stephen Sorry i been meaning to ask you… any books you recommend for horticulture practices?

1 Like

Hi @Jamminbear,

Sorry for the late reply - I’ll let @Stephen get back to you about the books.

You should be able to change your light schedule from the “Settings” tab in your app now. Check it out!

Regards,

Chris.

2 Likes

Hey Jamminbear,

Don’t know why I missed this one, I remember reading your question, just didn’t answer, sorry!

A couple I like:
Cannabis
Dank: the Quest for the Very Best Marijuana: A Breeder’s Tale by Subcool
Simple with gorgeous pics.
Green - A field Guide to Marijuana by Dan Michaels
Easy to read very basic with strain focus
The Cannabis Grow Bible by Greg Green
Full of great information. A must have.
Marijuana Botany by Robert Connell Clarke
For those looking deeper into the science

Other
Square Foot Gardening by Mel Bartholomew
Fun read about maximizing yield.

Stephen

6 Likes

Hi Stephen

I noticed the black cord for filling and emptying must have shifted during delivery as it does have issues draining to the point it stops because it’s not completely in the water at the bottom based on how it bends. Hope it’s a quick time fix or something down the road for that. It’s a firm cord and doesn’t want to stay in the right direction

1 Like

Hey @Todd.grobo,

We’ll help you sort this out right away - can you please write this issue to support@grobo.io (let them know Chris sent you :wink: )

Regards,

Chris.

1 Like

@Stephen I’ve been reading on the forum about Grobo users preference on germination some users are saying they’d rather germinate outside the Grobo I’d rather do it in the coco pod. Your thoughts?

Hey puchy, I prefer to germinate my beans in ro water, usually about 24-36 hours. By then I usually have a tap root and use a pair of tweezers to gently insert her into the coco pod tap root down. I find my seedlings :seedling: break the surface quickly, and the roots grow down quicker. I’ve just popped a bean in soil before and have had different issues. Seems since I’ve switched to germinating in ro water I’ve had none of the previous issues thus far. Just my experience and opinion.

2 Likes

@Osage do you just put them in a paper towel?

Hey Pedro, No I never put it in a paper towel, I simply get a solo cup, put my reverse osmosis water in it about half way and throw my bean in. I tap it a few times until it drops to the bottom, then place it in a semi dark place to do its magic. I check 24 hours later and if its showing a tap root, depending on the size I will then place it in the coco pod. Ive had much better results with this process than others in the past, and I’m sticking to it. Probably never do it differently again. Try it and you will see a difference. Cheers

2 Likes

Hey @puncy,

As you can plainly see, everyone has their own methods. I find the coco pod a perfect germination vessel, as it has been designed to have an optimal oxygen to water ratio, helping germination along. Tear a small piece off and top the hole. In a couple days the ‘topper’ will rise and pop out, revealing a germinated seed. This avoids drowning them or breaking off the valuable tap root when you are transporting them from the paper towel or cup to the coco pod.

Best of luck,
Stephen

5 Likes

Hey @alucard

I’m going to add my 2 cents as well. I belive the outside germination method is better for the majority of grows EXCEPT for a Grobo. My reasoning is the Grobo will not compensate for the time spent germinating outside of the grobo so when you start your new grow your seed will be exposed to damper conditions for the extra amount of time it spent germinating outside of the Grobo increasing the risk of “damping off”

2 Likes