My First Grobo Grow

"Jack in the Box"
Jack Herer (Auto) by Canuk

Germination (Day 4/10)


The plug wasn’t even tight but she still chose to go around!

Germination (Day 5/10)


Just couldn’t wait to get out, wow that was fast!

Germination (Day 6/10)


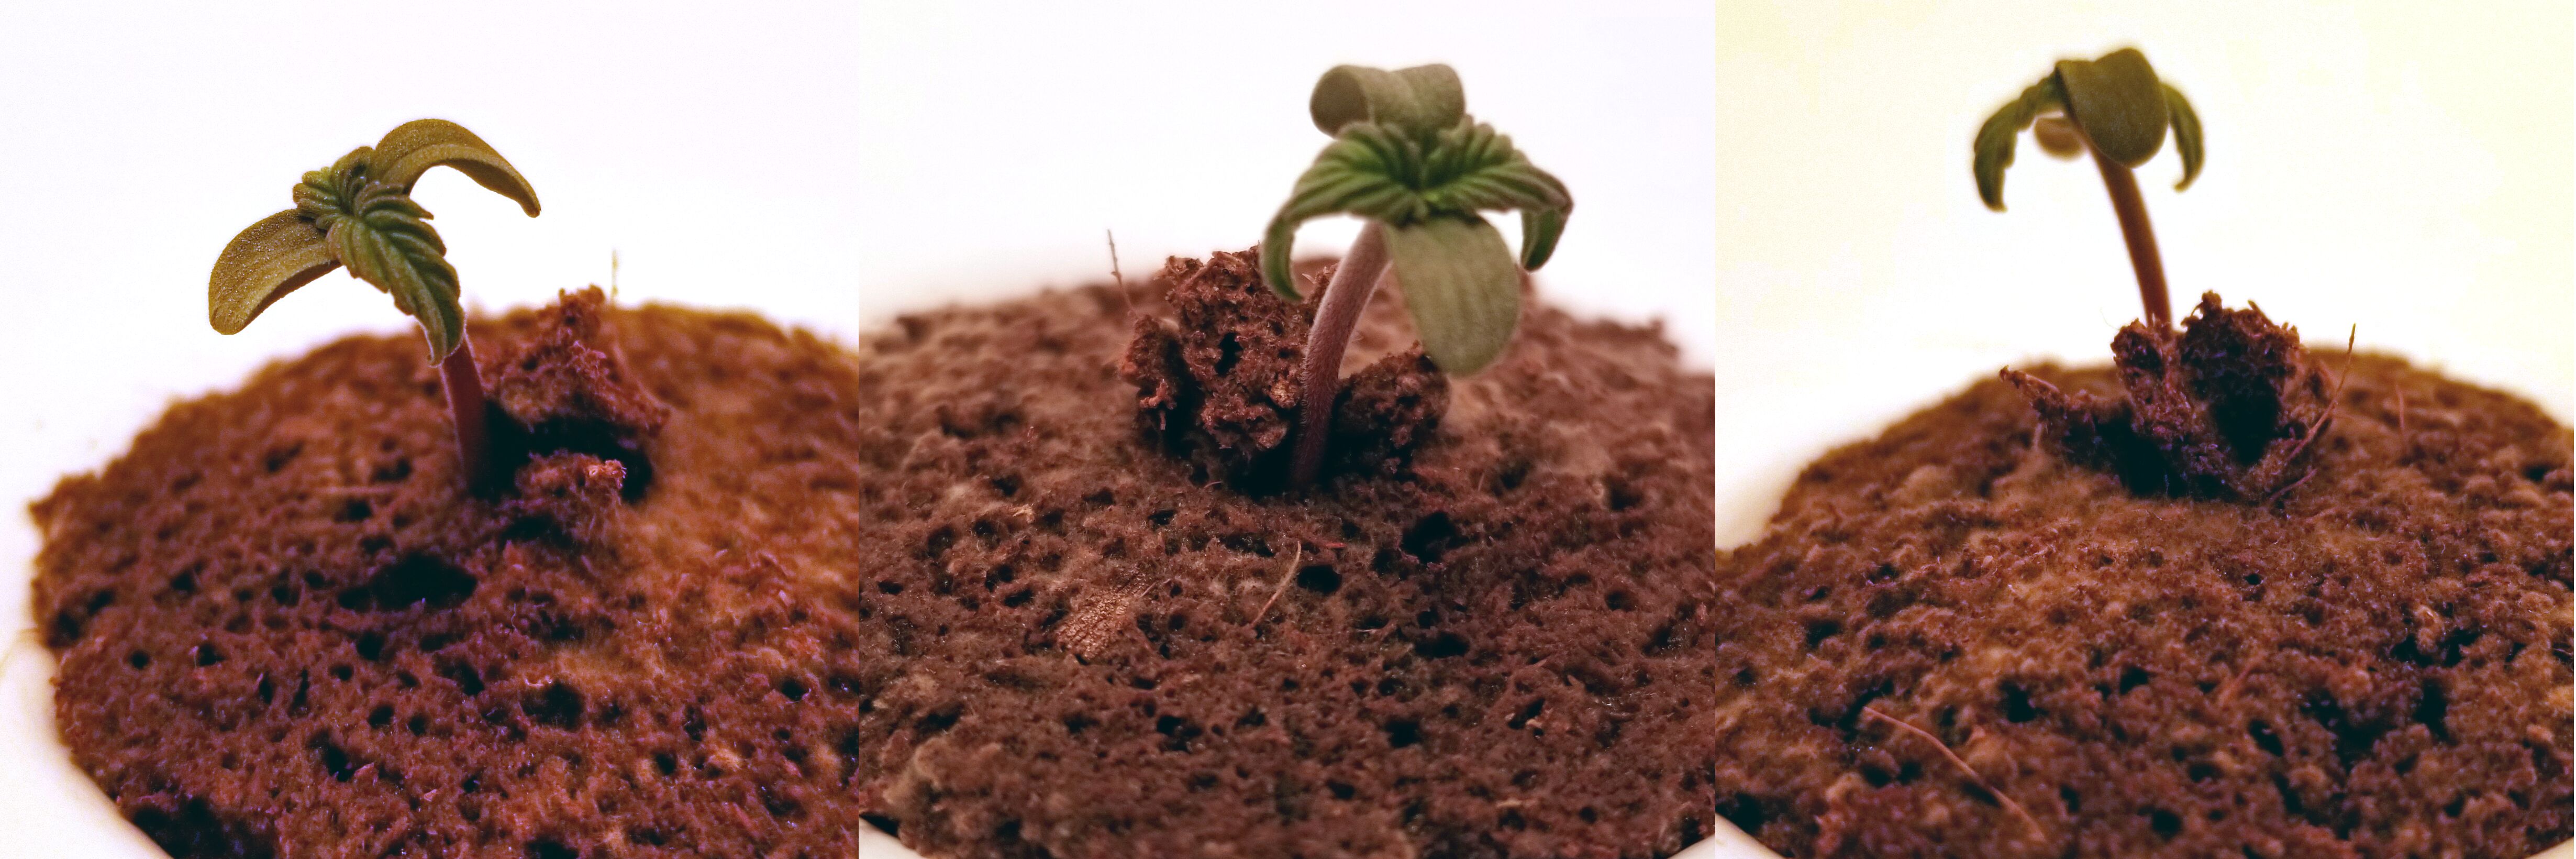
Looks like a good place to stop stretching…

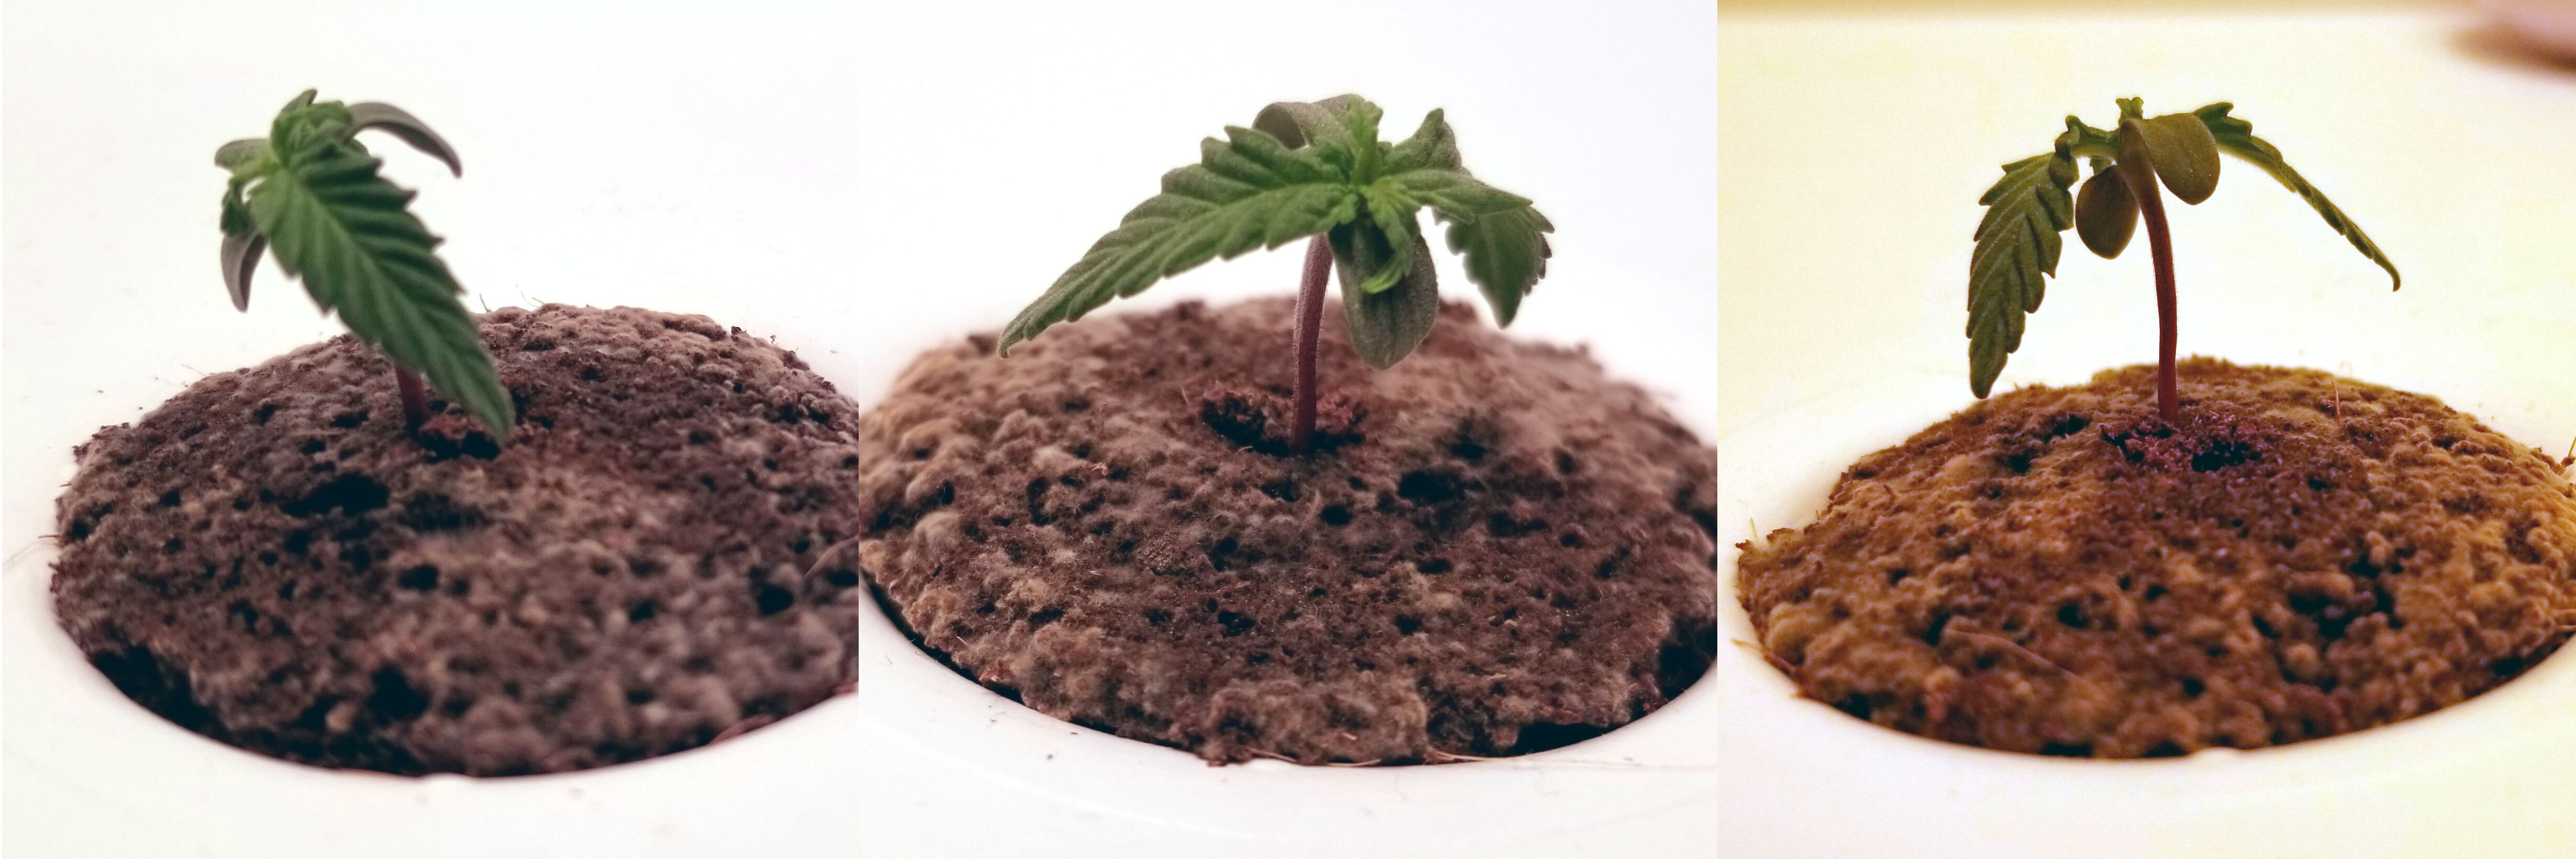
Germination (Day 7/10)


Not bad for 1 week! Appears quite healthy. :cupid: :smile:

Germination (Day 8/10)


Today is drain/fill day, hopefully it’s well received. That ugly plug was fixed. :hammer_and_wrench:


Peeked under the hood while draining, noticed a single root poking out. Excellent!

Germination (Day 9/10)


Still growing after the water change. That’s a good sign, yeah? :thinking:

Germination (Day 10/10)


No noticeable change in growth rate. Steadily gaining in size and shape.


A quick peek shows the new water is indeed being enjoyed. That root continues much deeper into the tank already and there’s plenty more coming in right behind it!

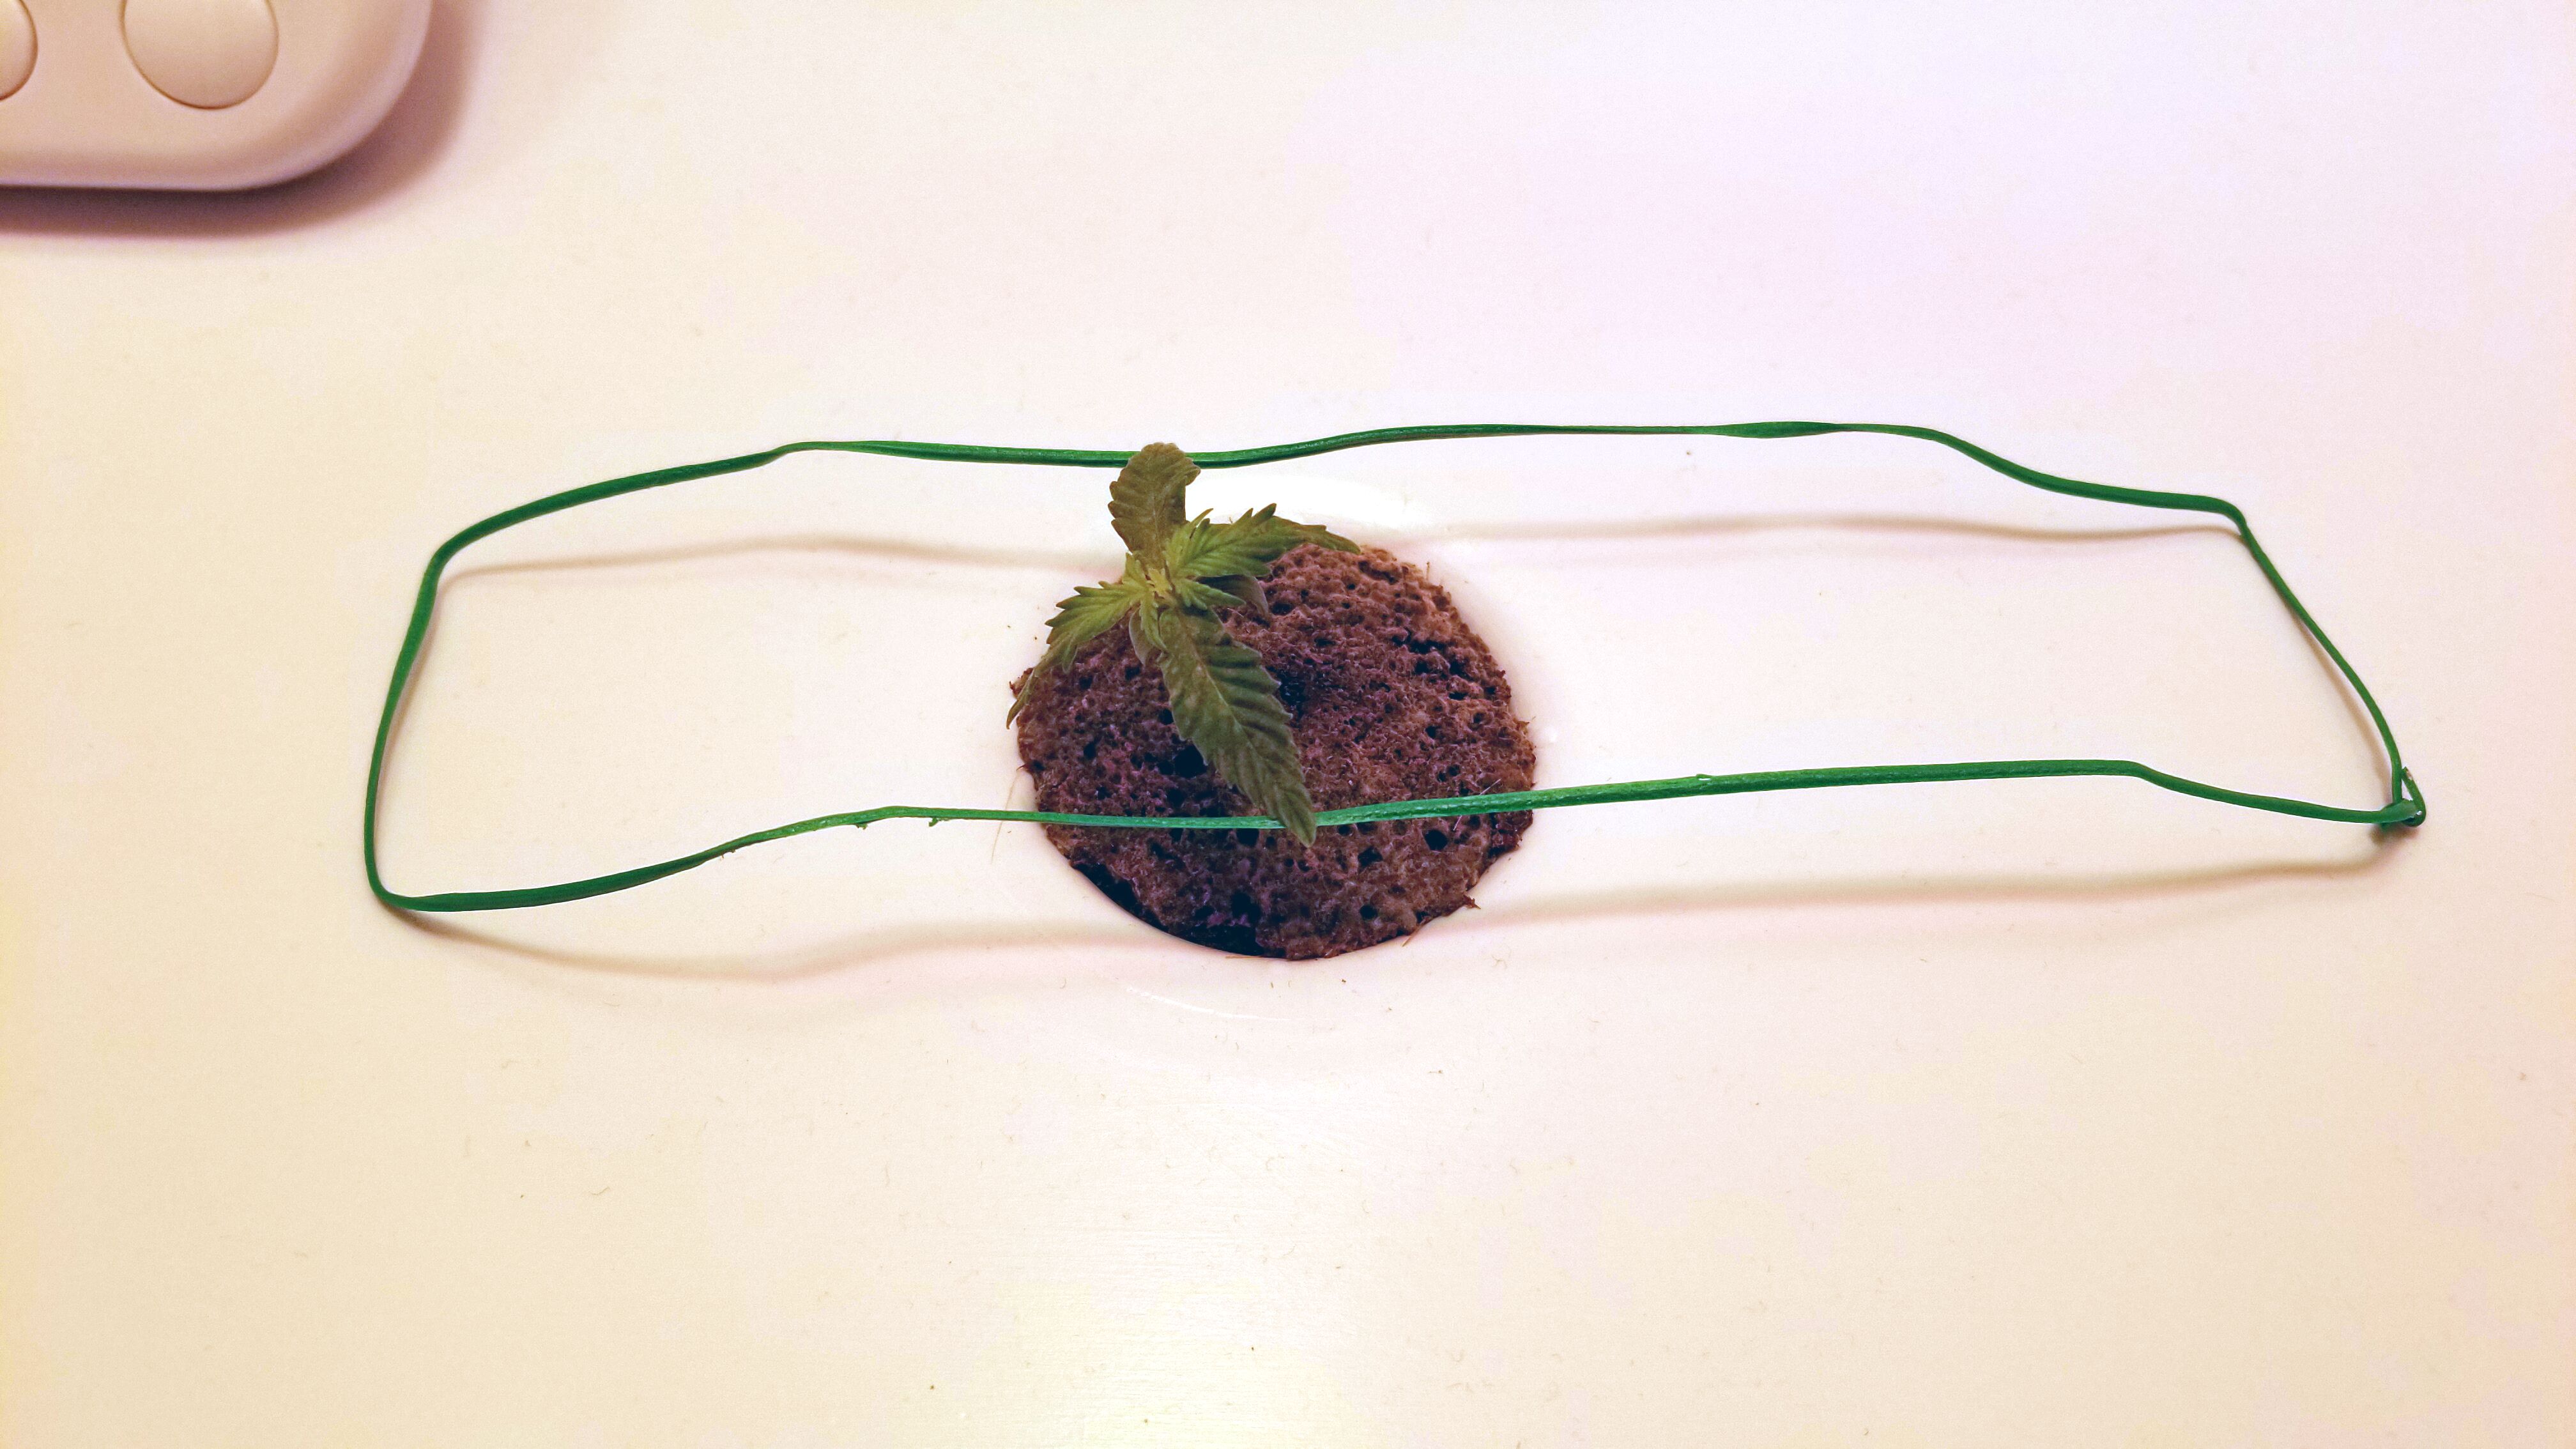
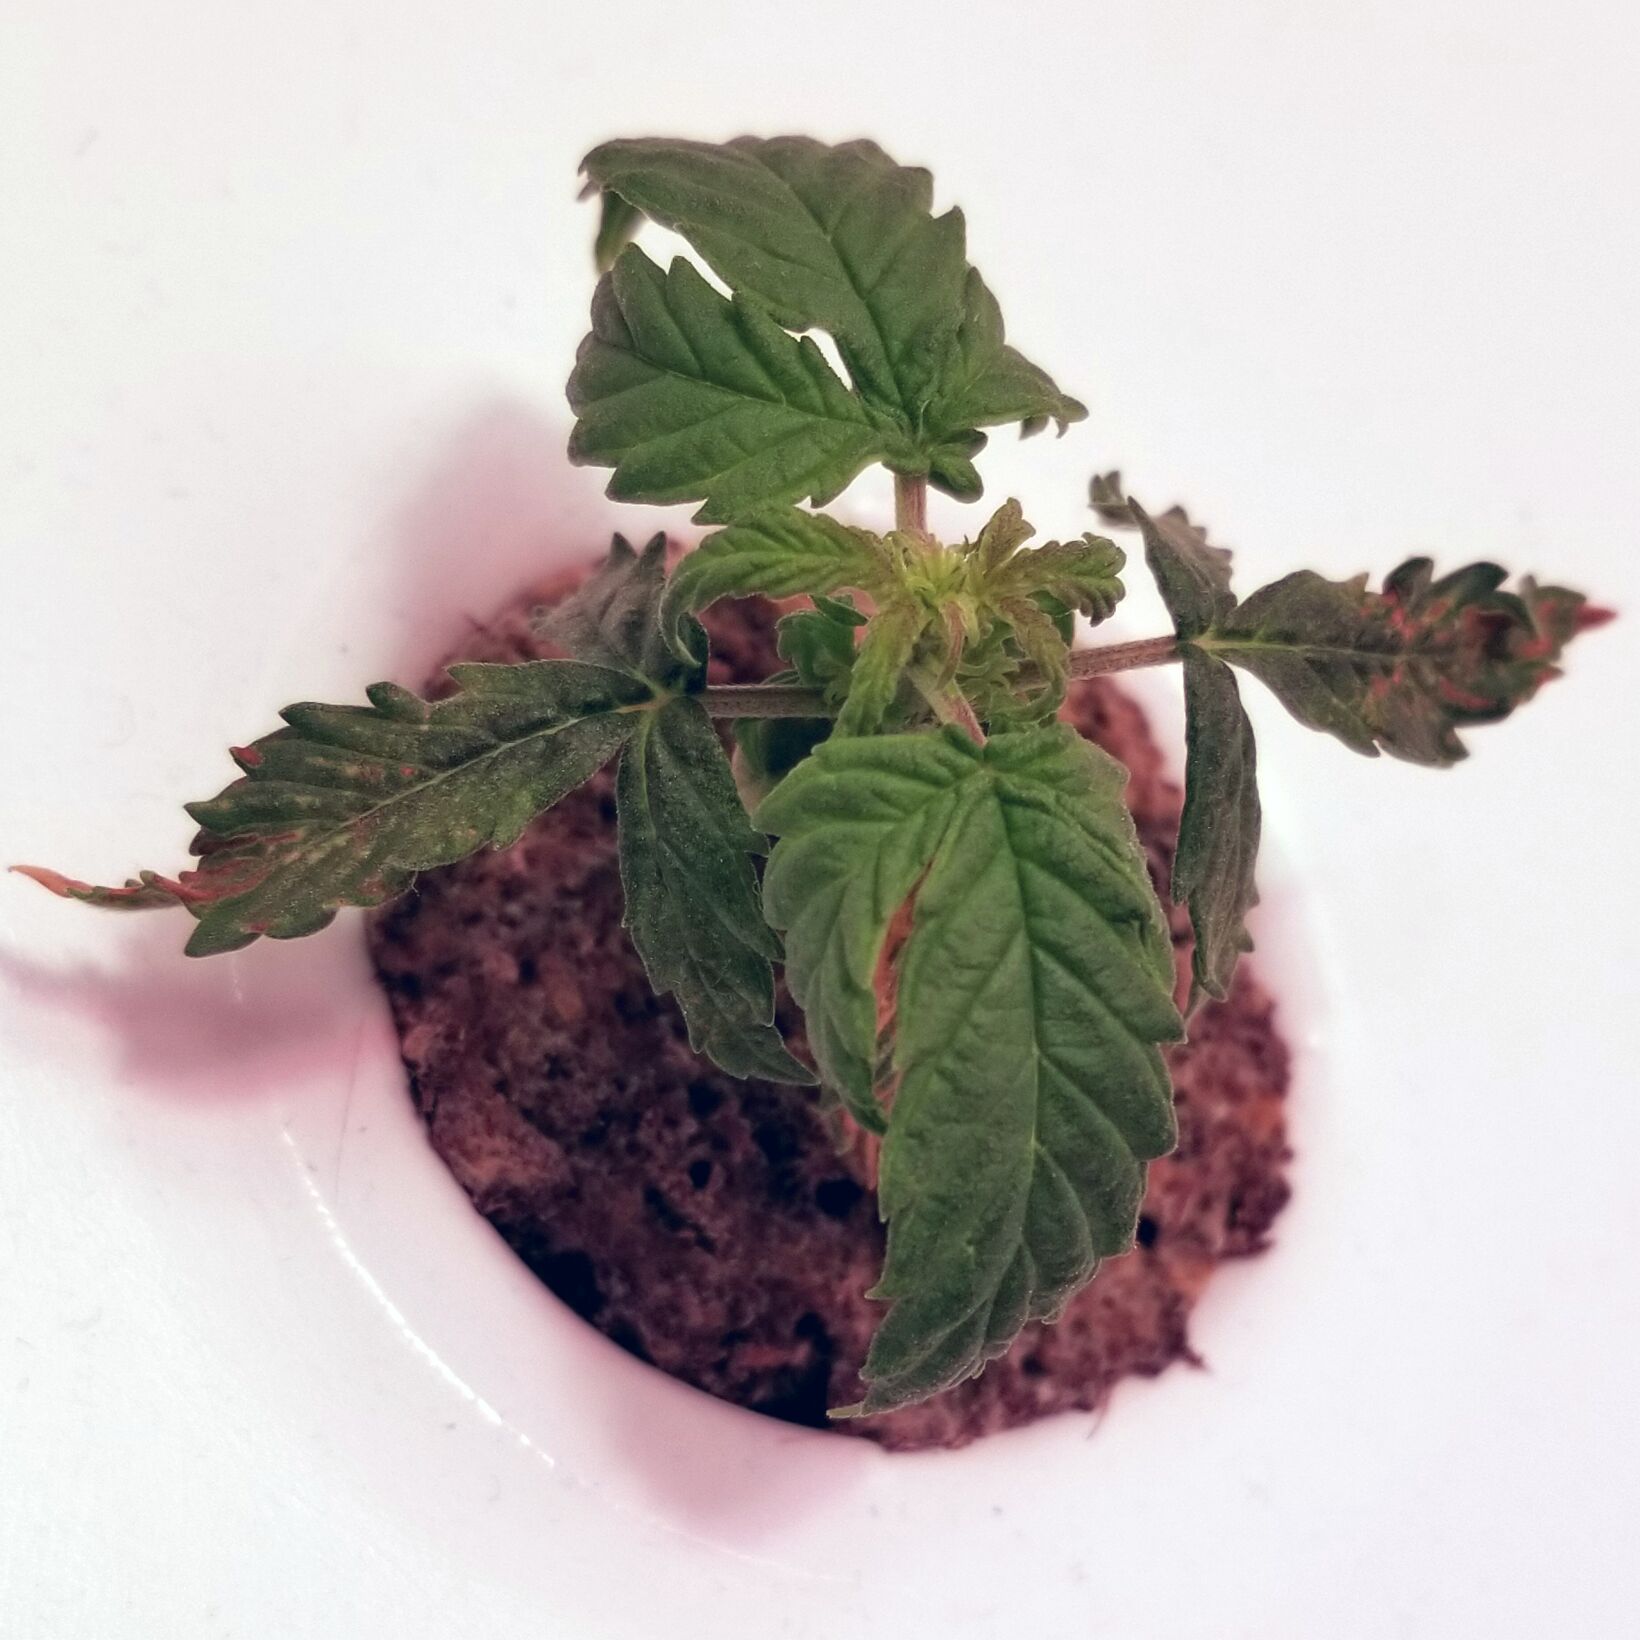
Early Vegetation (Day 1/14)


Those first curls are so cute. :cupid: :blush:

Early Vegetation (Day 2/14)


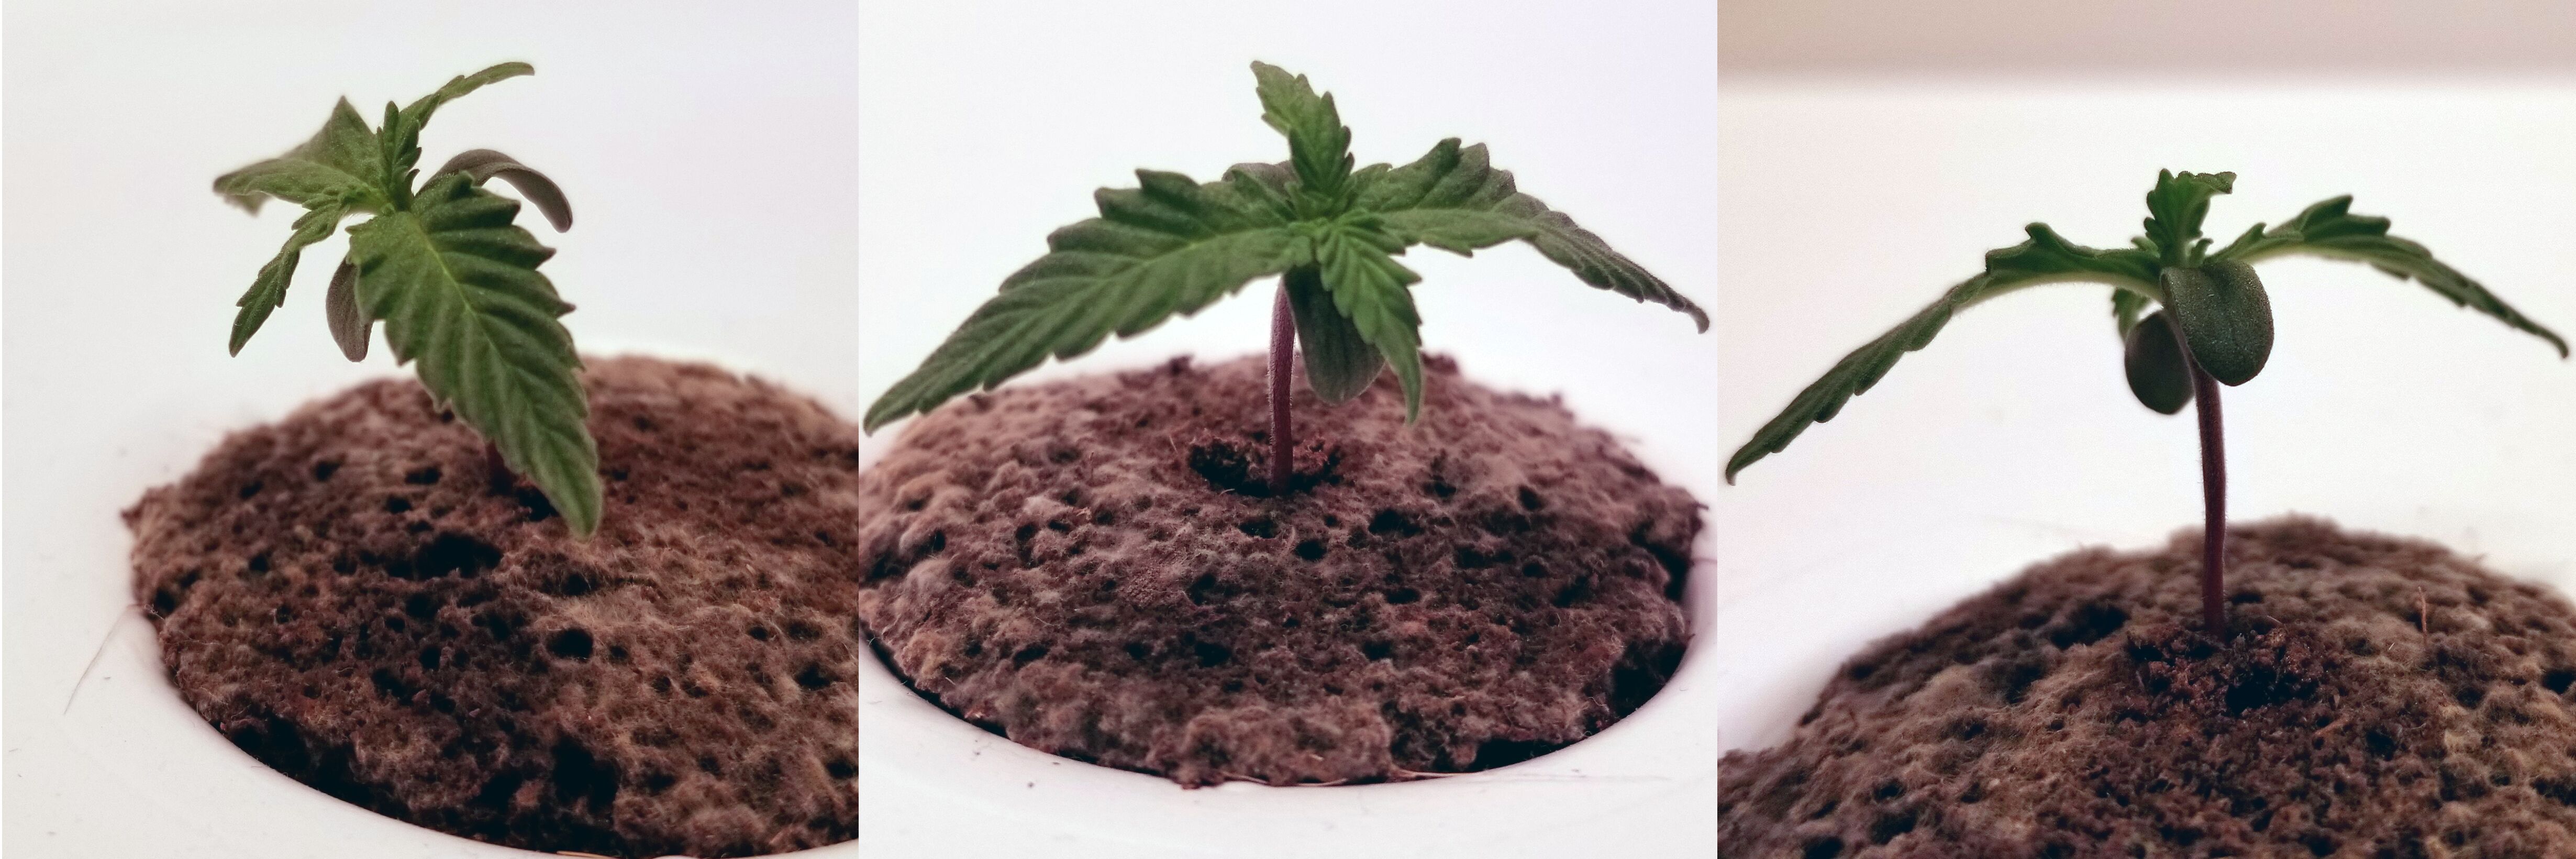
Keeping the pace up, no more cowlick. :cry: :laughing:

Early Vegetation (Day 3/14)


Getting stronger day by day. Tiny little branches starting to slightly gain in thickness and width. Exciting!

Early Vegetation (Day 4/14)


I like the direction this is headed in. :heart_eyes:

Early Vegetation (Day 5/14)


Can notice a spot developing on the first shot, she’s still growing though!

Early Vegetation (Day 6/14)


That spot is becoming those spots. :slightly_frowning_face: Noticed this in grows posted by others, hopefully it’s just due to the added nutes. The water was changed today. :potable_water:

Early Vegetation (Day 7/14)


The spots aren’t of too much concern yet but they do look ugly. :tongue: Worth sending in a ticket to double-check the data. That yellow in the middle does look like she’s dealing with some sort of deficiency. :face_with_thermometer:

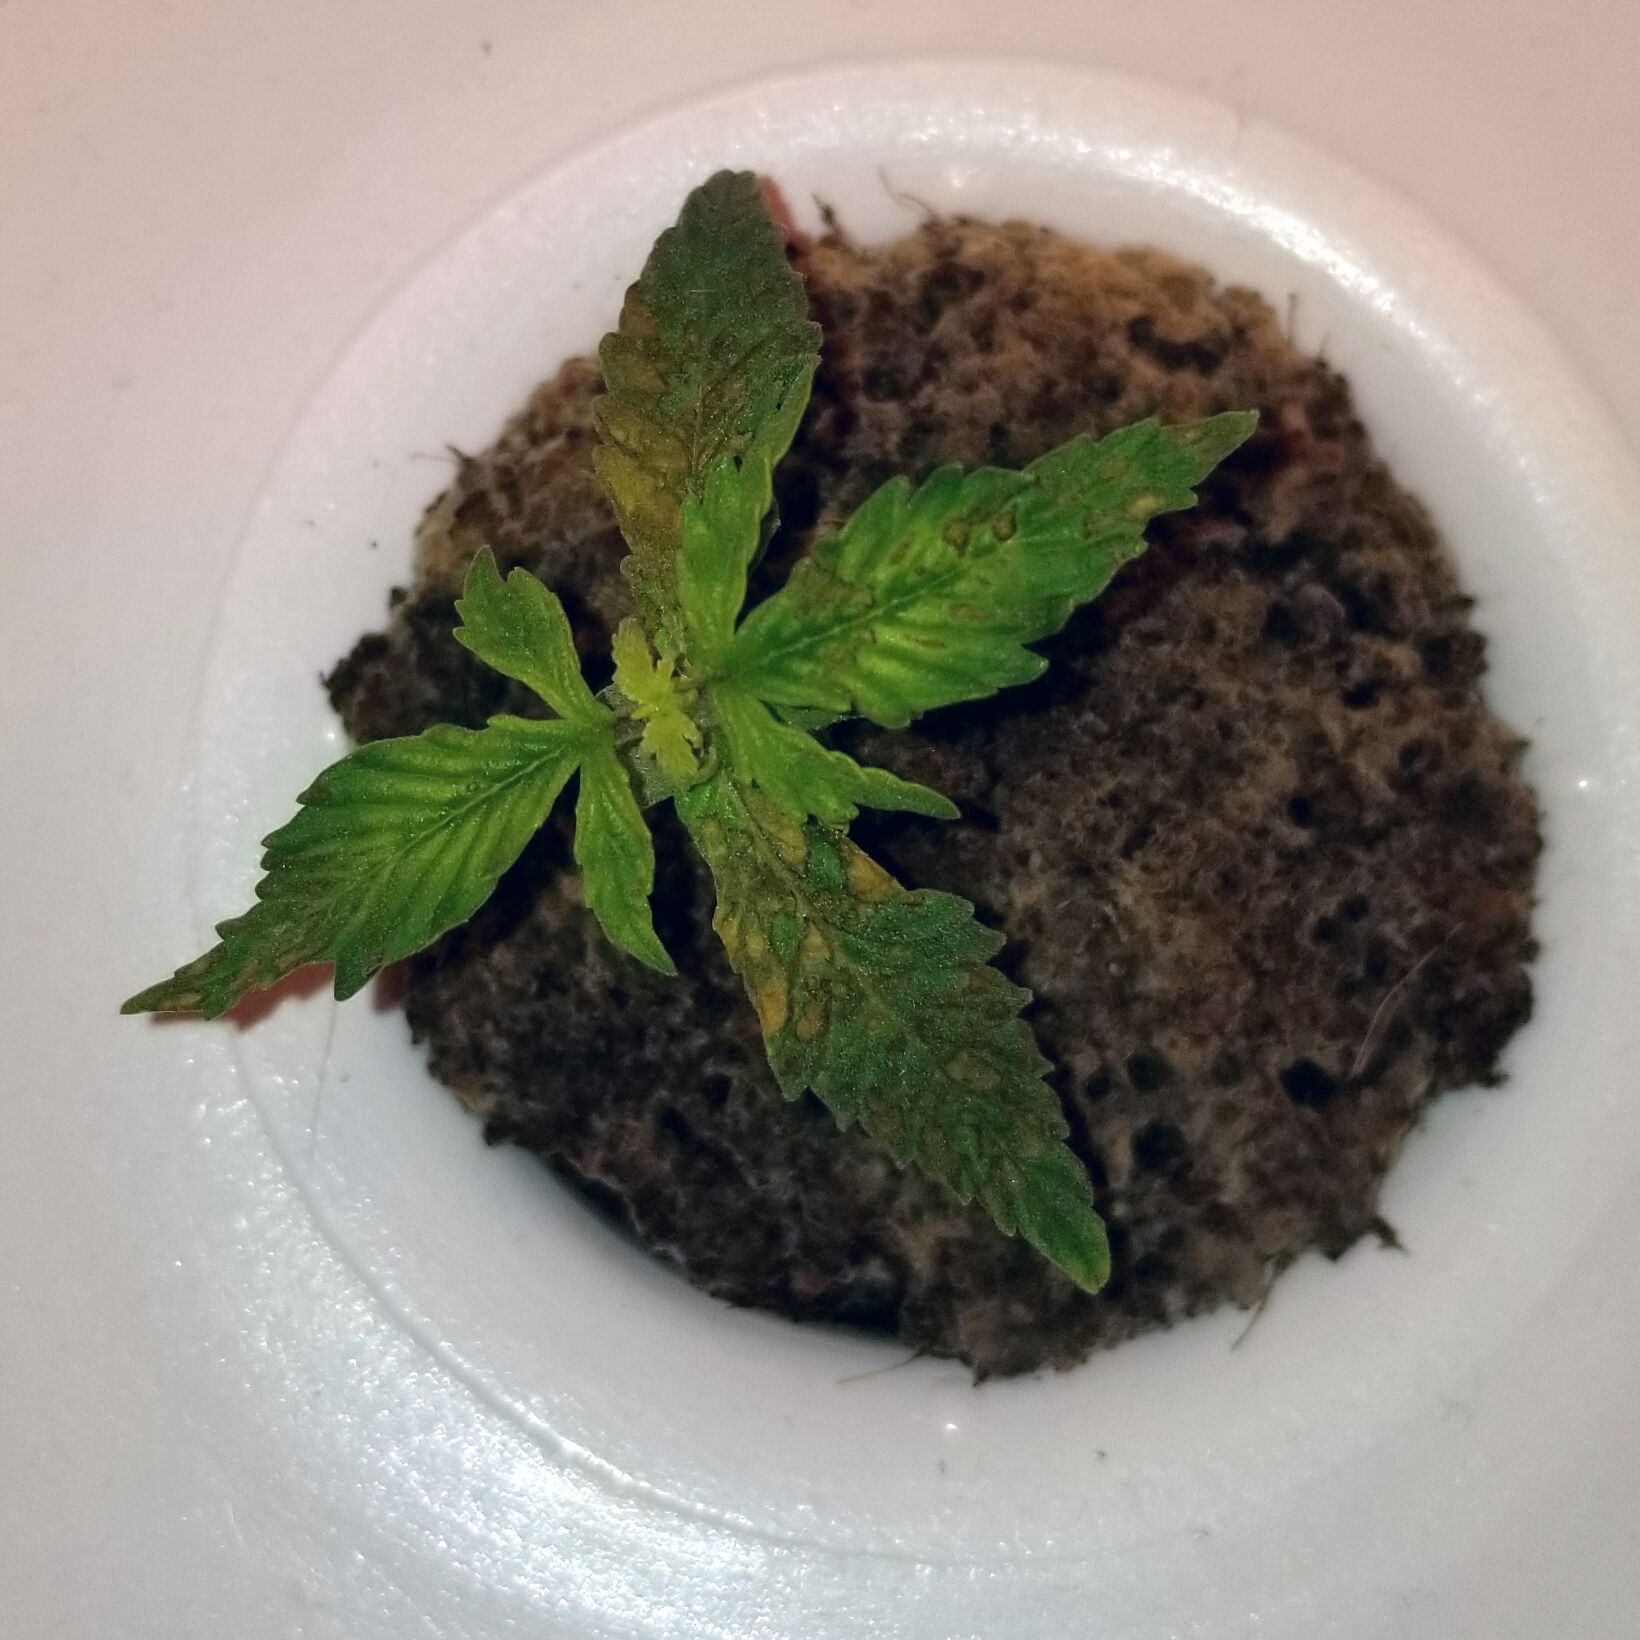
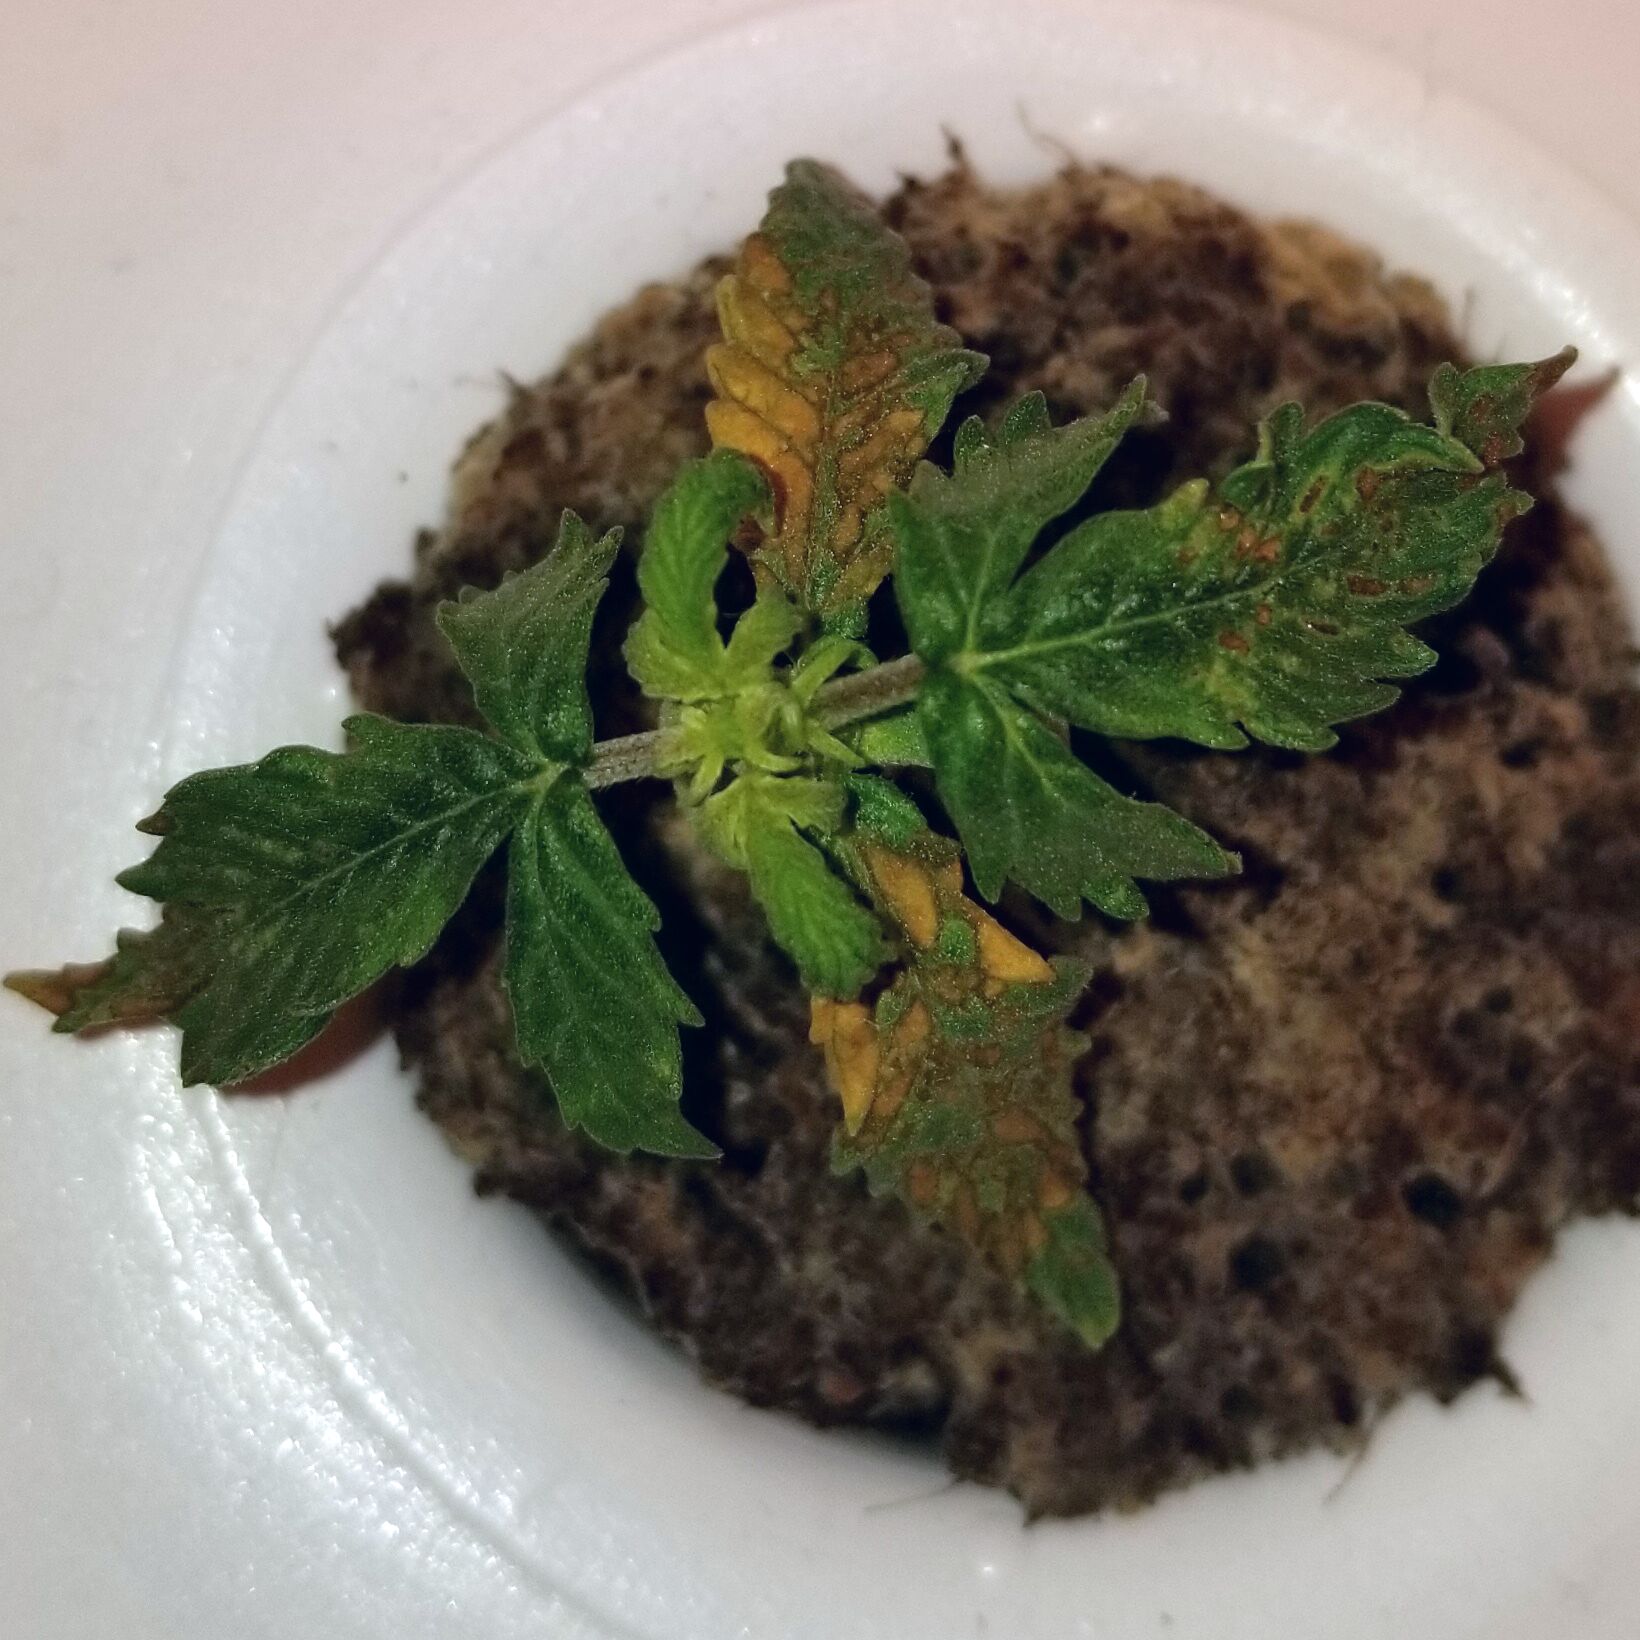
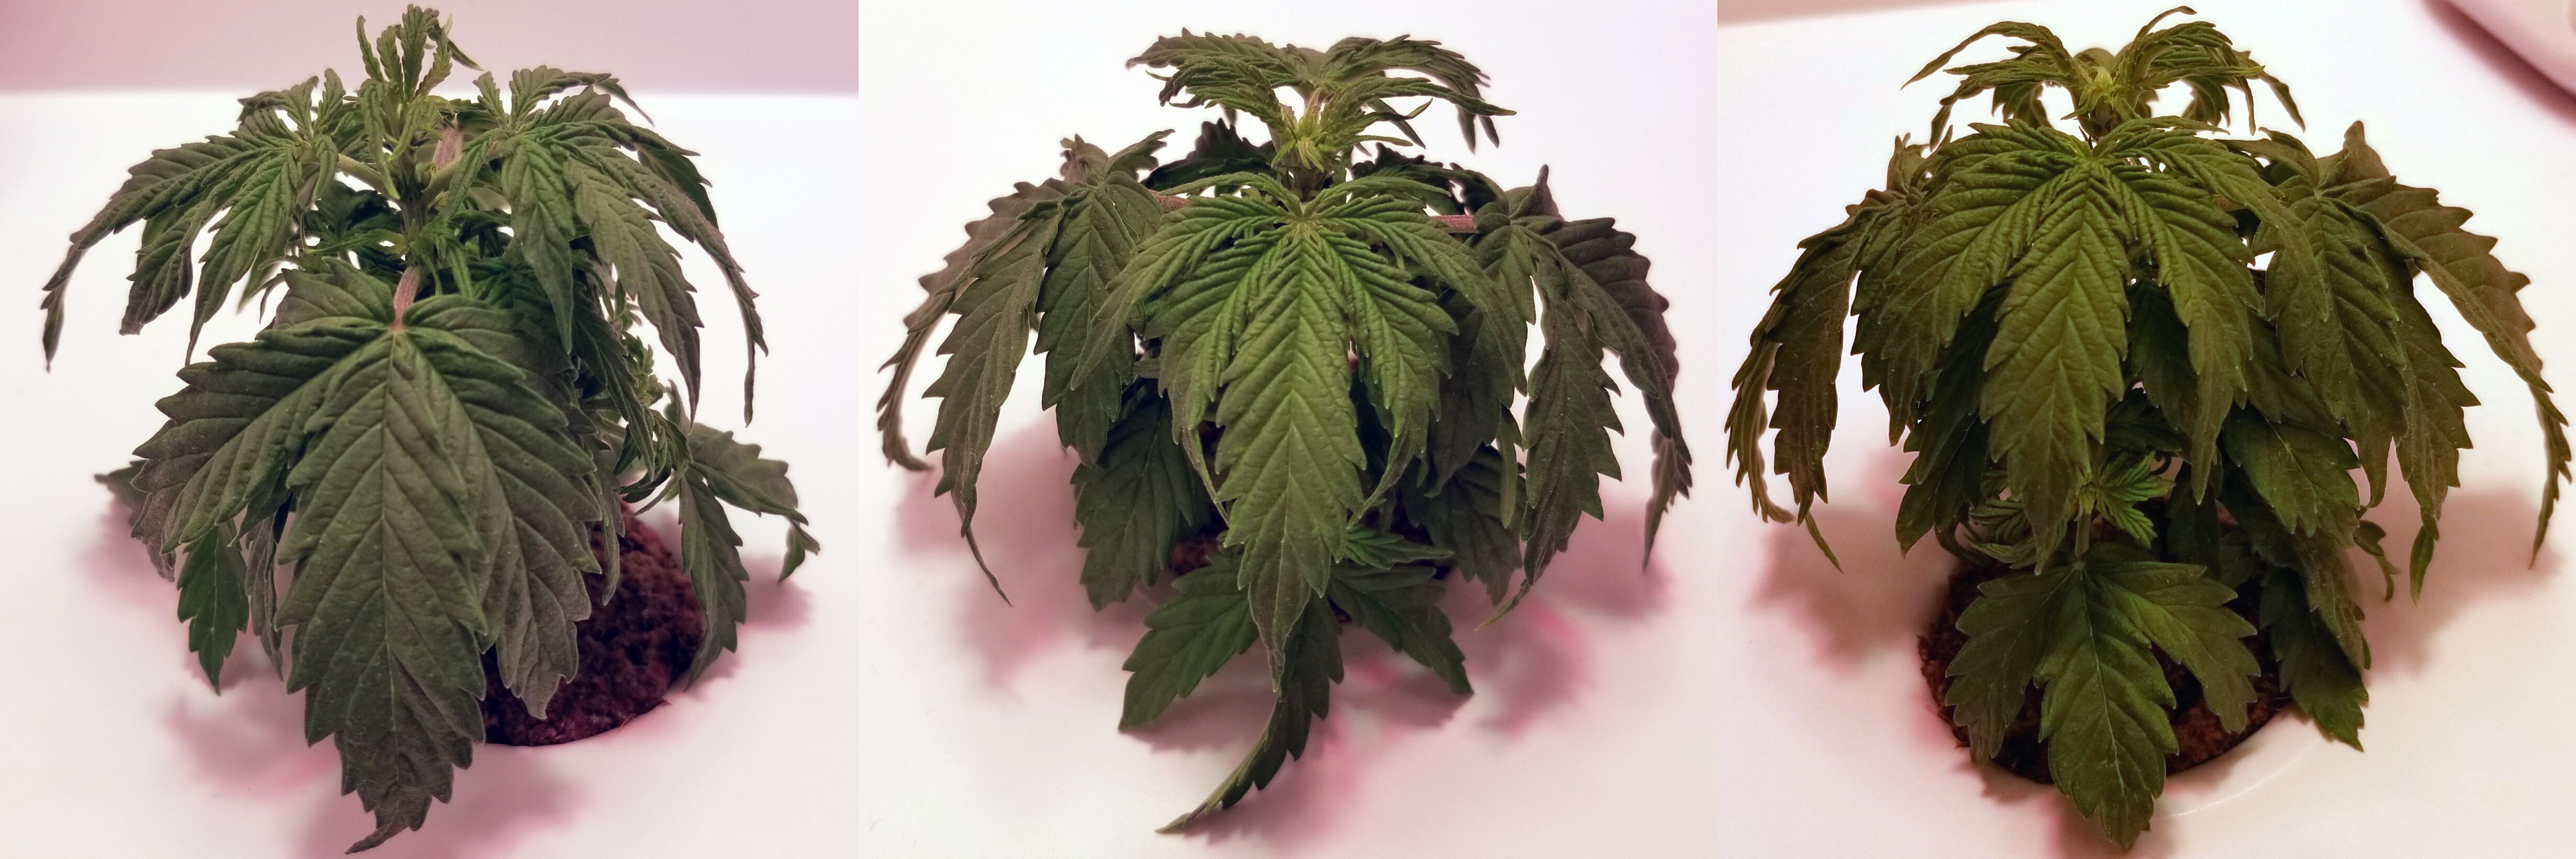
Early Vegetation (Day 8/14)


The spots are more ugly today than yesterday. Still noticing some new growth at the top but the affected leaves haven’t really grown much since the problem was first noticed.

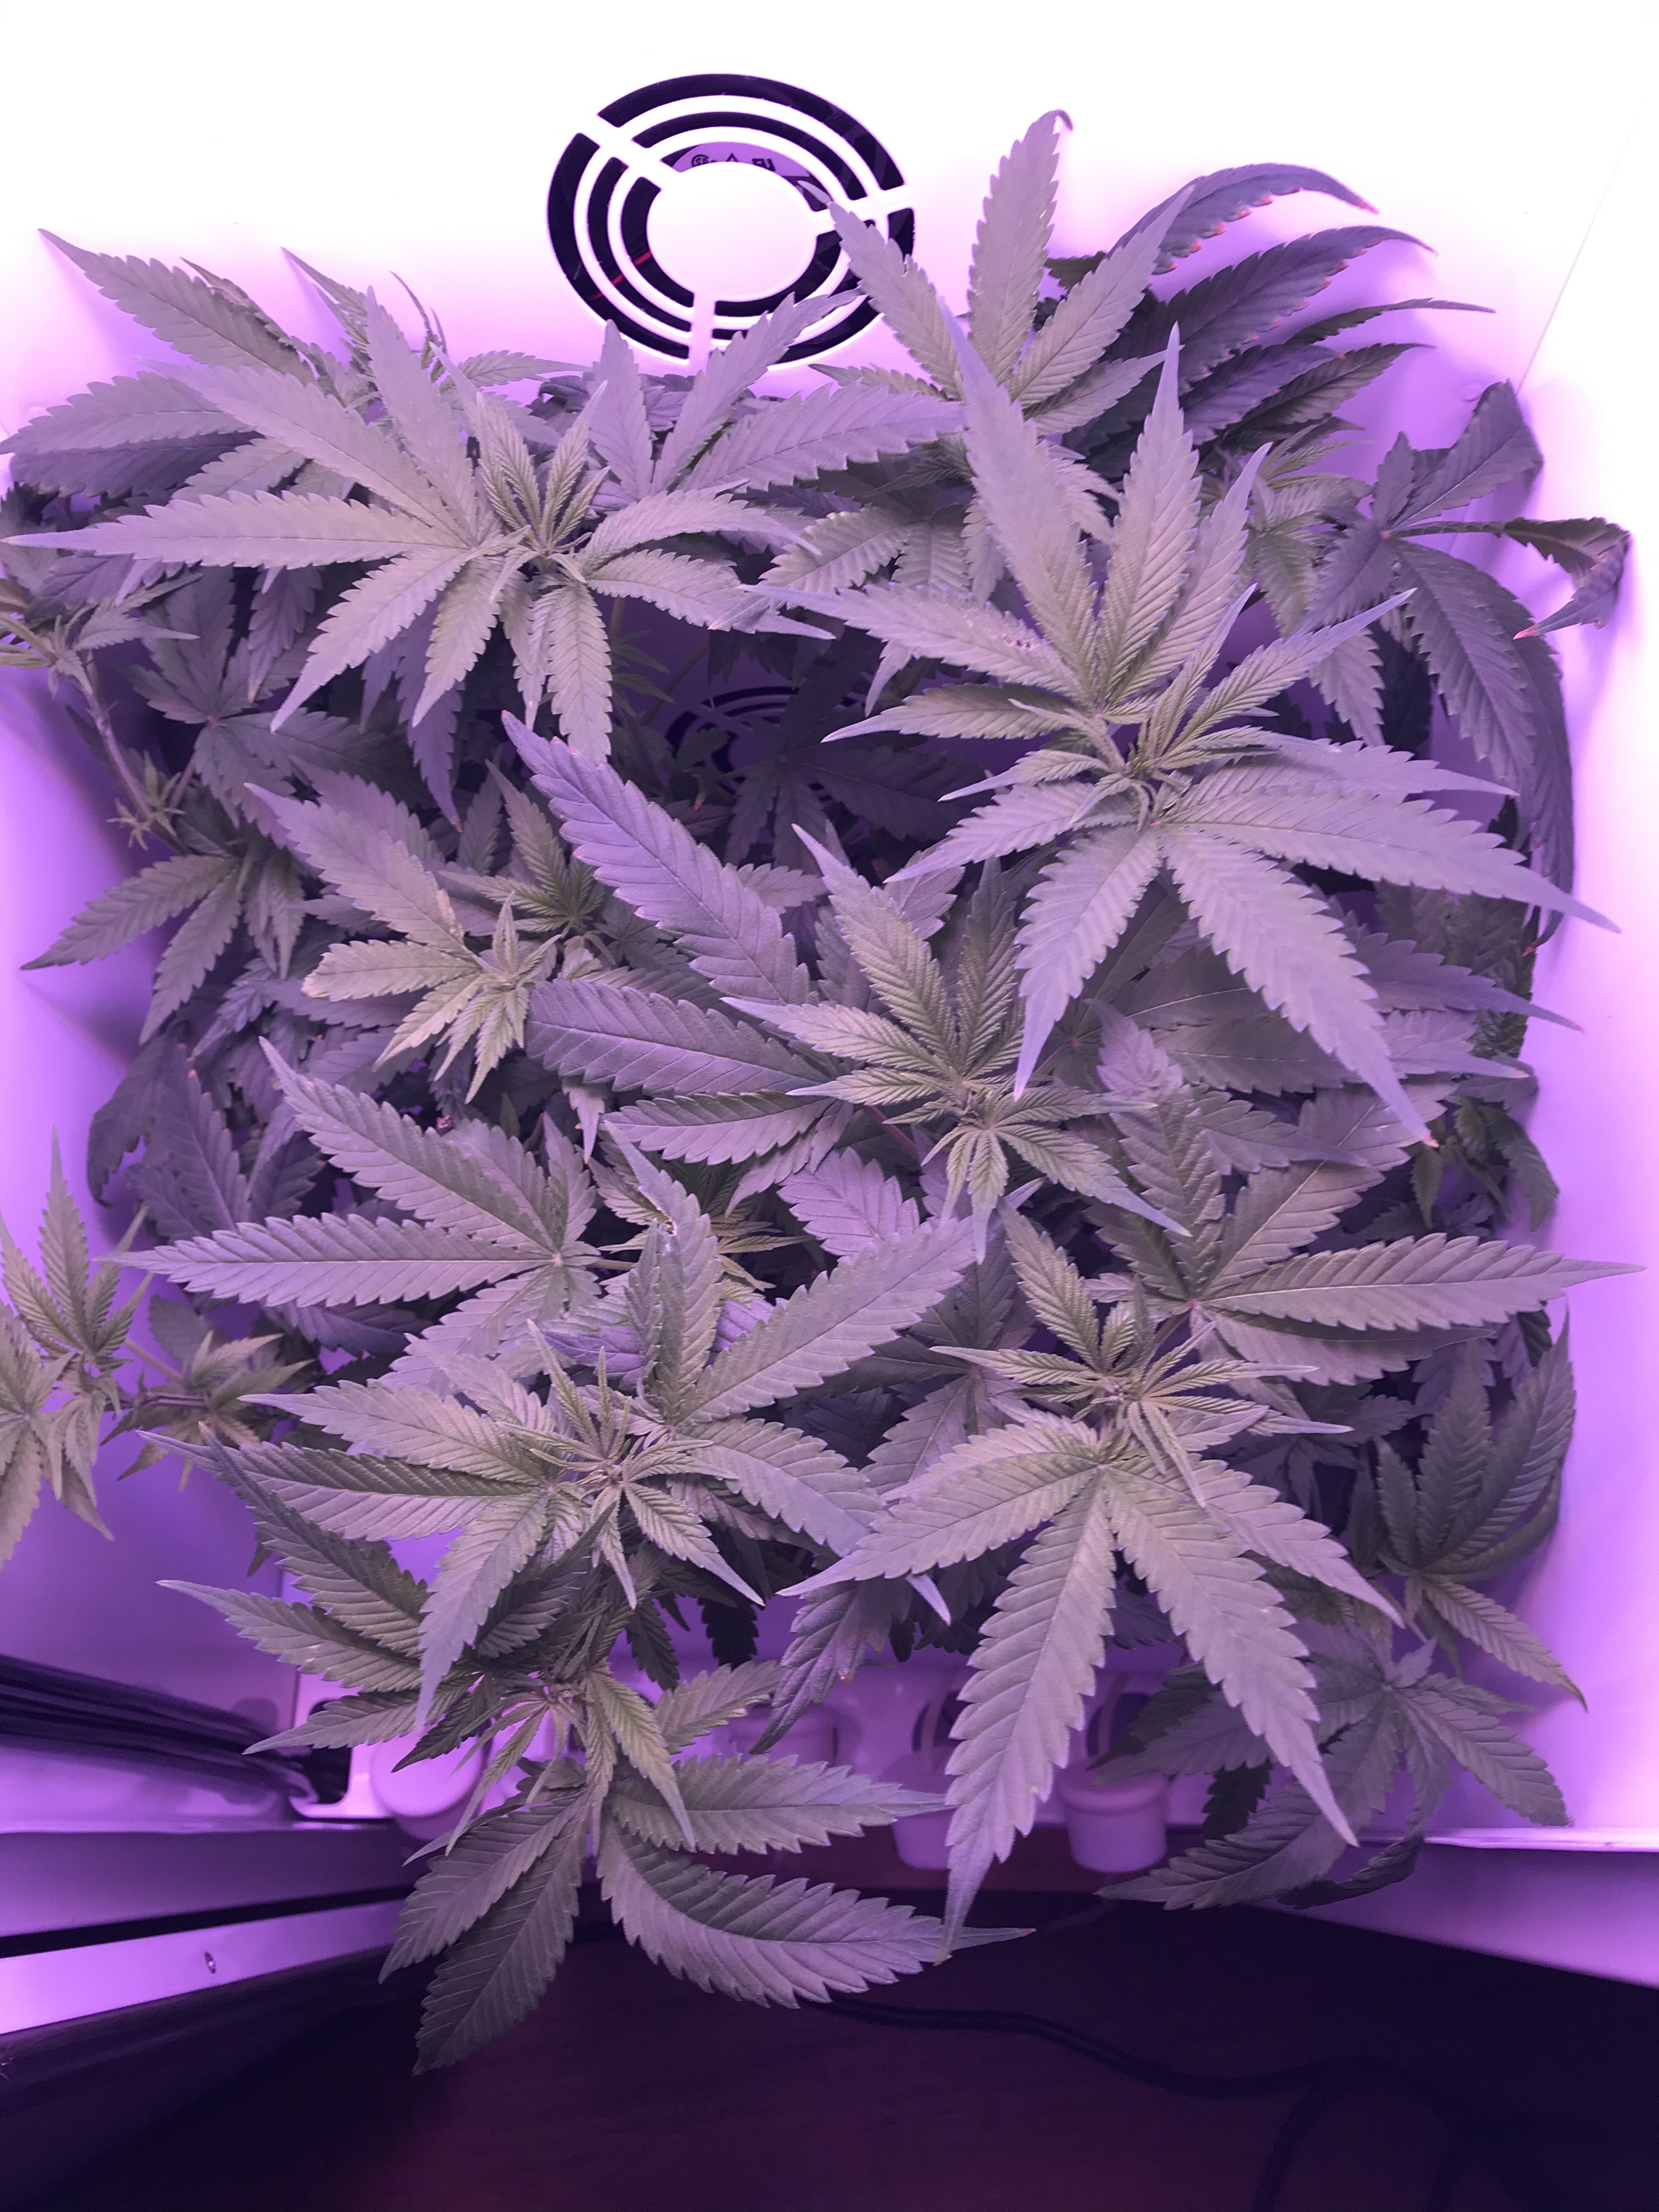
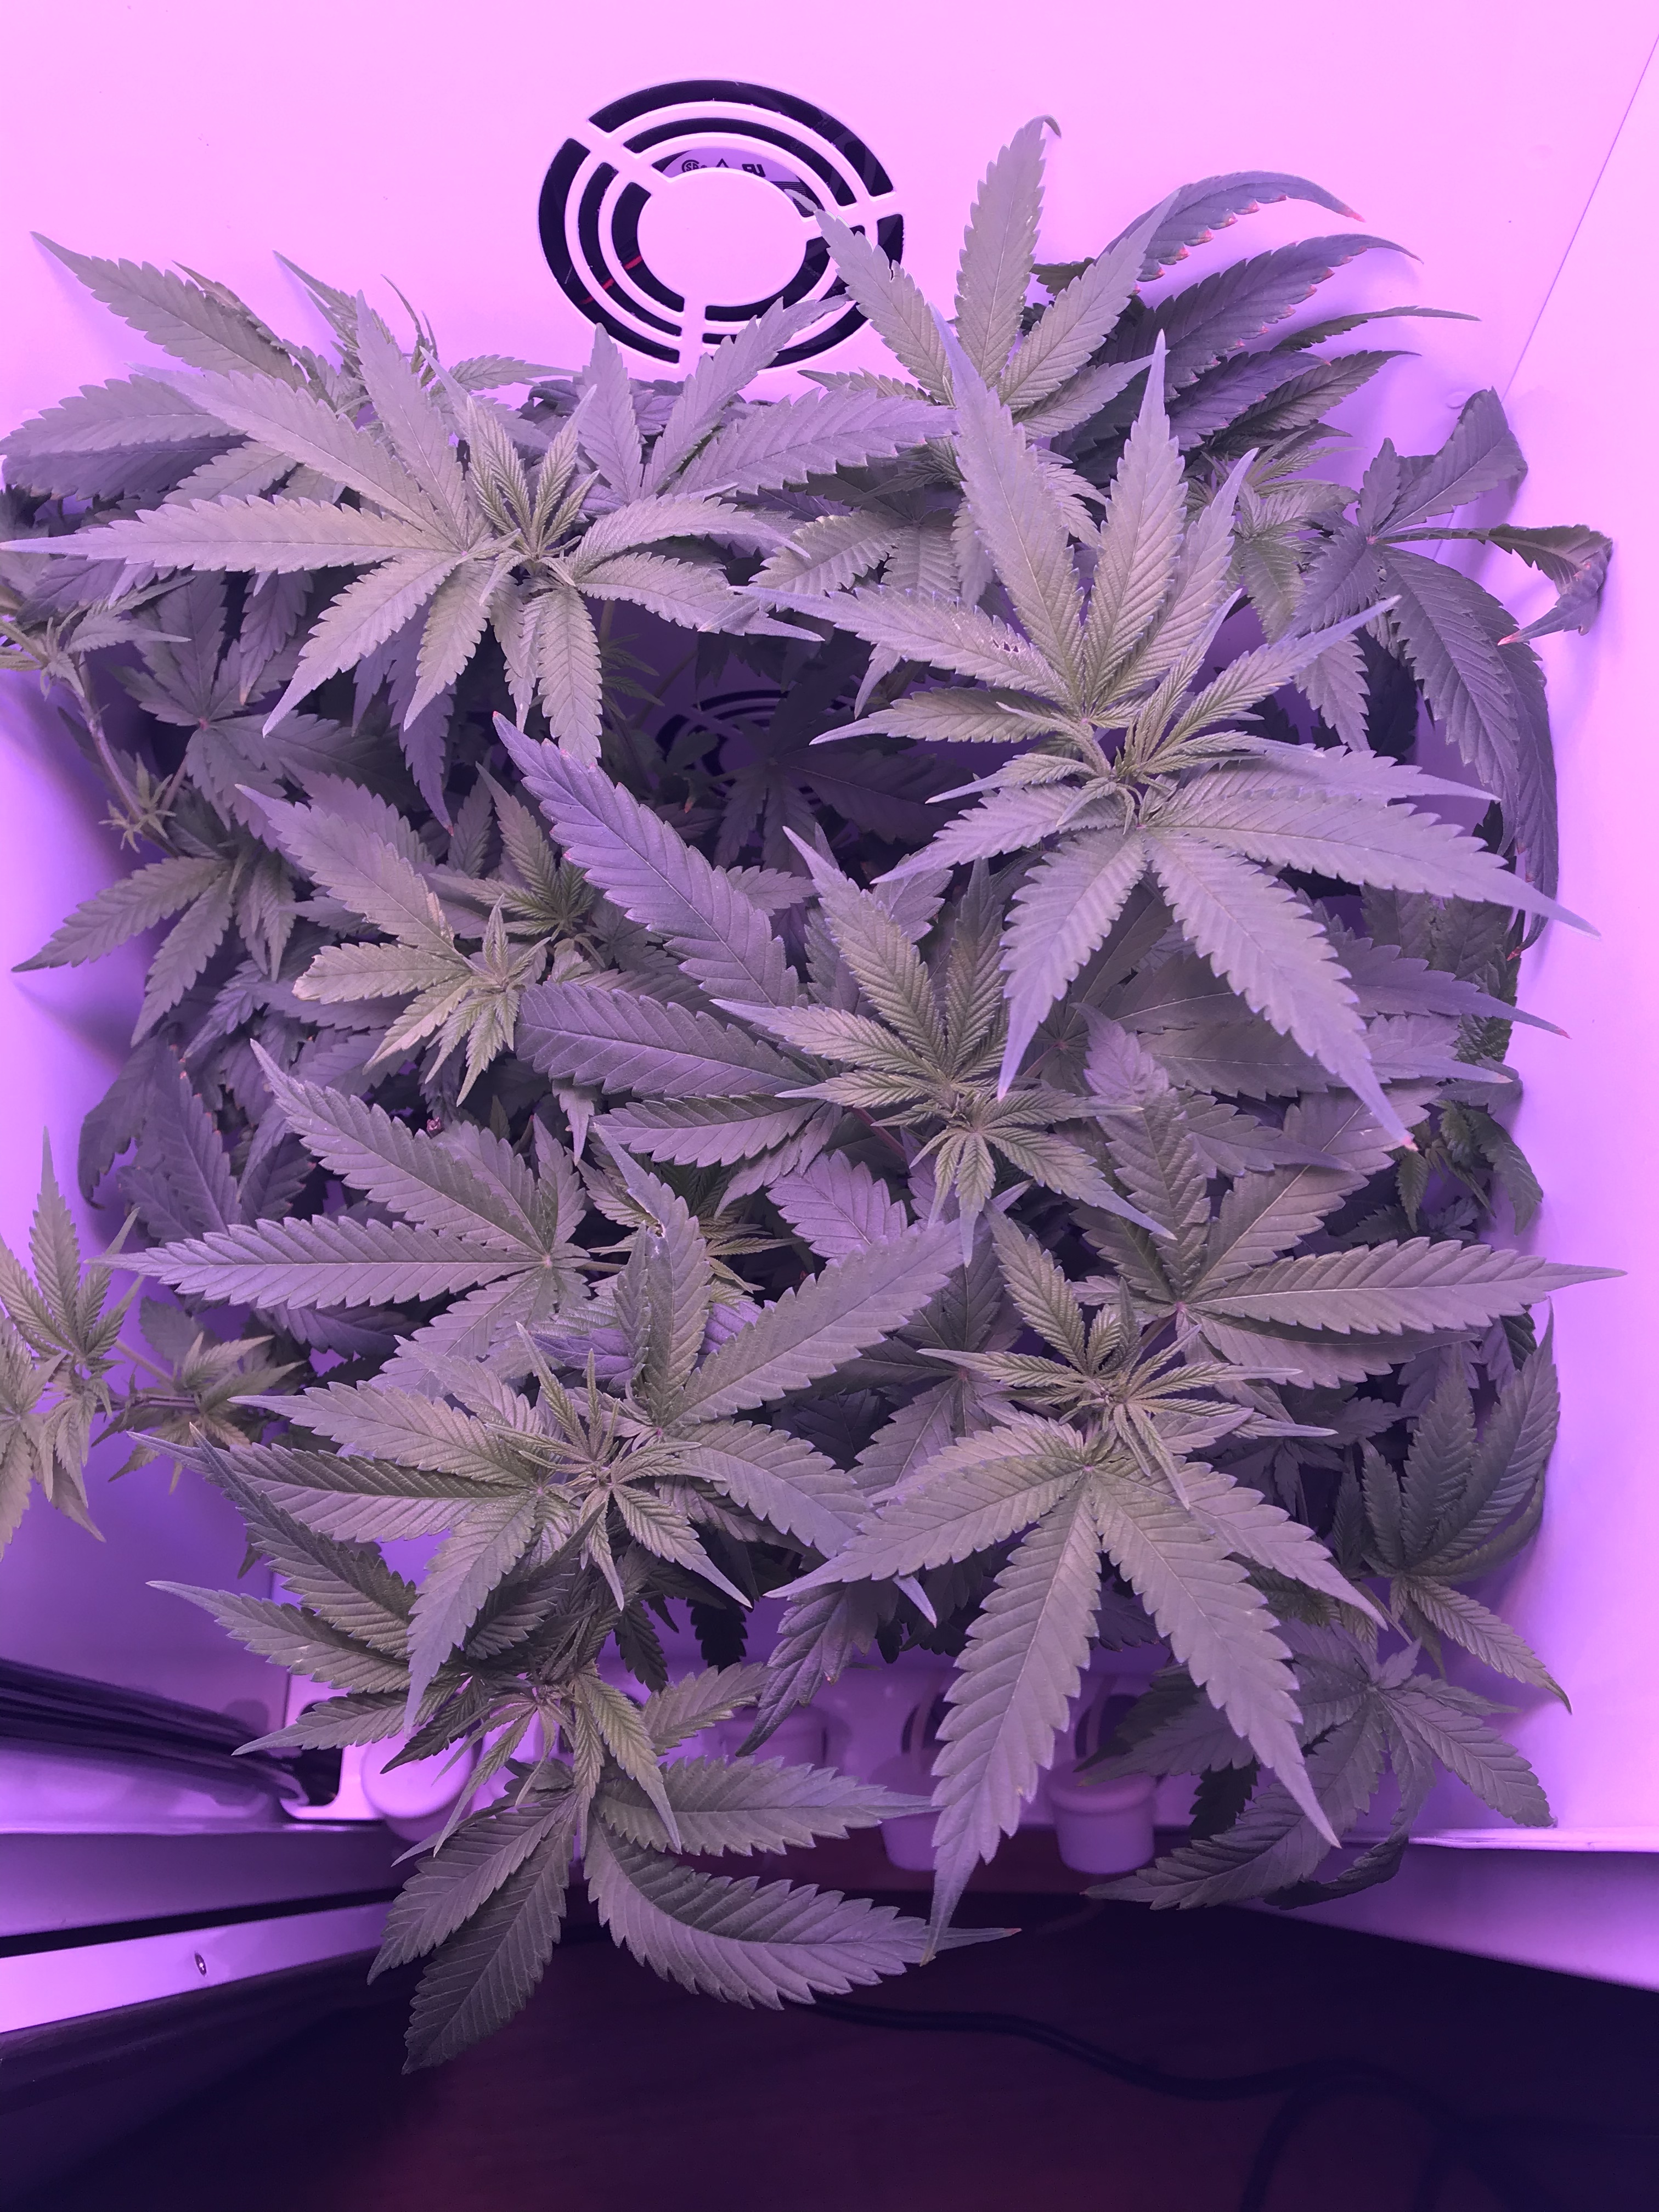
Here’s what she looks like from an overhead perspective:

Early Vegetation (Day 9/14)


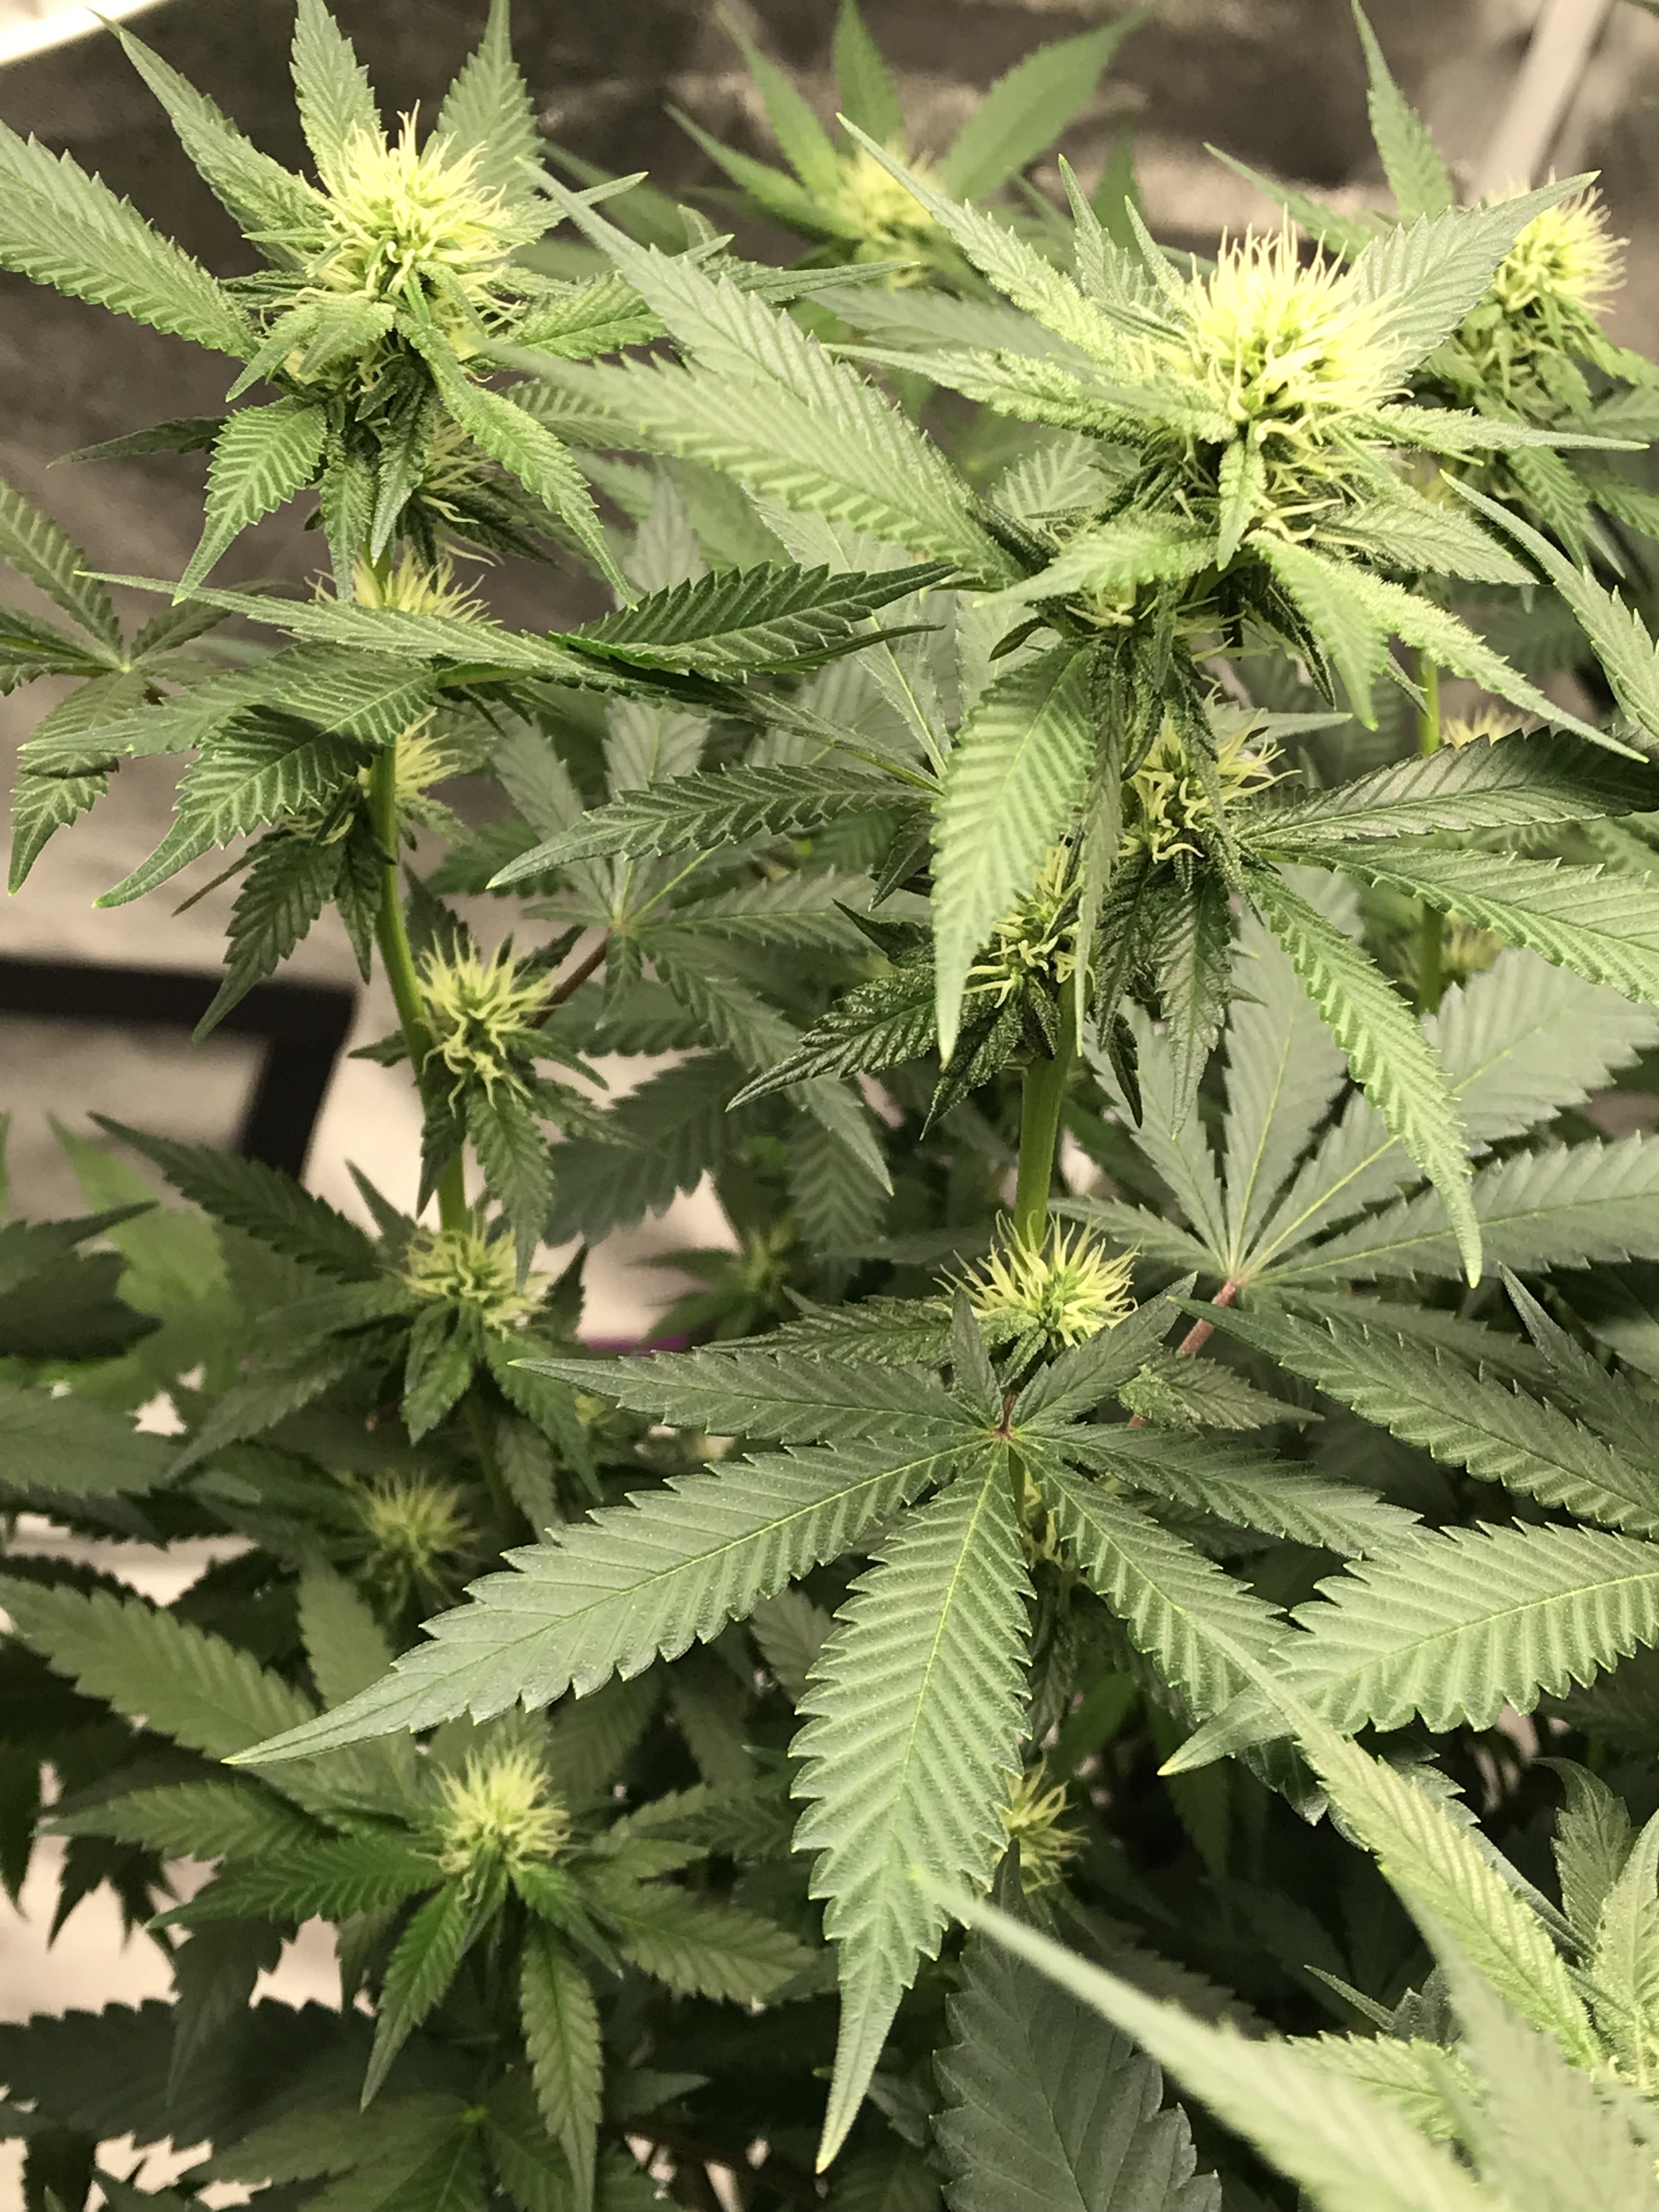
Spotting continues but still seeing some new development up top.

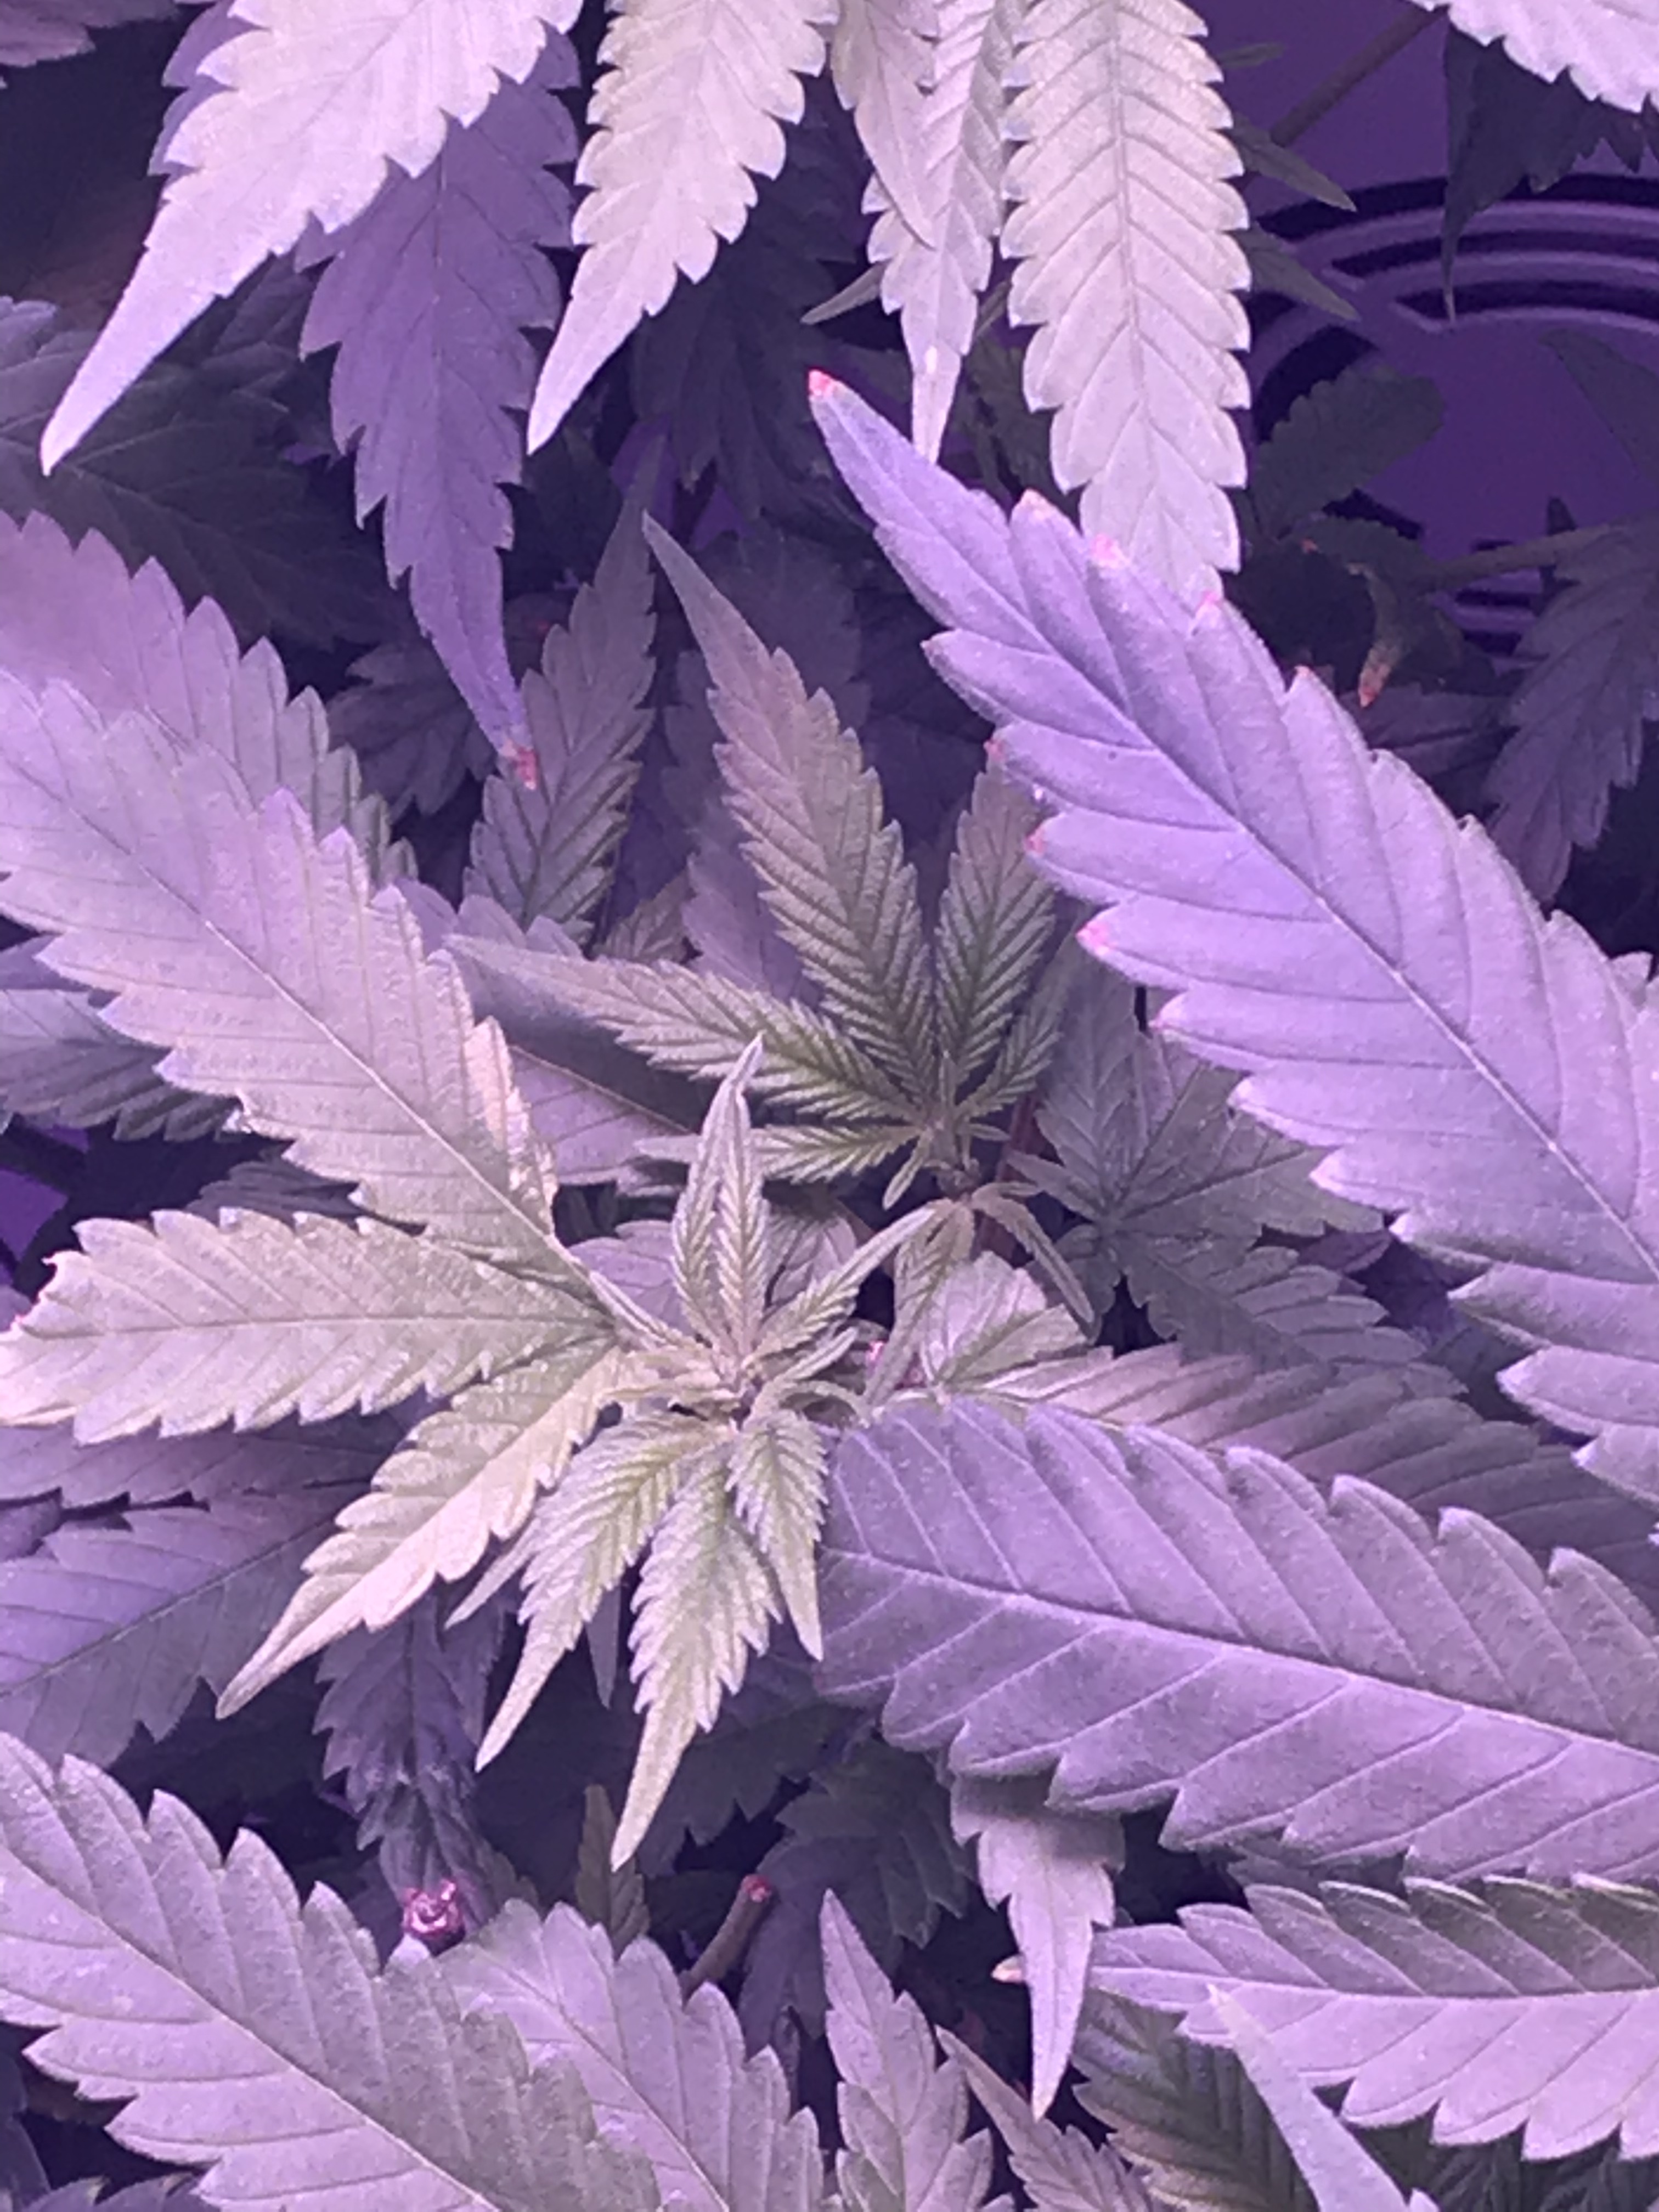
Some closer shots of the top:


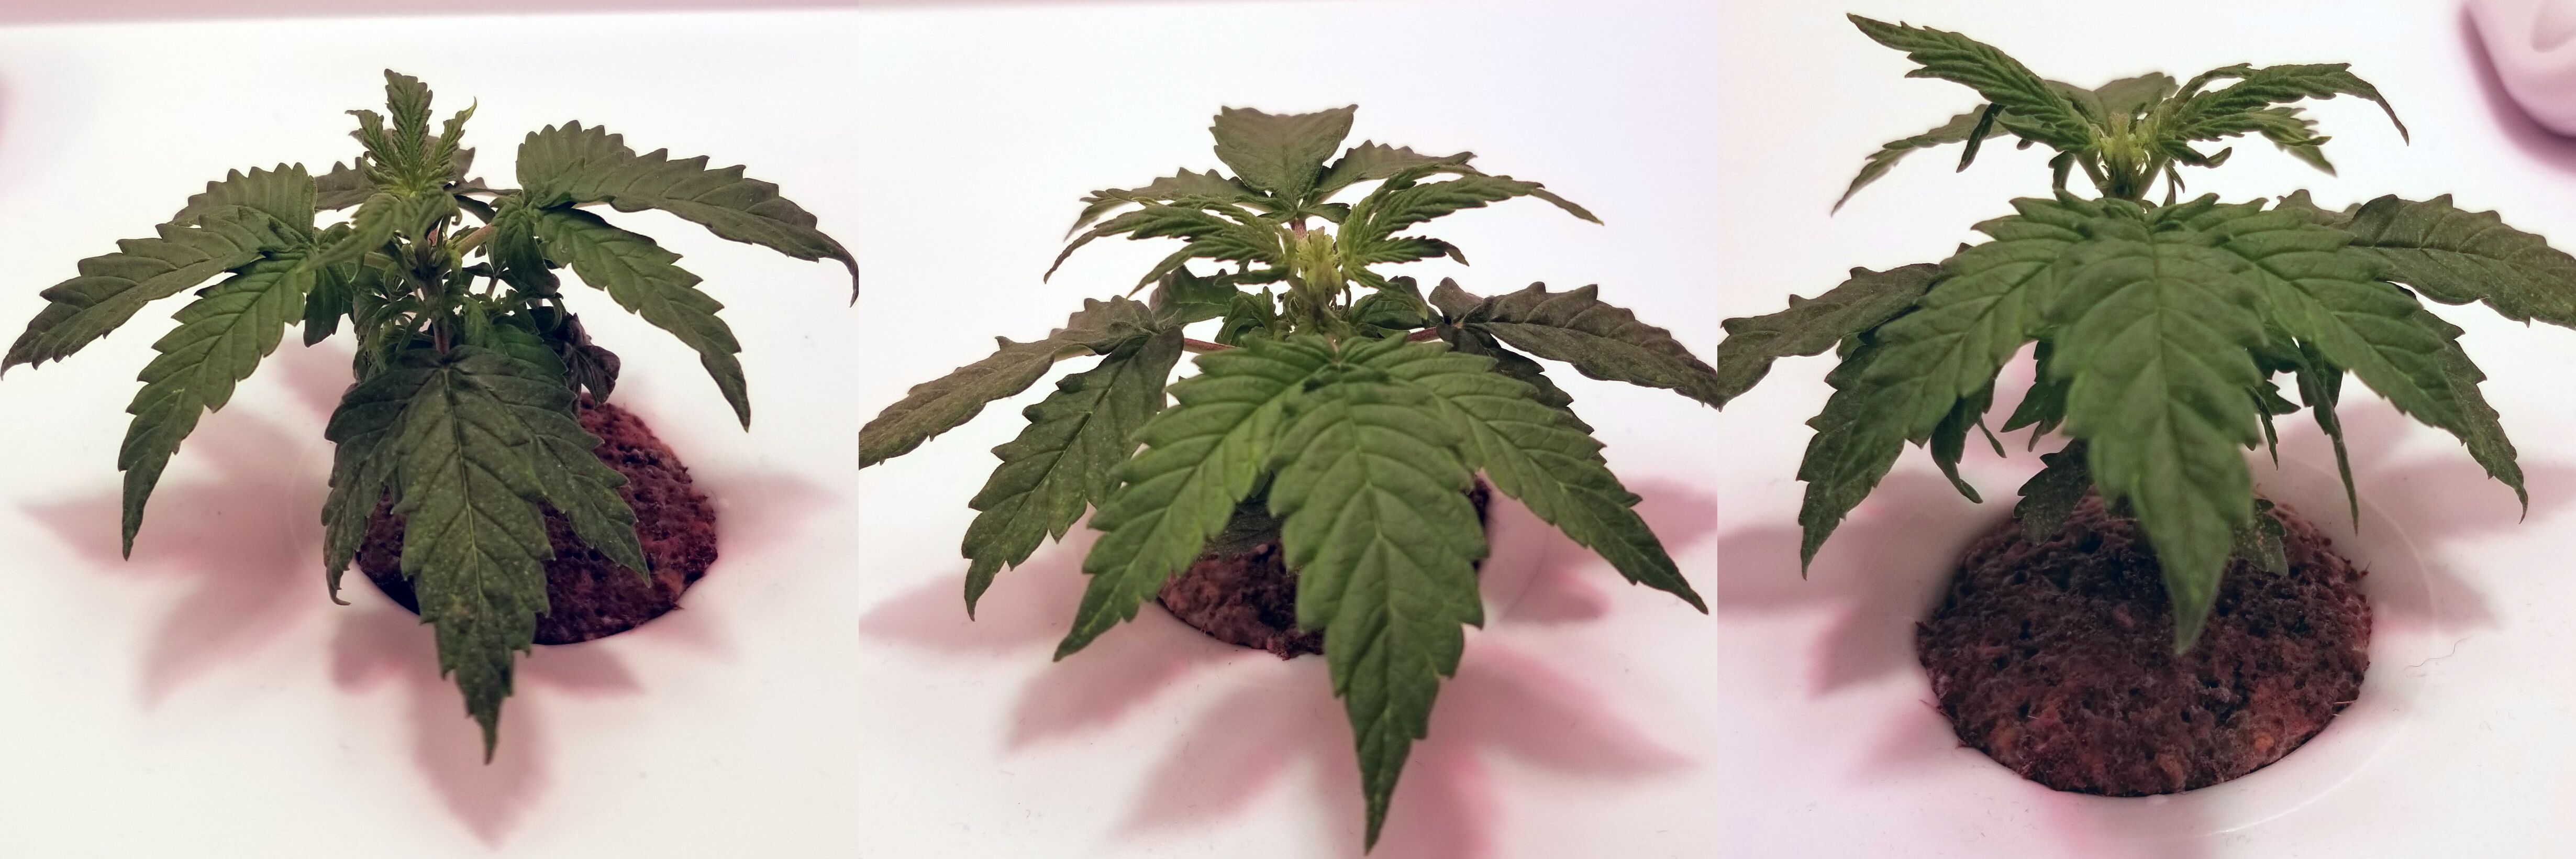
Early Vegetation (Day 10/14)


Blemishes aside, the growth up top looks good!

Shots from above, can really see how far that top growth stretched out since yesterday:


Update regarding the spotting: After looking at the data it appears as though EC levels are at least partially to blame for the condition she’s in. Earlier on in the grow my unit was having overheat issues and to this day it’s been an everyday battle keeping the internal temperature at 25C or lower. What happened is in-between the previous drain/fill and this last drain/fill the system was shut off for a (short) time when it would’ve been feeding the plants so it ran a week without the intended nutrient/EC level. After the last drain/fill it fed successfully and the EC levels are looking normal again now.

So, that’s likely why there’s a sudden burst in growth again as well as a slowdown in growth last week.

Early Vegetation (Day 11/14)


Action up top and the 2nd set is also perking up, it’s not over yet!

New growth is late but doubled in size overnight:

Early Vegetation (Day 12/14)


The spots aren’t getting any worse and she’s starting to reach further up again.

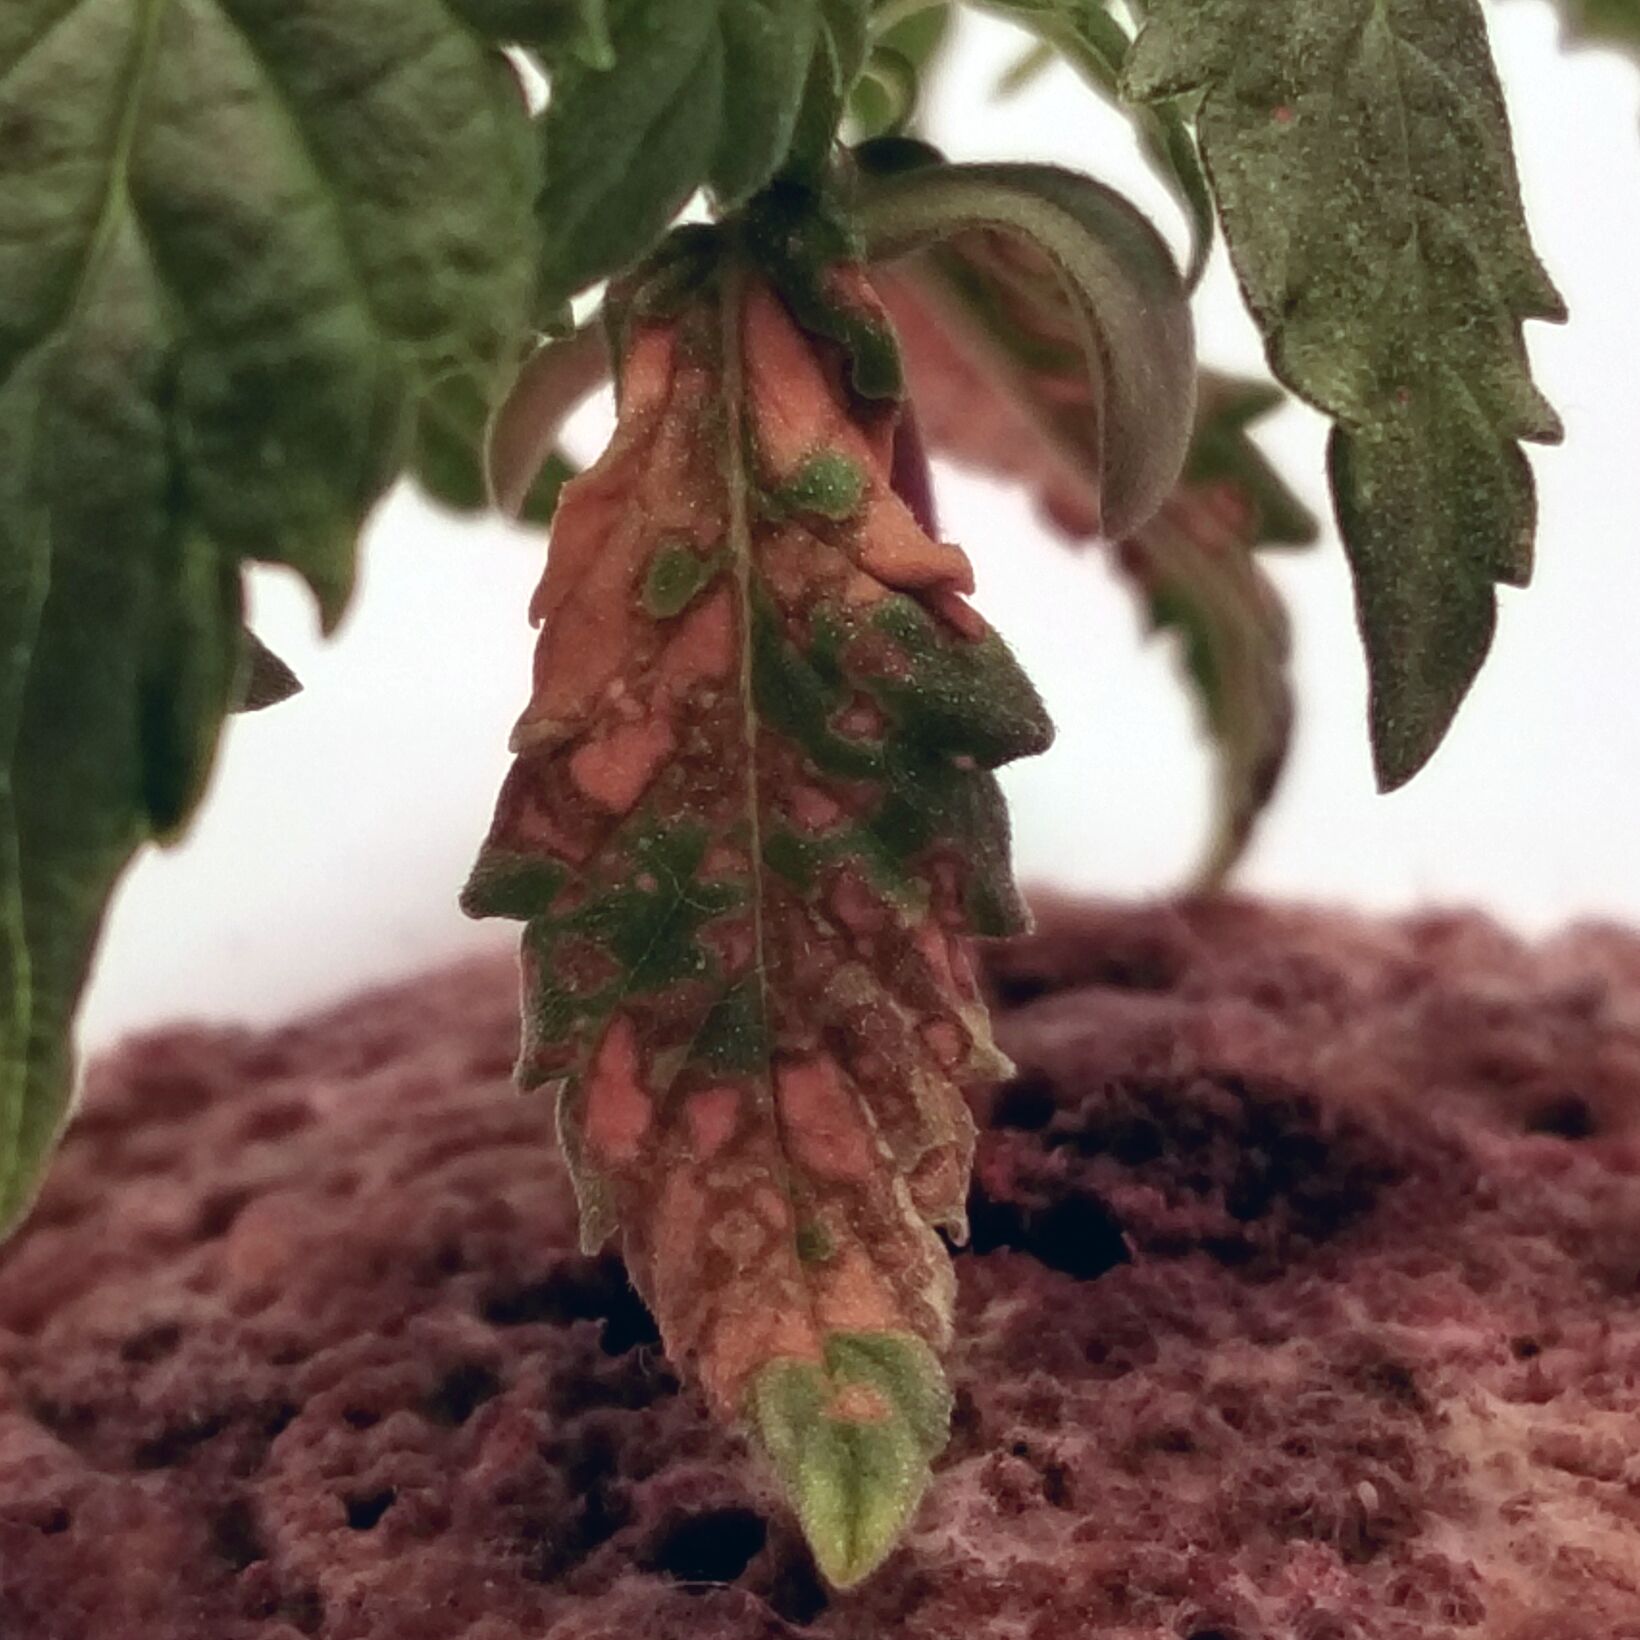
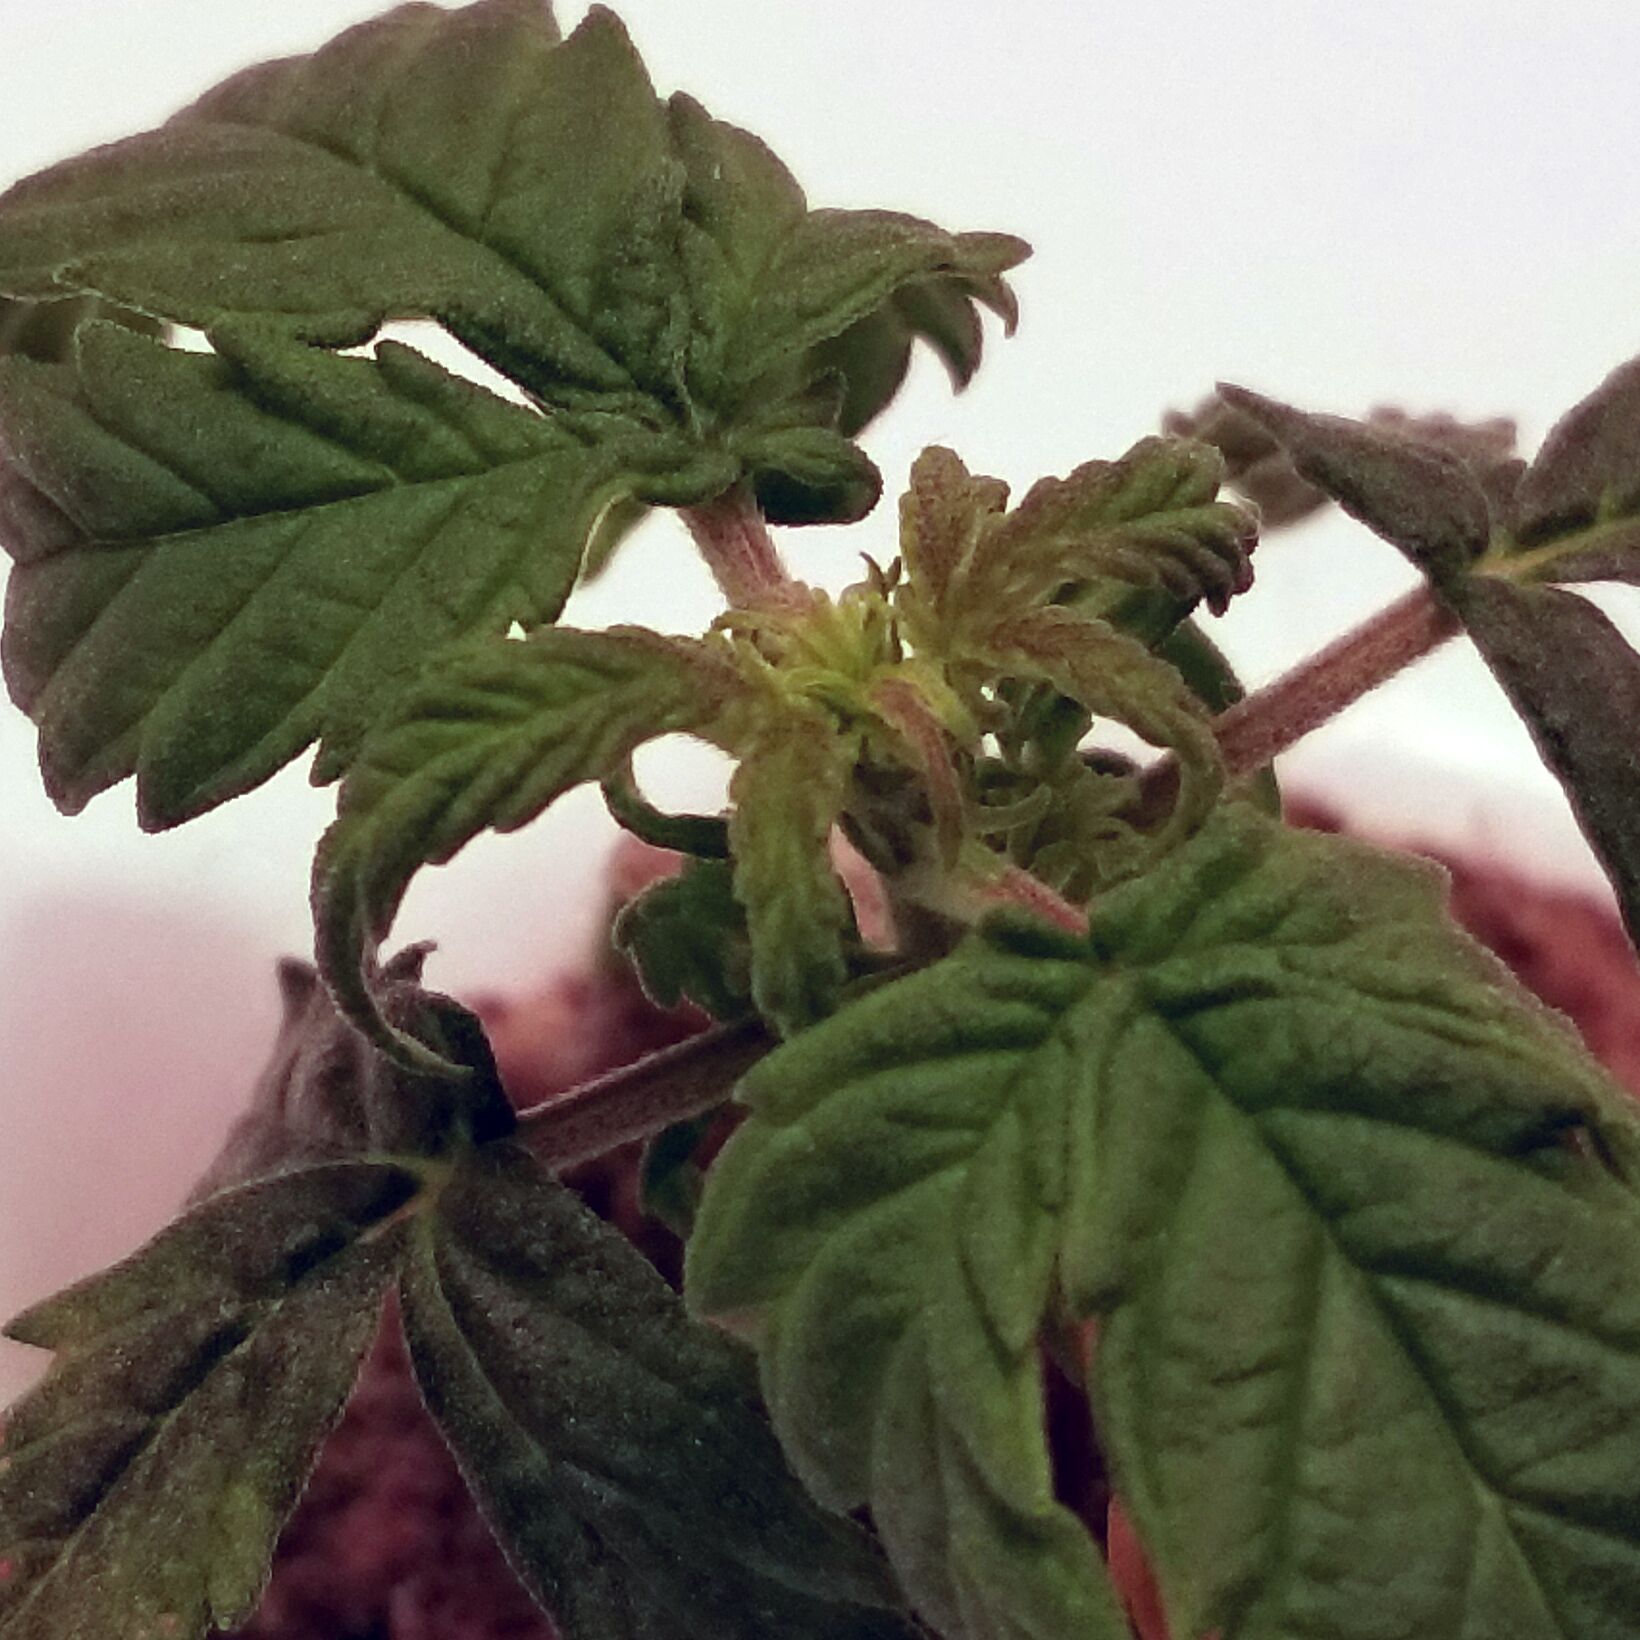
Early Vegetation (Day 13/14)


The new leaves are already bigger than any others. Doing much better now!

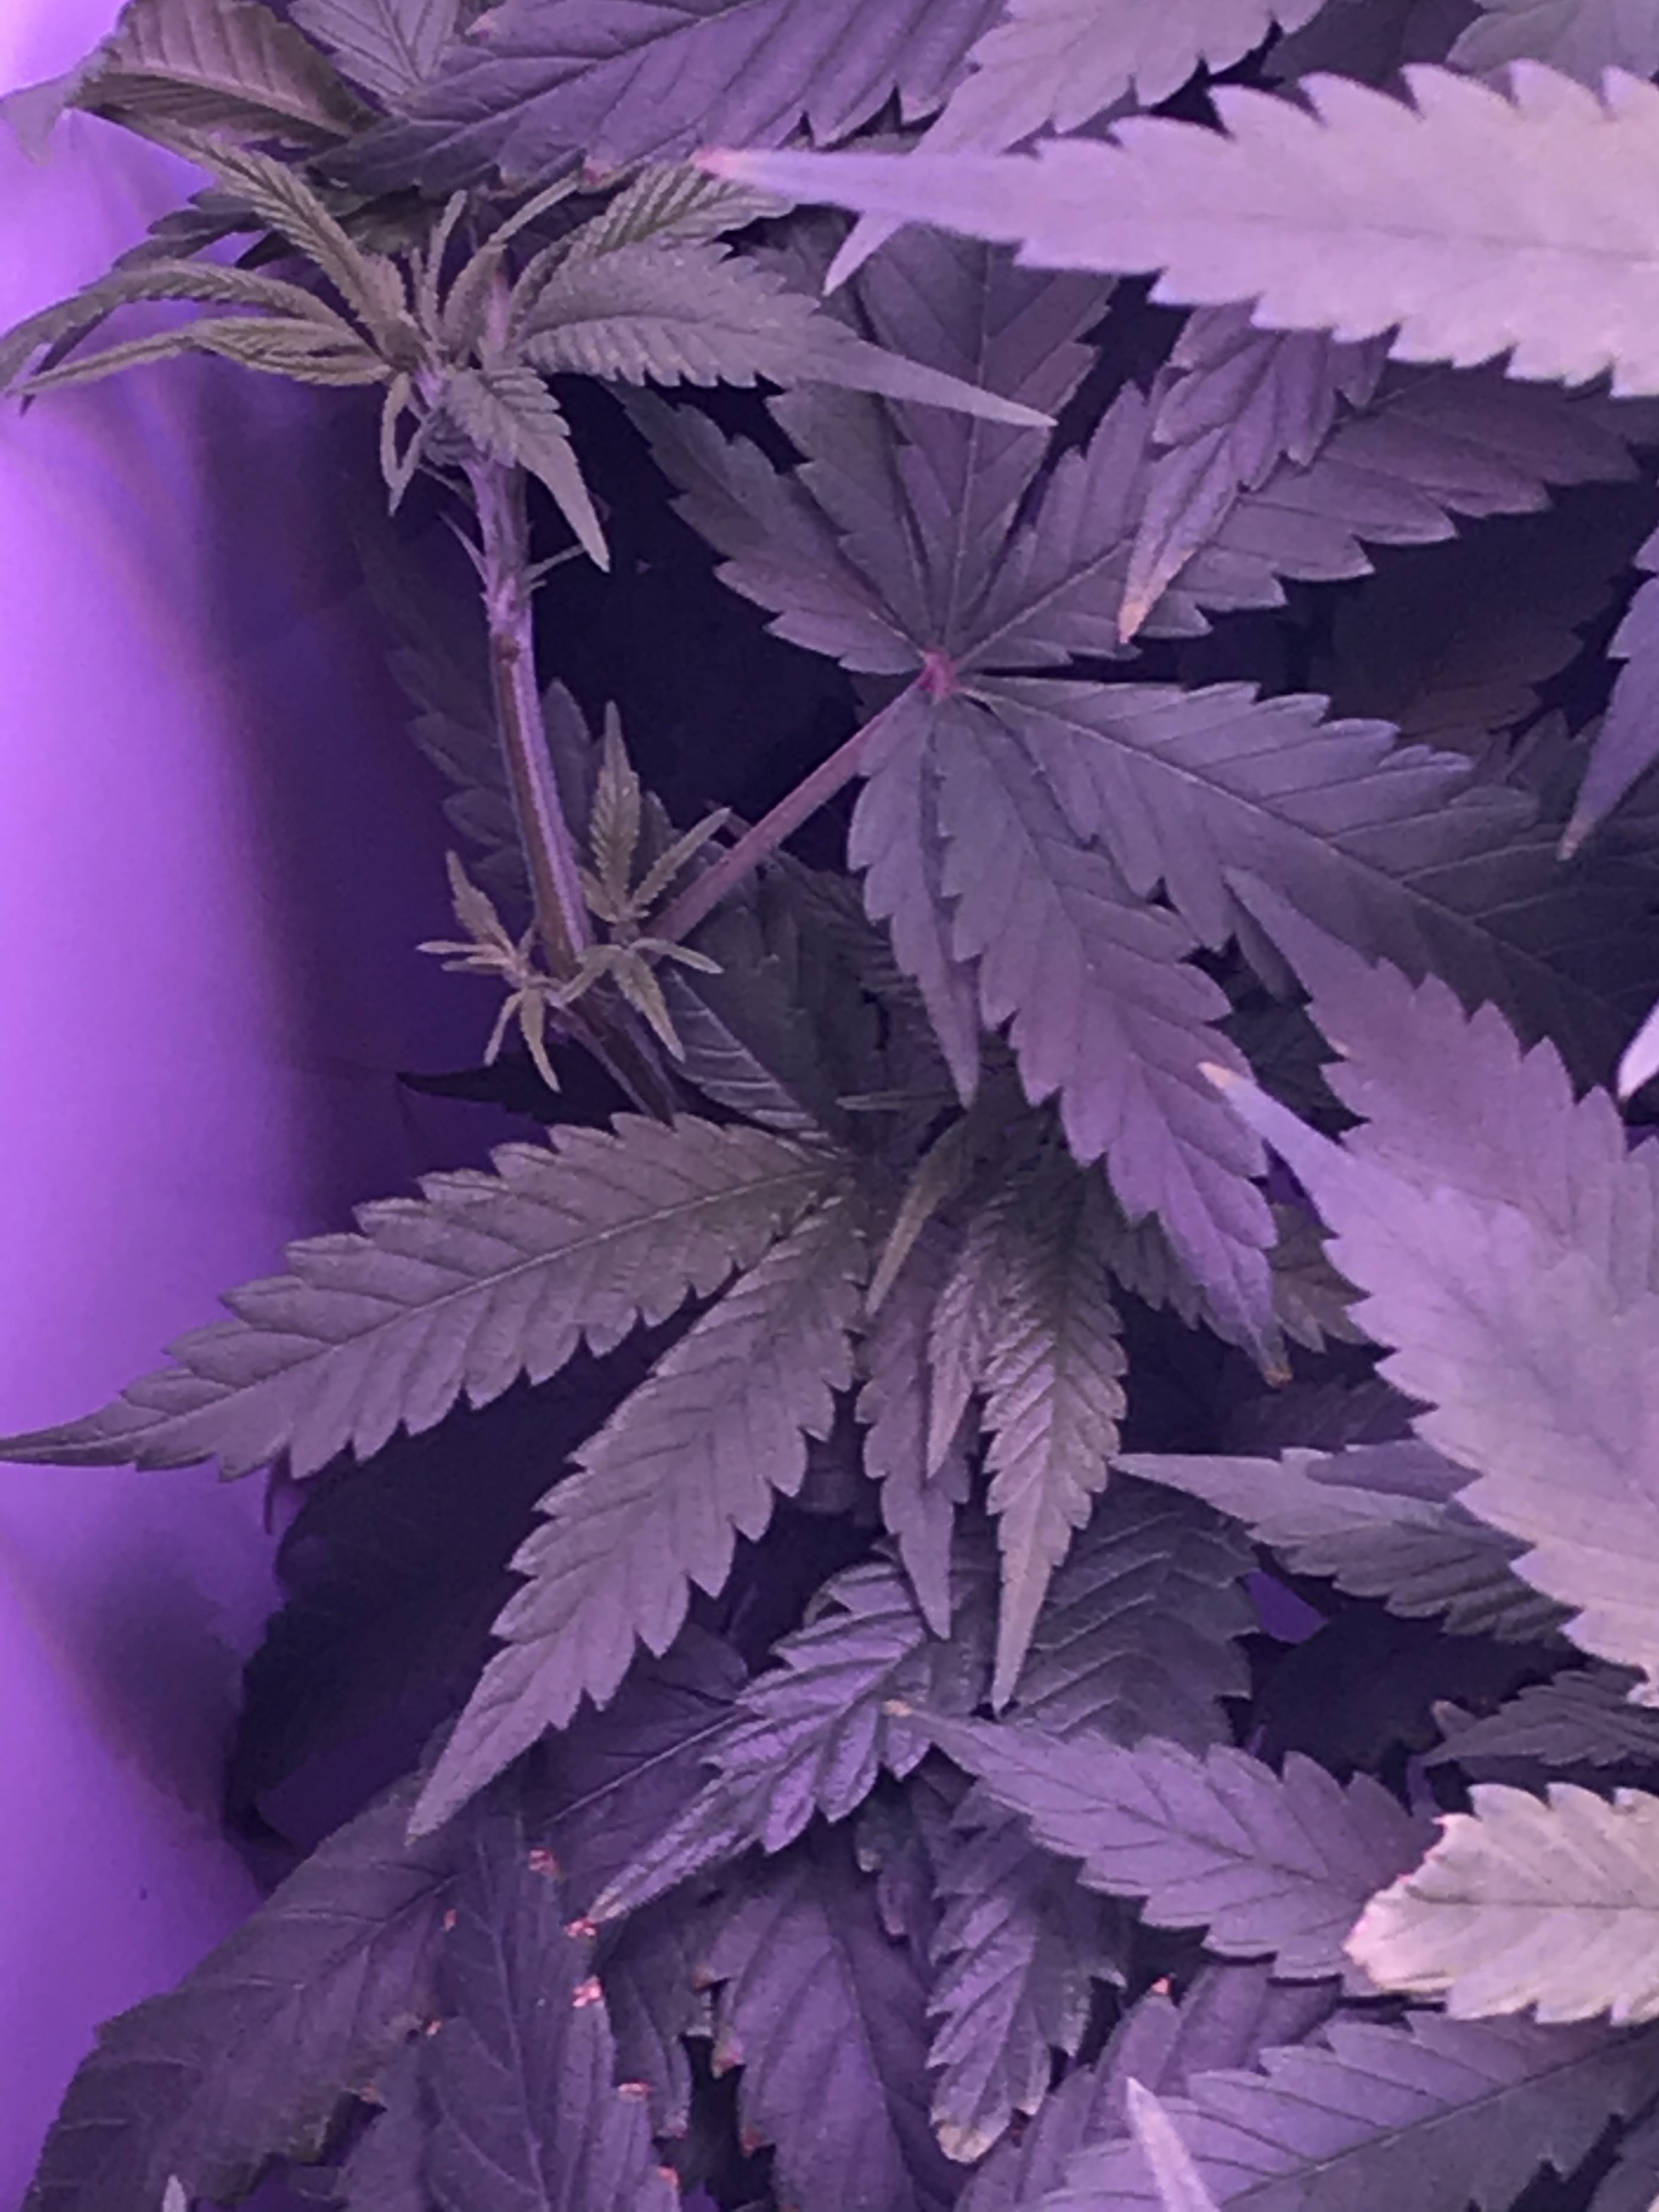
Some close up shots of the wounded areas (soon to be trimmed):

There’s still more seen happening up top, starting to pick up the pace again:

Early Vegetation (Day 14/14)


Noticing some fungus or decay starting on the burnt sections – the white marks on the closest edge in view of the bottom-left-most fan leaf. The leaf in front makes it trickier to see as they seem to blend into one another. It’s time to trim those dying sections off before that gets any worse. Otherwise, things are still looking better. Moving into transition tomorrow and will likely need to add an additional week before flowering; we’ll see!

Here’s what was trimmed off:

Transition (Day 1/14)


Looking better without the ugly spots.

There’s more action at the nodes, too:

Transition (Day 2/14)


Some new spots developing on the older branches, especially the leaves that were trimmed earlier. They’ll probably need to go soon but have been hoping she’d stretch out a bit first.

Transition (Day 3/14)


Stem is getting noticeably thicker and still growing but those spots are just asking for the data to be checked.

Transition (Day 4/14)


Still growing. The bottom leaves got her this far but won’t last much longer. There has been a considerable increase in root growth over the past few days.

Transition (Day 5/14)


Lots of development around the nodes, each has new leaves sprouting but she’s not reaching very far yet. Water change today, too.

Transition (Day 6/14)

Surface area continues to increase steadily albeit slowly, she’s a bit of a dwarf at this point. Noticed some brown slime around the roots after a couple of particularly hot and humid days, will post pics of that separately. Added just over 6mL of hydroguard.

Transition (Day 7/14)

Two more sets of bottom leaves have started spotting. Roots were already cleaner 3 hrs after adding the hydroguard, but today are looking much better overall – a lot more are coming in.

This is after snipping the spotted sets:

Transition (Day 8/14)

Looking much better top and bottom.

Transition (Day 9/14)

Not much time to inspect today but still seeing some positive change.

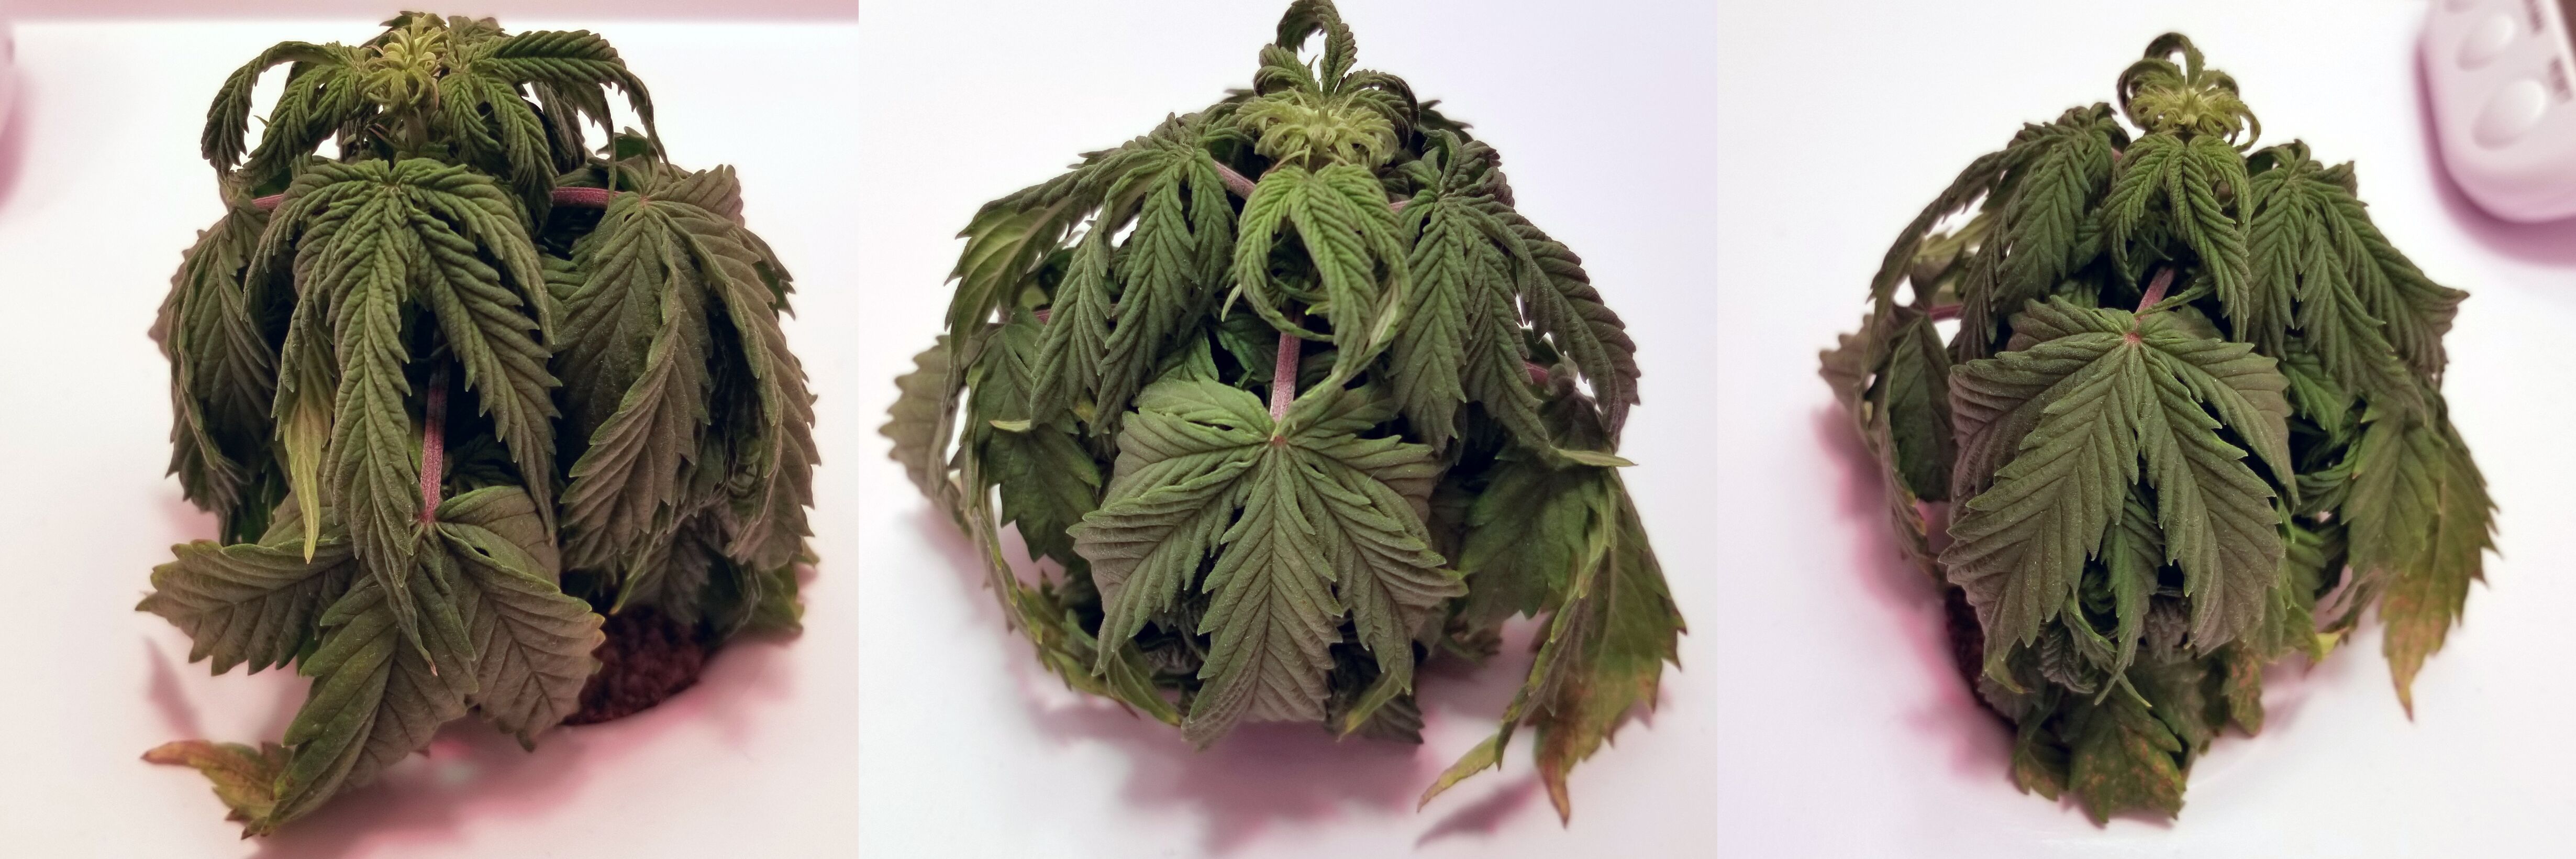
Transition (Day 12/14)

Was away for a few days, she must’ve missed me looks a bit sad. It’s water change time, hoping that helps kick her out of this funk. A bit of vertical growth would be nice!

Transition (Day 13/14)

The water was changed and hydroguard added again. She’s still growing but not perking up.

Pic of roots after the water change:

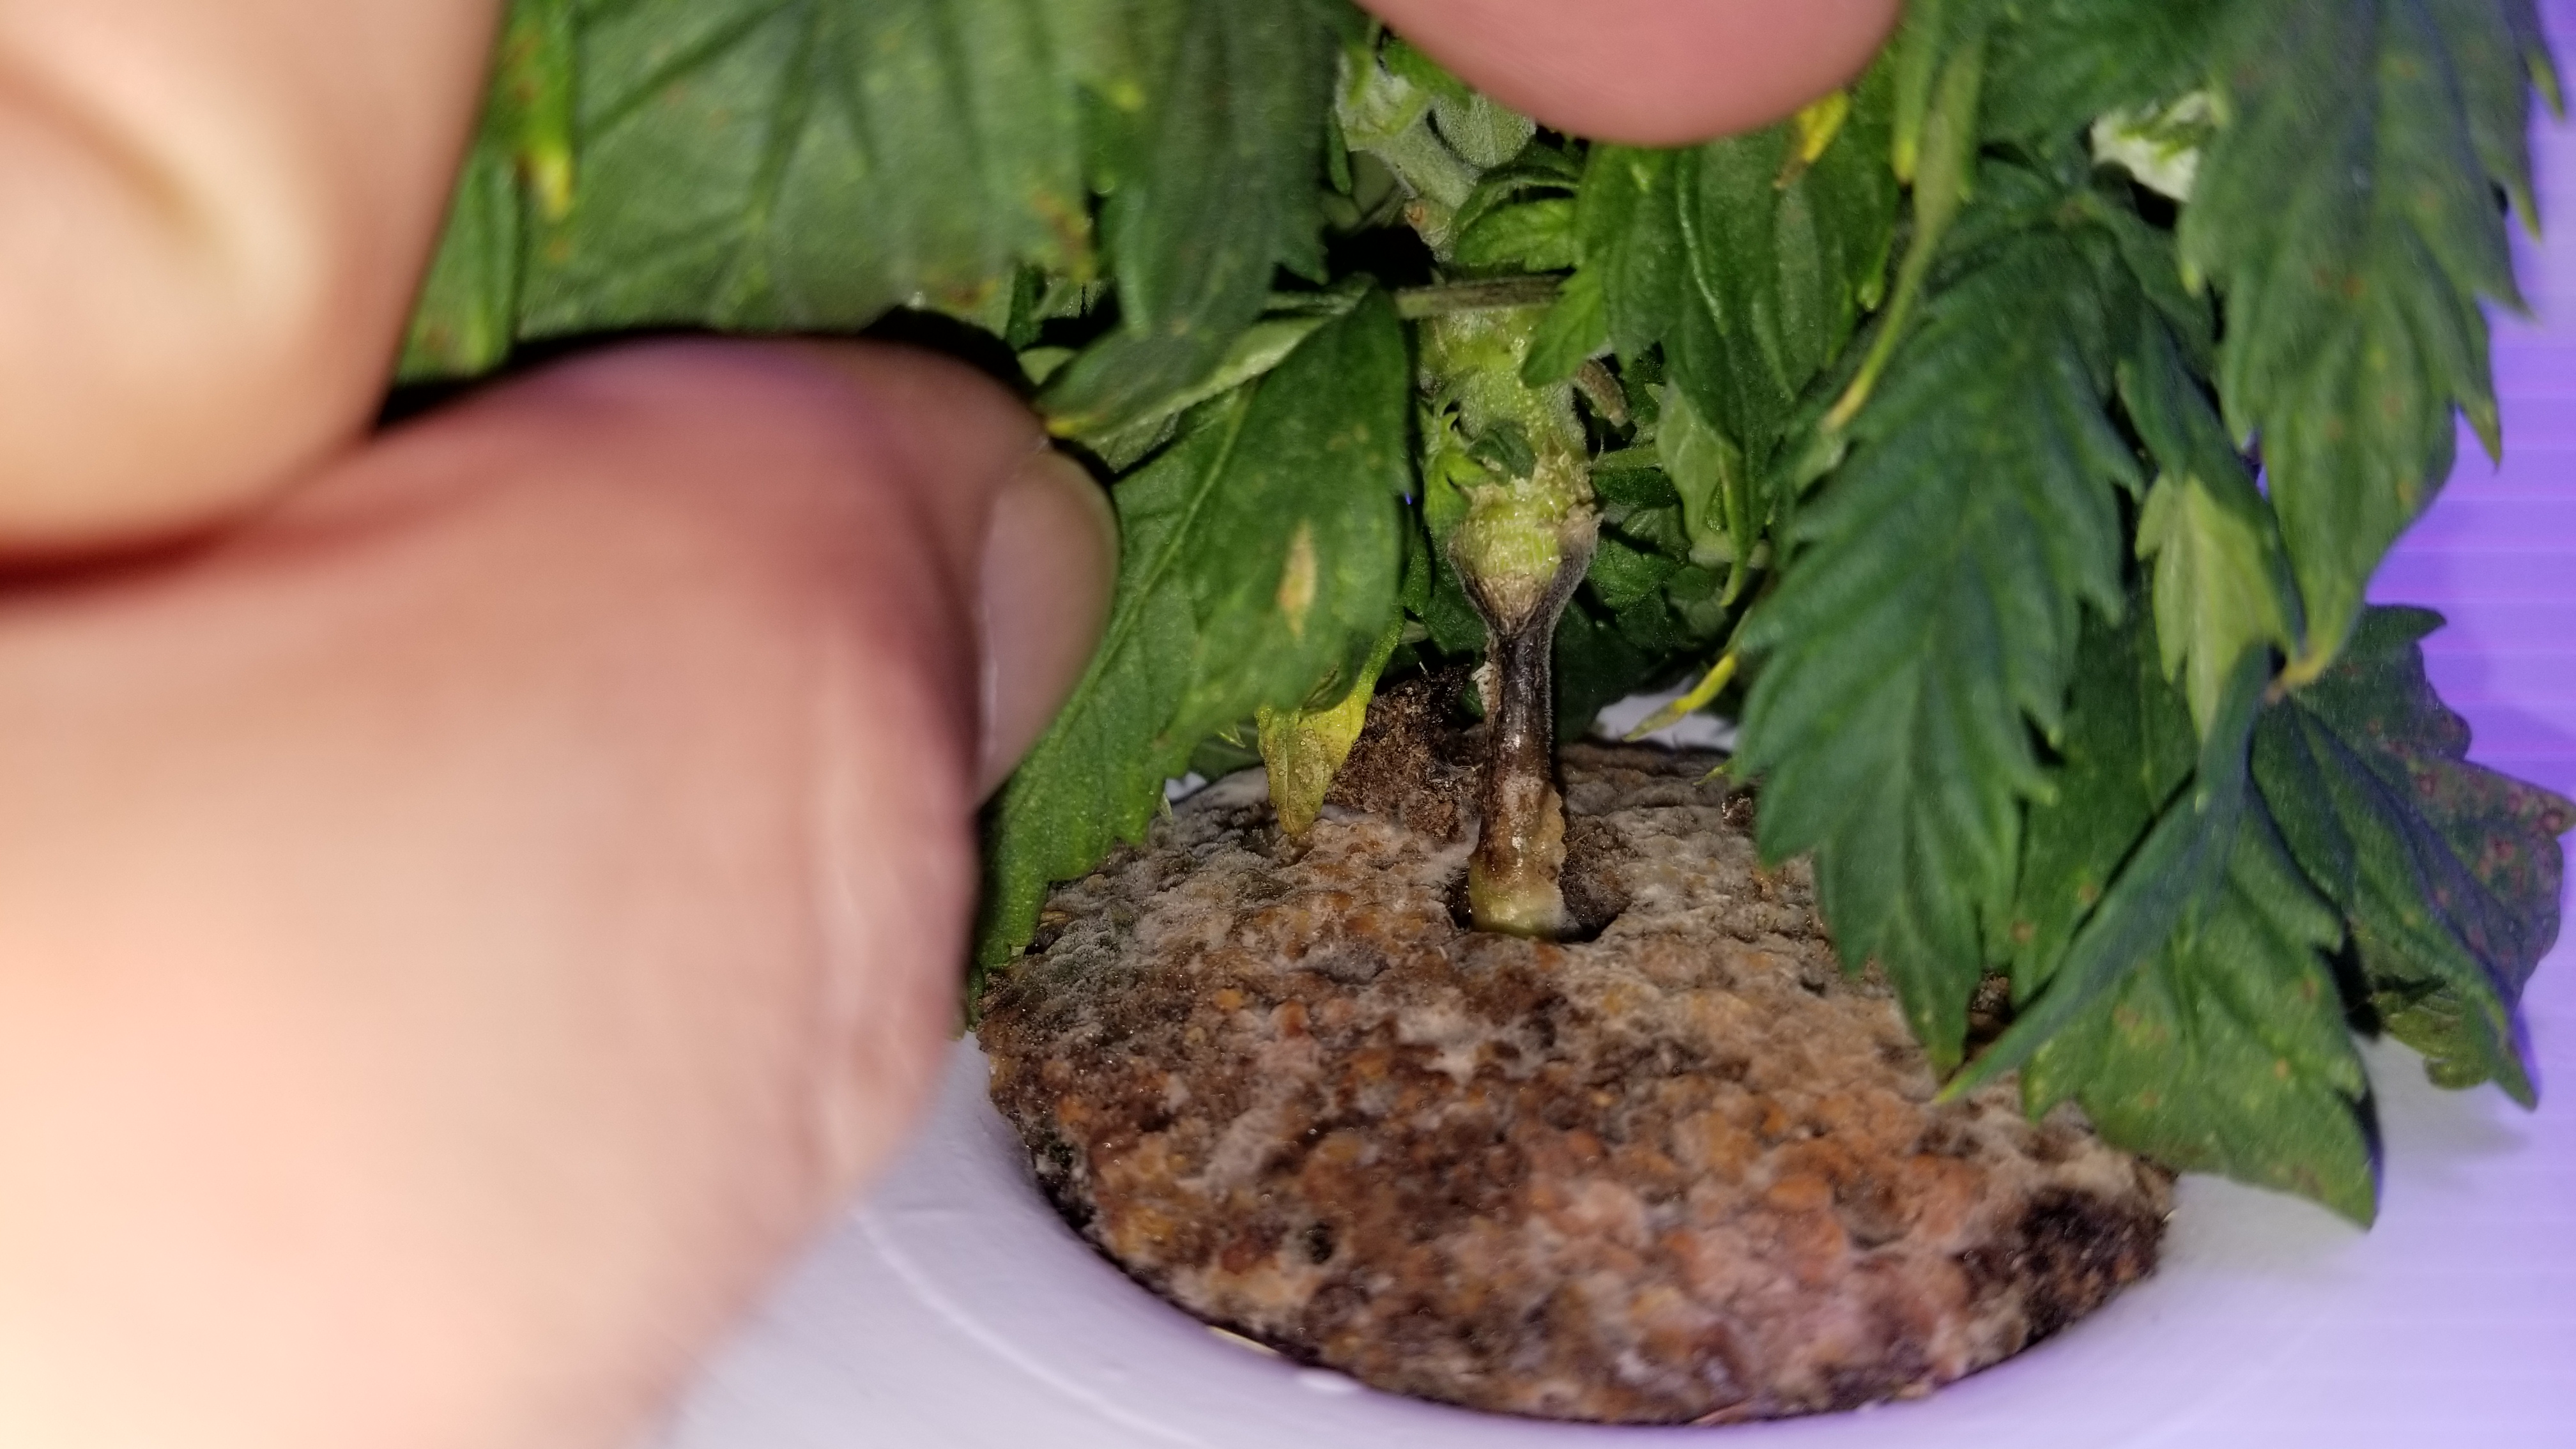
Transition (Day 17/21)

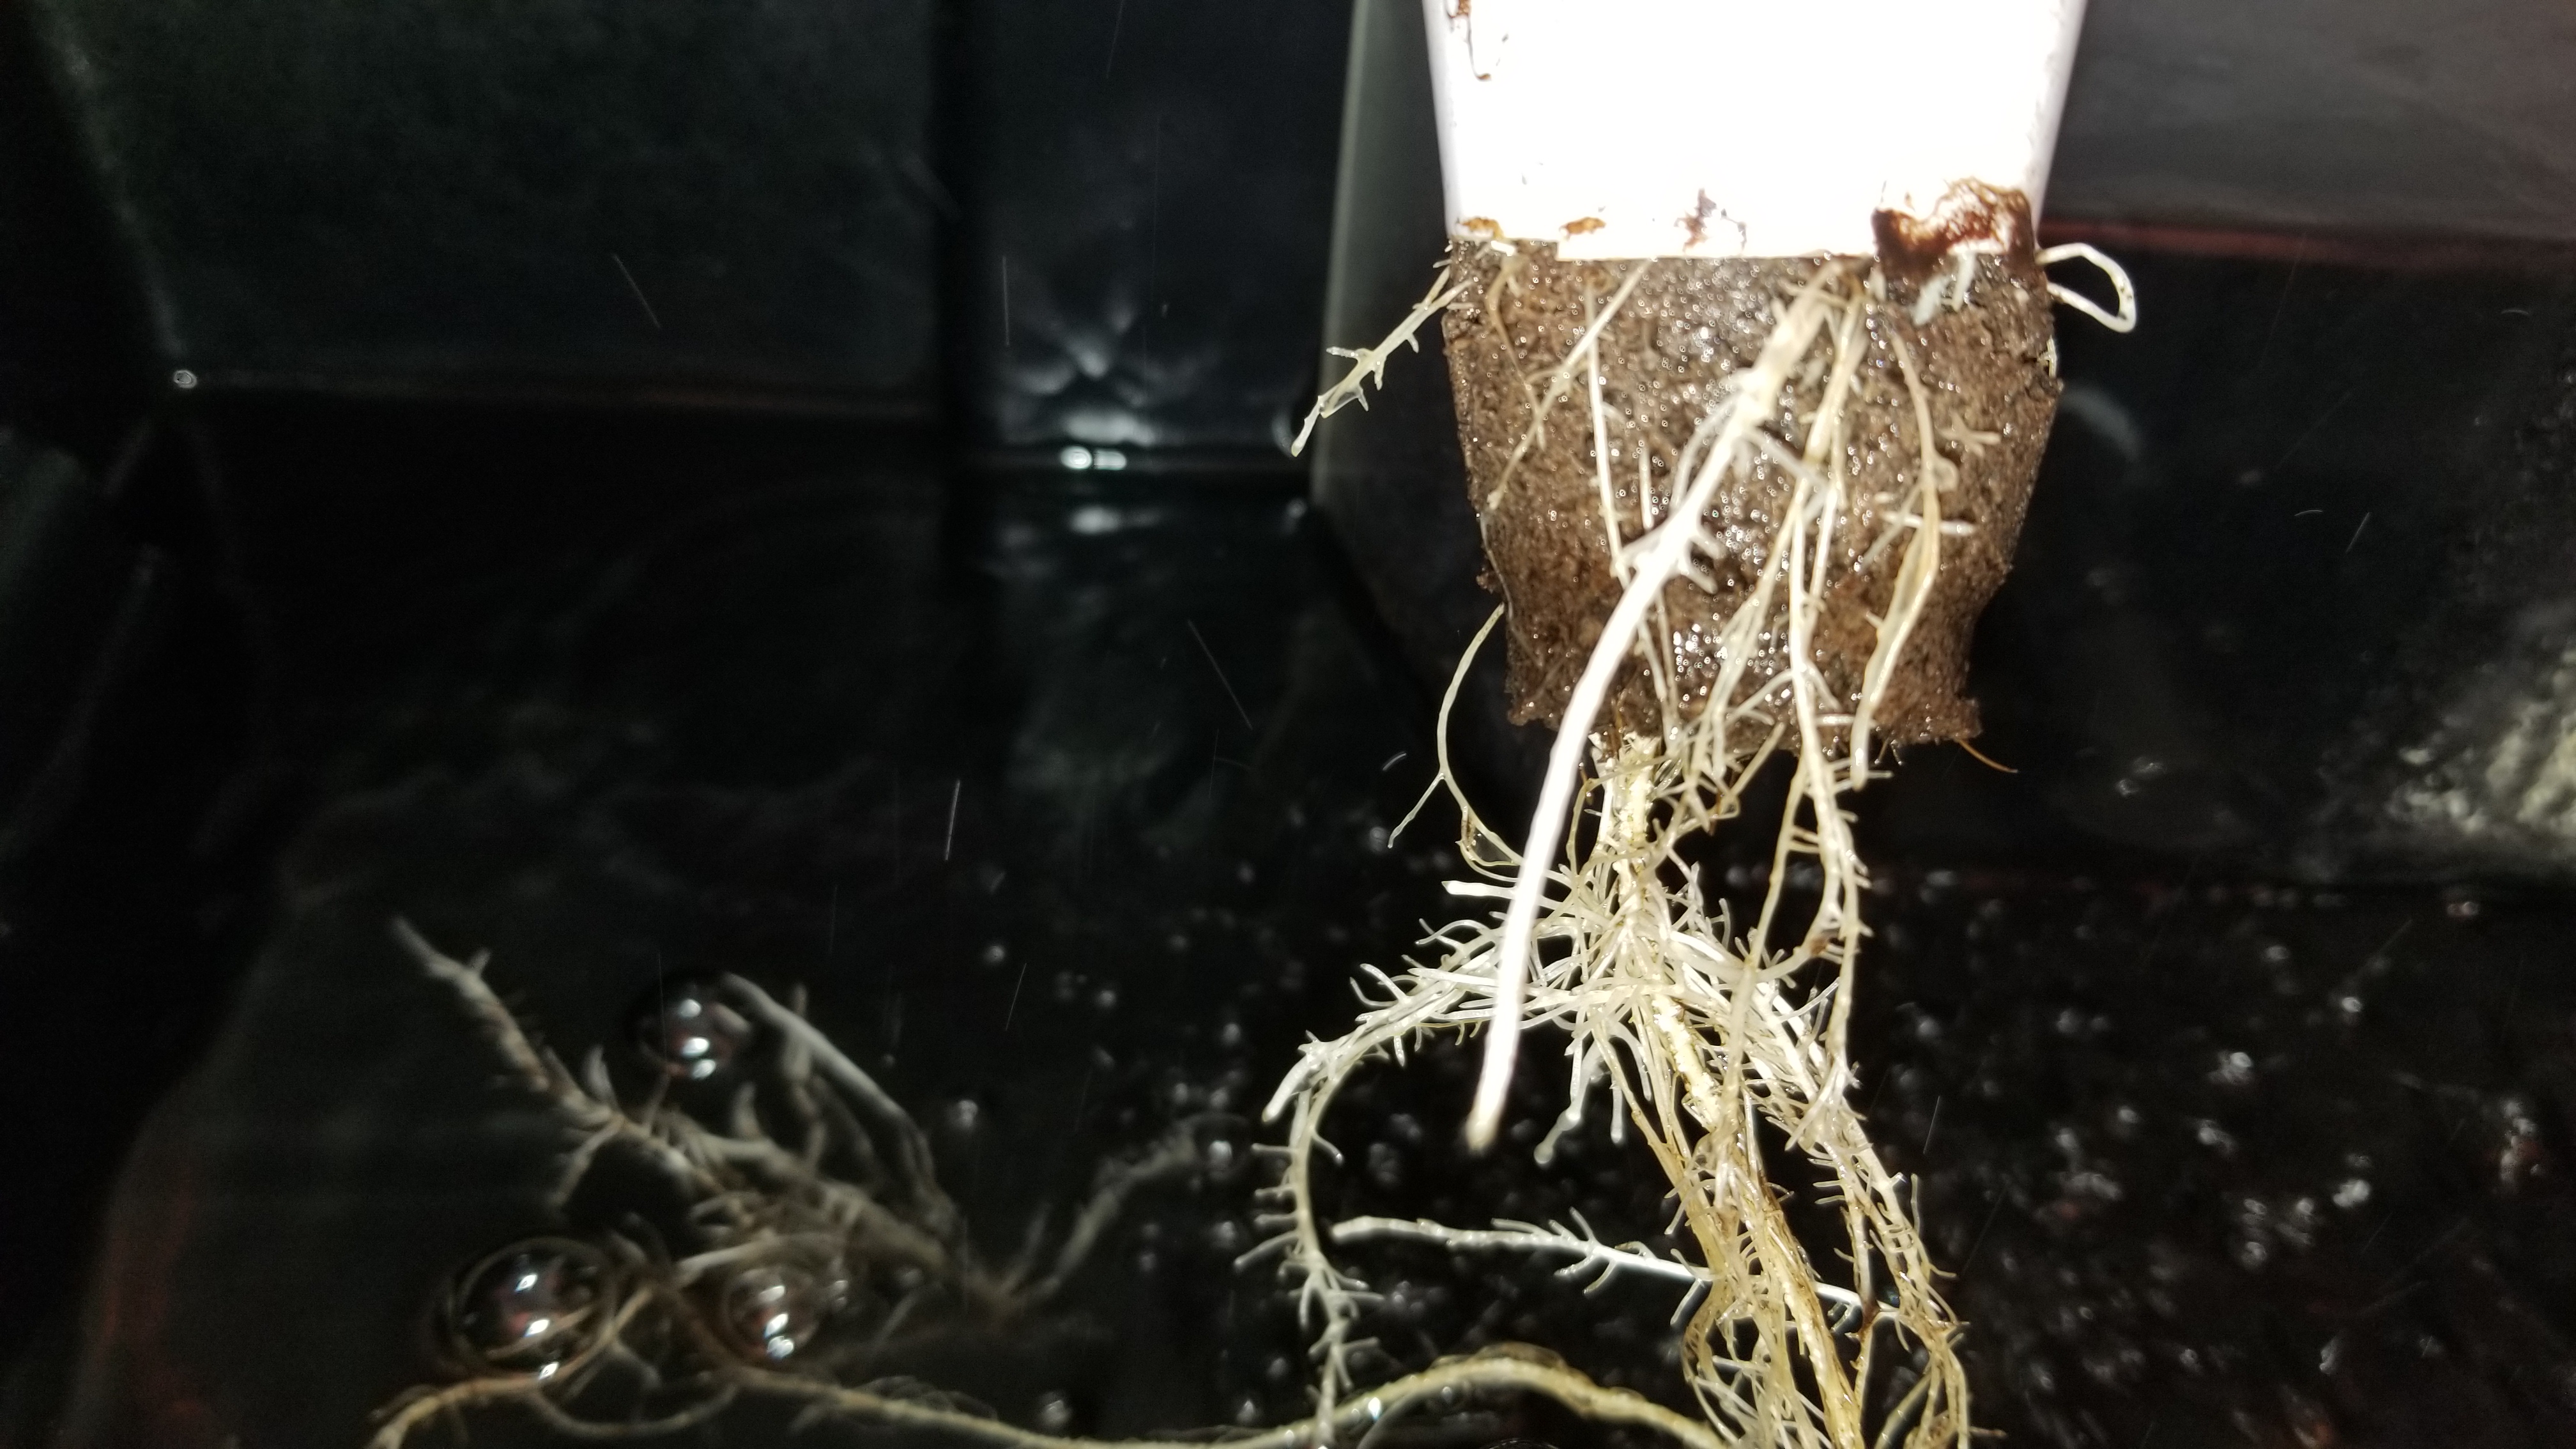
Returned from another few days away and there’s not much sign of recovery. Roots are showing signs of brown slime again, they were fairly clear after the last water change.

Pic of roots:

Upon further inspection it appears as though below the branches that were pruned earlier is where the rot seems to be forming. This next pic furthers that theory, it’s much more apparent now that the rest of the stalk has thickened around it:

14 Likes

@vegetato,

My First Grobo Grow

((#LoveYourStory))… :wink::smiling_face_with_three_hearts::sparkling_heart::open_book::bookmark:

((#WoundedSoldier)):

:crossed_fingers::crossed_fingers:

((#SorryForYourLoss)):

:sob::sob::sob:

3 Likes

Today the tip of one leaf was touching the coco pod so I added this to prevent that:

2 Likes

Is it just me or are the leaves colour a bit off? If so send in a ticket! :+1:

2 Likes

No you’re right, it’s a ph issue. Happens with pretty much every grobo grow. The system doses ph every hour. This is what causes the wild ph swings and thus the first set of leaves to fk off. The team won’t address it because they don’t think it’s a big deal and in some circles it isn’t. But for me it is an issue. That’s my two cents and I’m sticking to it and fk anyone who says different because I’ve had major issues with that hence me doing my own ph and nutes!!! :fu:

2 Likes

And that :fu:is not aimed at you, or anyone in particular, just venting :joy:

@Osage - I’d be interested to know more about how you are managing your own pH & nutes. Have you posted any schedule/recipe or shopping list by chance, i.e. what you’ve found to be successful? Do we just unplug the grobo bottles fill with manually treated water? My biggest reservation in doing that is in having to open/close the lid too much (allowing light/outside air in/possible contaminants etc) so I’ll probably also get a second set of hoses/pump to manage additions to the mix between drains.

Originally I was thinking about getting the SuperCloset and augmenting that with a raspberry pi with probes/sensors and automating it on my own; this isn’t actually that hard for me (that’s my strong point, actually). The grobo appeared to already provide this so the thought was that spending a bit more would actually save me a good month or two of work and let me start growing immediately.

I’m quite a bit disappointed in the lack of data presented and am planning to wire a second set of sensors throughout the grobo attached to a pi, though this does seem ridiculous considering it already has those sensors. If going to that length it might make more sense to just replace the grobo brain with my own and just reuse the sensors and pumps it has.

I’ve had issues keeping humidity above 30% but have been managing to at least keep it there – the A/C is keeping the overheat issue in check but it causes the humidity to drop. I’ve even tried humidifier at the intake fan but that only raises it by 1-3% inside the grobo and didn’t seem to really make much of a difference (except to make the A/C work harder).

My soil plants aren’t having any of the same issues as I’m seeing in the grobo and they were in a cabinet on the other side of the room (subject to same humidity conditions) and have recently moved outdoors. They were even starved of water a couple times and still pulled through.

2 Likes

Funny, those of us who are doing things manually, have run into these exact issues. I mix my nutes(advanced nutrients ph perfect), then oh my water mix after. If you ph first it will be off due to the nutrients, ph after. I do it all in a 5 gal bucket. I fill 3 gals in the bucket then nute then ph. After that, I drain the unit in a different 5 gal bucket and then fill from the 5 gal I mixed. You won’t need to open the lid as ph perfect nutes hold the ph you set for the week.

Now as far as switching the brains using a raspberry pi, I wouldn’t. Or at least not fully. I’d make my own automated rdwc system if you are that handy. It will be a fraction of the cost. I think the most expensive part will be your nute doser. Or alternatively you could repurpose the grobo doser, but I don’t know if that would actually work.

All of us who are also growing soil, have experienced exactly what you are experiencing. I planted my soil girls a week after my grobo girl and it’s the same strain. Look at the difference, also they are both in flower:

8 Likes

I’ve never heard of Jack in the box(I’m a Noob) Who’s the breeder? What grobo recipe are you following?

1 Like

Thanks for that detail! Your girls look nice. I’ll get some pics of mine as they progress, they just finished germinating.

I already use the pH perfect for soil and have it on hand to try if every other attempt fails. Haven’t given up on the automation yet and really want this to “just work” so hopefully it’s only a matter of finding the right combination of things to do (or not to do) to get to that point.

For now am inclined to leave it be until tomorrow after support gets a look at it. If it’s too far gone or dies then will try again with RO water instead.

So far I’ve been trying to keep it simple and not vary from the defaults much to get a baseline on how this thing behaves. Distilled water has been easier for me to source thus far and its pH/EC has been tested before each fill. Have also been taking readings of drained water as well as of the last one. There should be very little adjustment needed except for the nutes it does (as you’ve mentioned, yes always mix before ph!) as this water is already in the low 6s if not high 5s already.

1 Like

@coffindancer It’s Jack Herer Auto from Canuk, using the Generic Auto recipe. I also requested it be added for next grow.

2 Likes

No recipe at all. I’m mixing my own nutes and ph manually :+1::v:

1 Like

Ha thought you were asking me :joy:

Actually that’s not entirely true. I am using the Girl Scout cookies recipe, but only for the lights and fans if that makes any sense :+1::v:

1 Like

Got ya. Thanks! I got some free Jack Herer fems from Seedsman when I ordred. They spell it “Herrer” Supposed to grow as high as 6 feet. That wouldn’t fit my grobo or tent :laughing: Maybe main lining the tent could handle it, but I’m going the auto route for that space

I got those same freebies and gave them away to somebody, they’re growing quite nicely outdoors - sure to reach 6 feet at the current rate. Need to get pics next time I visit.

Used the autoflowering variety in the grobo to cut down on total grow time.

3 Likes

Looks to be rebounding. Larger leaves came in up top and quickly.

Used RO water for drain/fill today instead of distilled. I’m going to trim off the damaged sections soon.

2 Likes

Cut off the ugly parts, more pics of that in first post of this thread:

The new leaves came in so quickly… let’s hope this continues! No immediate signs of shock from the trimming but it’s only been 16 hrs since. She did get to sleep immediately after the cuts.

3 Likes

Hey @vegetato she is looking better! I’d do my best now and leave her be and 2 weeks from now says my gut we’ll all be impressed- :+1:

3 Likes

What do your roots look like? Nice and white?

I only ask because my leaves were curling under like yours and I was just starting to get root rot. I bought hydroguard and it saved my plant

3 Likes